 by
by
In this Pygame and Python library tutorial, we will learn
- How to draw circles in Pygame.
- How to animate the movement of circles around the animation screen in Pygame.
Python has a very powerful library for generating 2D animations. The name of this library is Pygame. The Pygame library is used for creating animations and computer games in Python. This library can be very useful for animating the motion of dynamical systems in Python.
Draw a Circle in Python and Pygame
In order to understand how to draw circles in Python and Pygame, it is first important to properly understand how the Pygame library defines and orients the coordinate systems. The Pygame coordinate system is illustrated in the figure below.
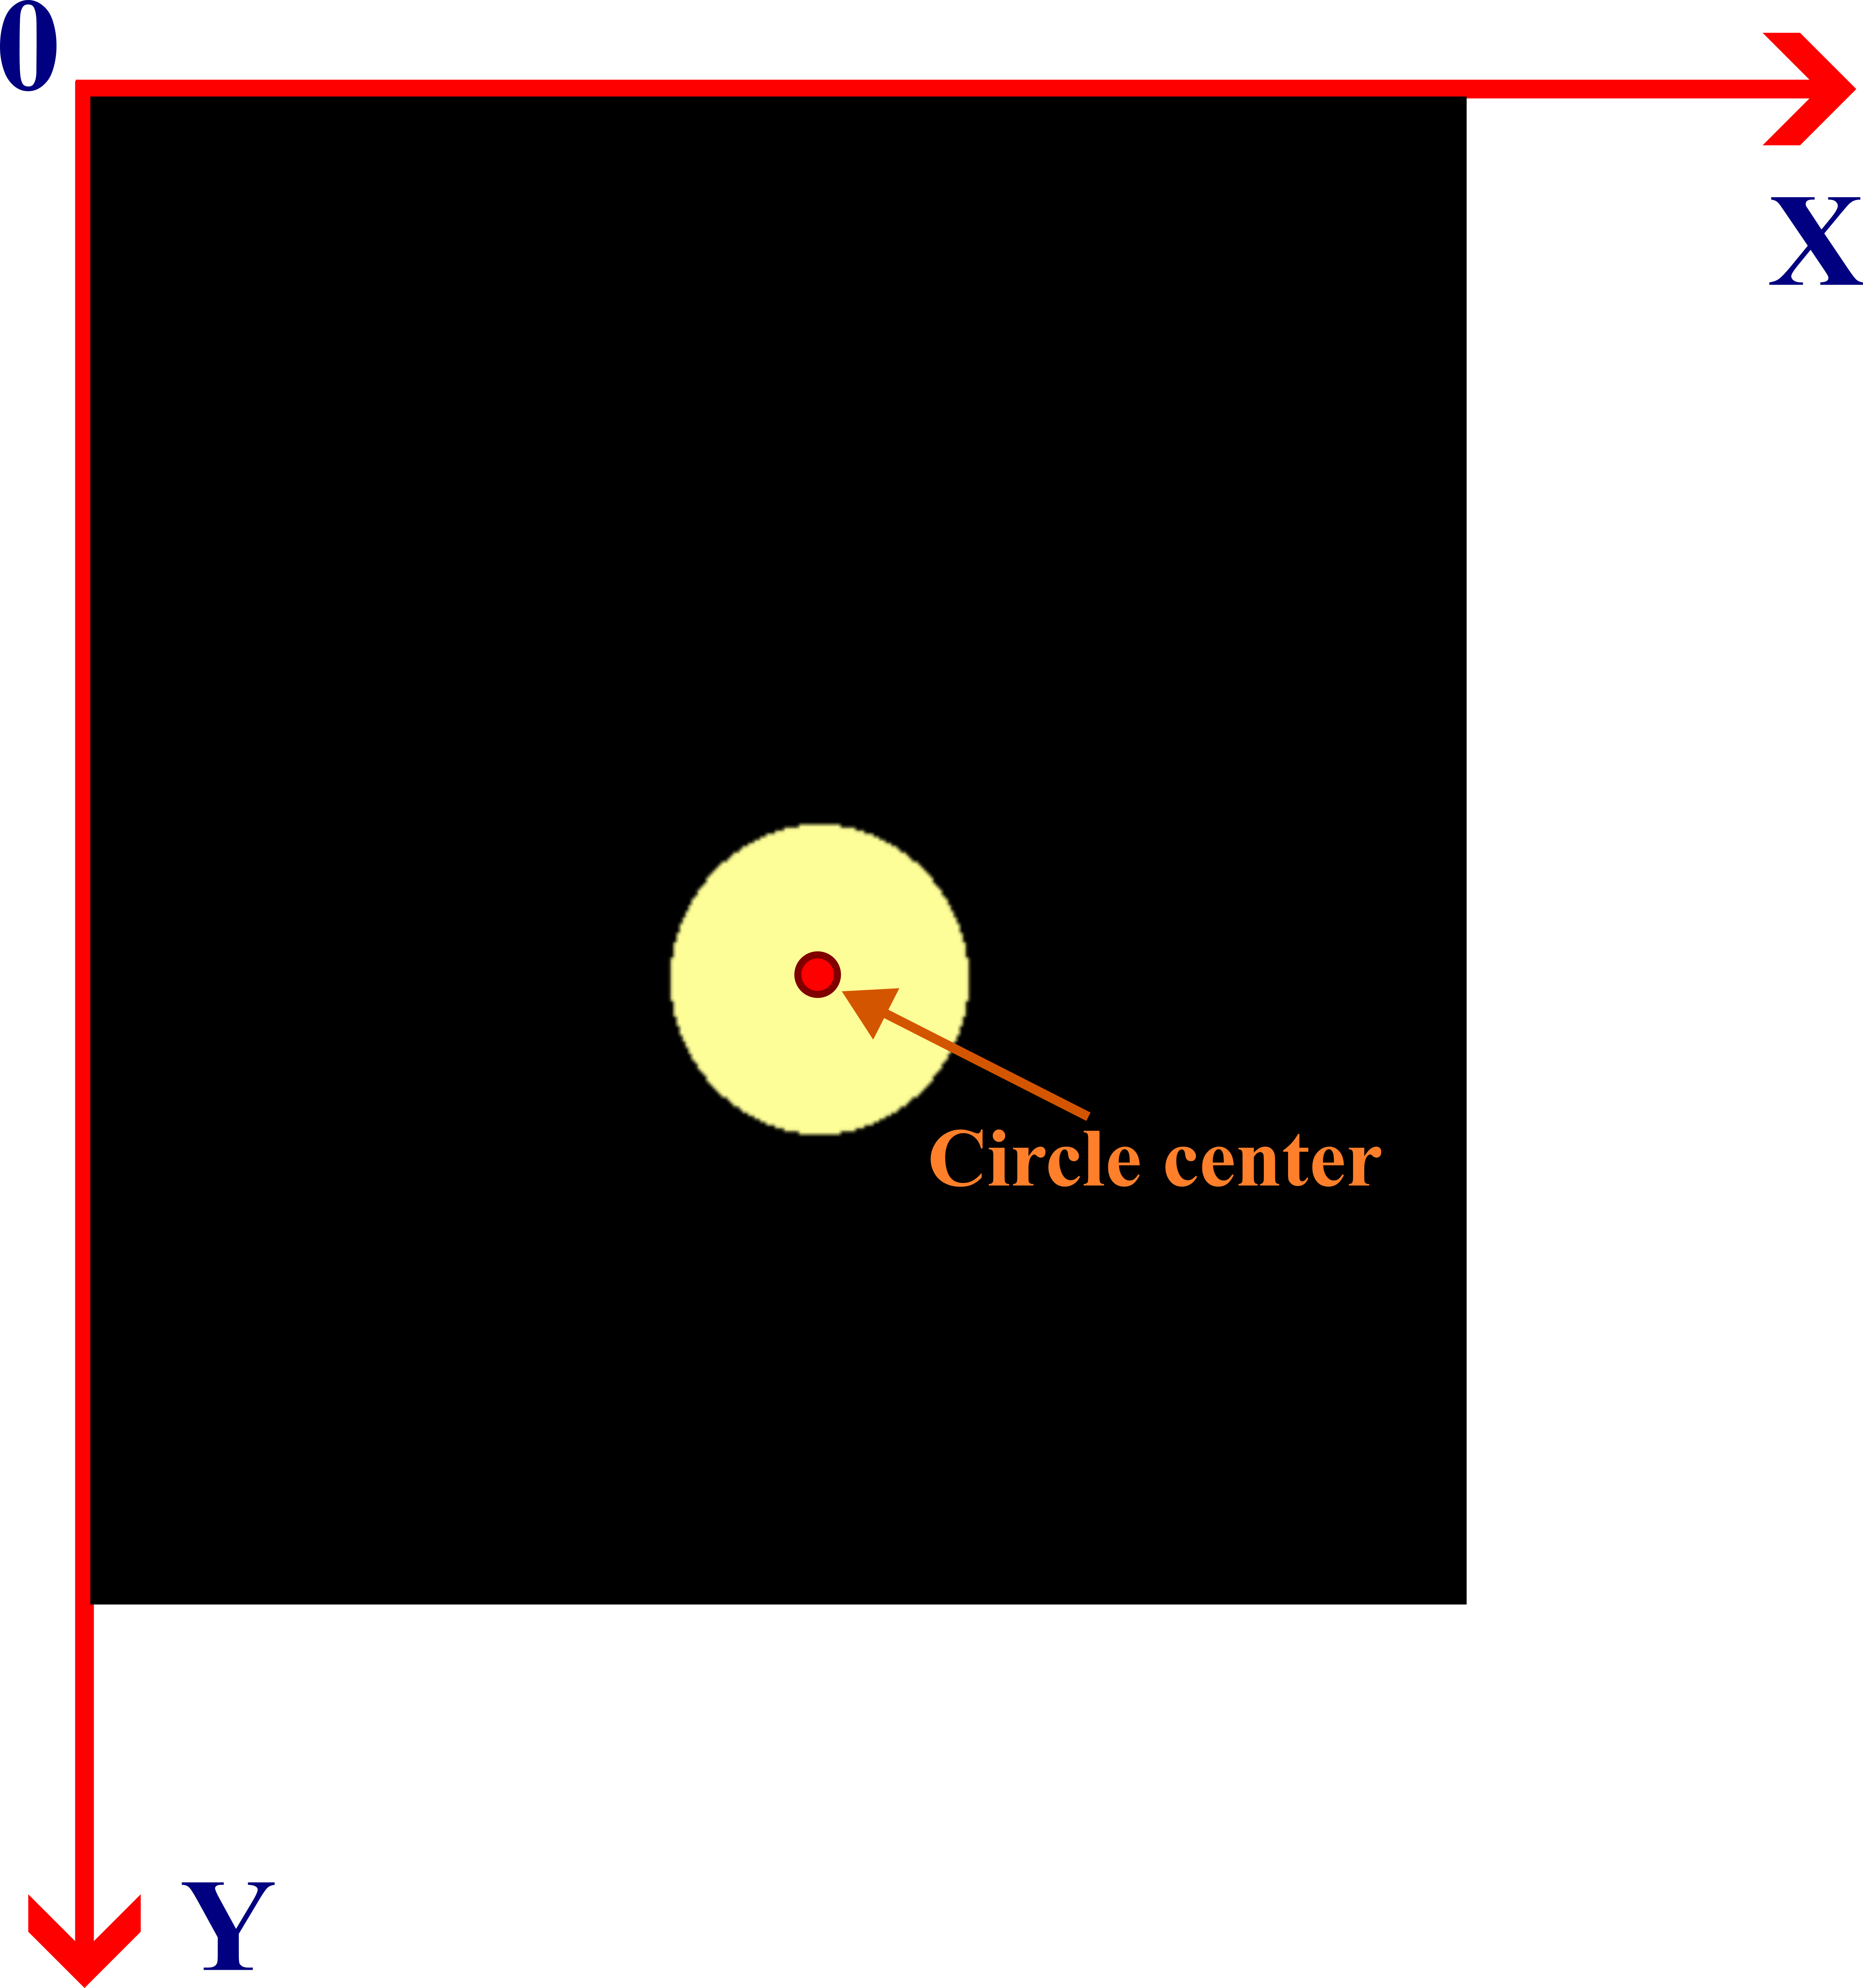
The Y axis is oriented downward, and the Y axis is oriented from left to right. In Pygame, the circle is defined by the circle center and the circle radius. The Python script shown below creates a circle on the screen.
# Pygame tutorial for drawing a circle on the screen
# Author: Aleksandar Haber
# Date: December 2023

# Before running this script make sure that you install Pygame:
# pip install pygame
import pygame

# we import time to display the animation screen for some time
# and them we close the screen
import time

# This function is used to initialize all imported pygame modules.
pygame.init()


# Set window size
size = width,height = 1600, 800

# This function is used to create a display surface
# it returns  Surface object to draw on
# Surface is used to represent any image.
screen = pygame.display.set_mode(size)

# create the color tuple for the circle
# the color is bright yellow
colorCircle=(255,255,153)

# here we draw the circle
# x coordinate of the circle center
# y coordinate of the circle center
xC=300
yC=300
# circle radius
radiusC=50

# this is how we draw a circle completely filled
pygame.draw.circle(screen,
                   colorCircle,
                   (int(xC),int(yC)),
                   radiusC)

# this is how we draw the circle with only the boundary

# this is how we draw a circle completely filled
# the last input argument is the line thickness of the boundary

pygame.draw.circle(screen,
                   colorCircle,
                   (int(xC+100),int(yC+100)),
                   radiusC, 6)


# This function is used to update Surface image
pygame.display.flip()

# display the circle on the screen for certain amount of time
# sleep for 20 seconds
time.sleep(20)

# to close the window
pygame.quit()
The most important parts of the above script are explained in the sequel.
- We import the Pygame library by using “import pygame”
- We import the Python library time by using “import time”. The function from this library “time.sleep()” is used to delay the code such that we can view the screen during a certain time interval.
- The function “pygame.init()” is used to initialize all imported Pygame modules.
- The animation window is created by using “screen = pygame.display.set_mode(size)”. The input argument “size” is the previously defined Python tuple defining the animation window size.
- By using this code line “colorCircle=(255,255,153)” we define the color of the circle. The tuple “(255,255,153)” is the RGB (red-green-blue ) code for the bright yellow color.
- We draw a completely filled circle by using
pygame.draw.circle(screen,colorCircle,(int(xC),int(yC)),radiusC)
The first input argument of this function is the screen for plotting. The second input argument is the color of the circle. The third input argument is the tuple defining the center of the circle. The final input argument is the radius of the circle. - We draw a circle that only has a boundary by using
pygame.draw.circle(screen,colorCircle,(int(xC+100),int(yC+100)),radiusC, 6)
This syntax is the same as the previous one (for the filled circle), except for the last argument that represents the line thickness of the boundary. - We update the screen and plot the circles by using “pygame.display.flip()”
- We delay the code such that we can see the circles by using “time.sleep(20)”
- We close the animation window by using “pygame.quit()”
Animate the Movement of Circles
The Python script shown below is used to animate the movement of a circle on the animation screen. The while loop given below will create animation frame by frame. That is in a single execution of the while loop one circle is drawn at the locations prescribed by the arrays x and y.
# Pygame tutorial for drawing and moving a circle on the screen
# Author: Aleksandar Haber
# Date: December 2023

# Before running this script make sure that you install Pygame:
# pip install pygame
import pygame

# import numpy
import numpy as np

# This function is used to initialize all imported pygame modules.
pygame.init()

# this function creates a clock object that is used to track time
clock=pygame.time.Clock()

# Set window size
size = width,height = 1600, 800

# This function is used to create a display surface
# it returns  Surface object to draw on
# Surface is used to represent any image.
screen = pygame.display.set_mode(size)

# create the color tuple for the circle
# the color is bright yellow
colorCircle=(255,255,153)

# circle radius
circleRadius=50

# x and y coordinates of the circle center
x=np.linspace(300,800,500)
y=x

# initialize the frame index i
i=0


# simulation while loop
while (i<len(x)):
     # Close window event
    for event in pygame.event.get():
        if event.type == pygame.QUIT:
            running = True

    # fill the surface with the background color -black
    # this is used to erase the previous frame
    # if you do not call this the circles from the previous
    # frames will be kept

    screen.fill((0, 0, 0))

    # draw the circle
    pygame.draw.circle(screen,
                       colorCircle,
                       (int(x[i]),int(y[i])),
                       circleRadius)

    # update the screen
    pygame.display.flip()
    # introduce a delay
    pygame.time.delay(10)
    # this is used to limite the runtime
    # by using for example
    # clock.tick(50) once per frame,
    # the script will not run faster than 50 frames per second.
    clock.tick(50)
    i=i+1

pygame.quit()
- The code line “clock=pygame.time.Clock()” is used to create a clock object for tracking time.
- We create x and y arrays defining the positions of the circle as follows
x=np.linspace(300,800,500)
y=x - The frame index is denoted by “i”. It is used to draw circles for different values of “x” and “y”. This frame index is increased in the while loop.
- The function ” screen.fill((0, 0, 0))” is used to erase the previous frame and to generate a black background in the current frame.
- The function “pygame.time.delay(10)” is used to introduce delay.
- The function “clock.tick(50)” is used to limit the run time.