 by
by In this Robot Operating System 2 (ROS 2) webpage, we explain how to install ROS on Linux Ubuntu 22.04. In particular, we explain how to install ROS2 Version called Iron Irwini. This tutorial explains how to install ROS 2 from binaries. This type of installation is suitable for absolute ROS 2 beginners and for people who want to quickly start with ROS 2 programming and who need standard ROS 2 functionality. We also created a tutorial that explains how to install ROS 2 by building the source files. The link to that tutorial is given here. That tutorial is more suitable for advanced users who need to modify the ROS 2 base and customize the installation. However, the absolute beginners and people who need the standard ROS 2 functionality should follow this tutorial. The YouTube page accompanying this webpage tutorial is given below.
STEP 1: Verify that the Correct Linux Version is Installed
First, we need to verify that we have the correct Linux version on our computer. In order to properly install ROS 2 and use it afterward, we need to have the following Linux Ubuntu version: Jammy (22.04) 64-bit. To verify the current Linux version, open a new terminal and type:
lsb_release -a
As a result, you should see something similar to this
No LSB modules are available.
Distributor ID:	Ubuntu
Description:	Ubuntu 22.04.3 LTS
Release:	22.04
Codename:	jammy
If you do not have the Linux version 22.04, then you need to install that version. Otherwise, you will not be able to install and run ROS 2.
STEP 2: System Setup
First of all, we need to have a locale and environment that support UTF-8. UTF-8 is an encoding standard used for electronic communication. UTF is an abbreviation for Unicode Transformation Format. To properly set locale, we need to execute these commands
locale

sudo apt update && sudo apt install locales

sudo locale-gen en_US en_US.UTF-8

sudo update-locale LC_ALL=en_US.UTF-8 LANG=en_US.UTF-8

export LANG=en_US.UTF-8

locale
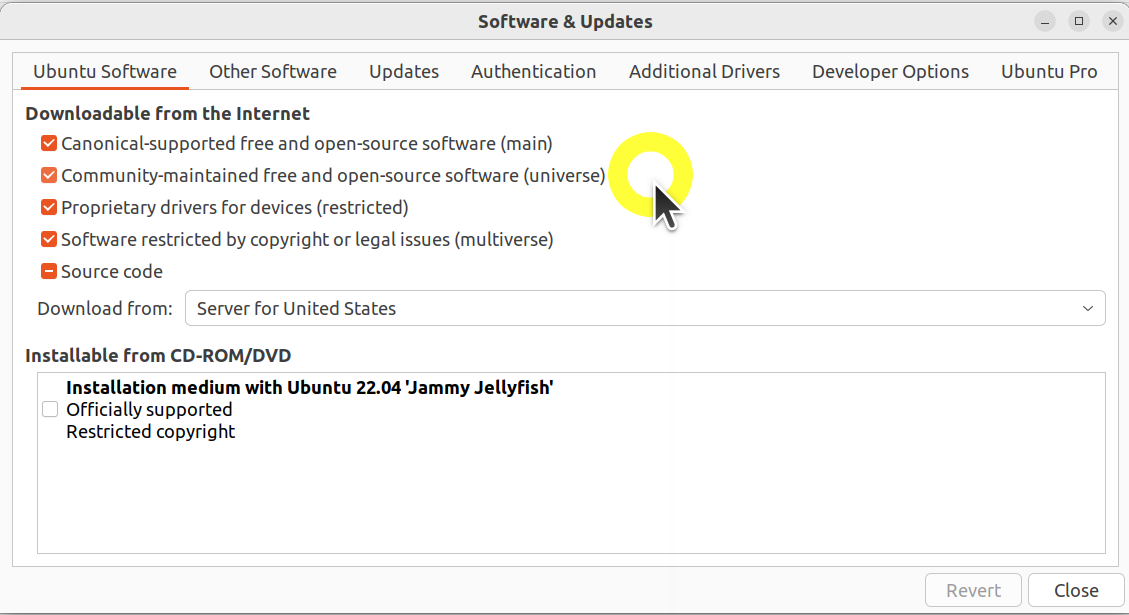
Next, we need to enable repositories. The first step is to make sure that the Ubuntu Universe repository is enabled. To perform this step, click on “Show Applications”, then search for “Software and Updates”. Then, click on the Ubuntu Software menu, and enable “Community-maintained dree and open-source software (universe)”. The menu screen should look like this
Then type
sudo apt install software-properties-common

sudo add-apt-repository universe
Then, we need to add the ROS 2 GPG key:
sudo apt update && sudo apt install curl -y

sudo curl -sSL https://raw.githubusercontent.com/ros/rosdistro/master/ros.key -o /usr/share/keyrings/ros-archive-keyring.gpg
and we need to add the repository to the source list:
echo "deb [arch=$(dpkg --print-architecture) signed-by=/usr/share/keyrings/ros-archive-keyring.gpg] http://packages.ros.org/ros2/ubuntu $(. /etc/os-release && echo $UBUNTU_CODENAME) main" | sudo tee /etc/apt/sources.list.d/ros2.list > /dev/null
Finally, we need to install the development tools
sudo apt update && sudo apt install ros-dev-tools
STEP 3: Install ROS2 and Test the Sourcing of the Environment
First, we need to update the repository cache:
sudo apt update
and then, we need to update the system
sudo apt upgrade
Finally, we can install ROS 2 Desktop version by typing:
sudo apt install ros-iron-desktop
This command will take some time to execute, so be patient. Next, it is very important to test the sourcing of the ROS2 environment. We can set up the environment by sourcing the file “setup.bash”:
source /opt/ros/iron/setup.bash
Note that we have to repeat this line in every new terminal session that we start! By sourcing this file, we set several environmental variables necessary for the proper operation of ROS2. Let us make sure that the environment is properly set up by running
printenv | grep -i ROS
We should see the correct ROS2 version if the ROS2 installation is properly performed.
STEP 4: Run Talker-Listener Example in ROS 2
The “talker-listener” example in ROS 2 is a “Hello World” program of ROS coding. It consists of a talker node that continuously sends a string with an incremented counter, and the listener node that receives the string through the appropriate topic. This example is often used to properly test the ROS 2 installation.
First, let us start the talker node. For that purpose, open a new terminal and type
source /opt/ros/iron/setup.bash

ros2 run demo_nodes_cpp talker
This will source the ROS 2 environment by executing the file called “setup.bash” and it will run the talker node. Node that the talker node is already written by people who wrote ROS 2. That is, it is run from the library of ROS 2 examples provided with the ROS 2 installation. The talker node will print a string that it is sending through the appropriate topic.
To start a listener node, open another terminal and in that terminal type
source /opt/ros/iron/setup.bash

ros2 run demo_nodes_py listener
If everything works well, the listener node should receive the string sent by the talker node and it will print the string on the computer screen.