by
by In this OpenCV and Python tutorial, we explain how to draw circles. We explain how to draw completely filled circles and circles with only a boundary line. We also explain how to generate an image with a white color and how to save the generated image to a PNG image file.
The YouTube tutorial accompanying this webpage is given below.
How to Draw a Circle in OpenCV
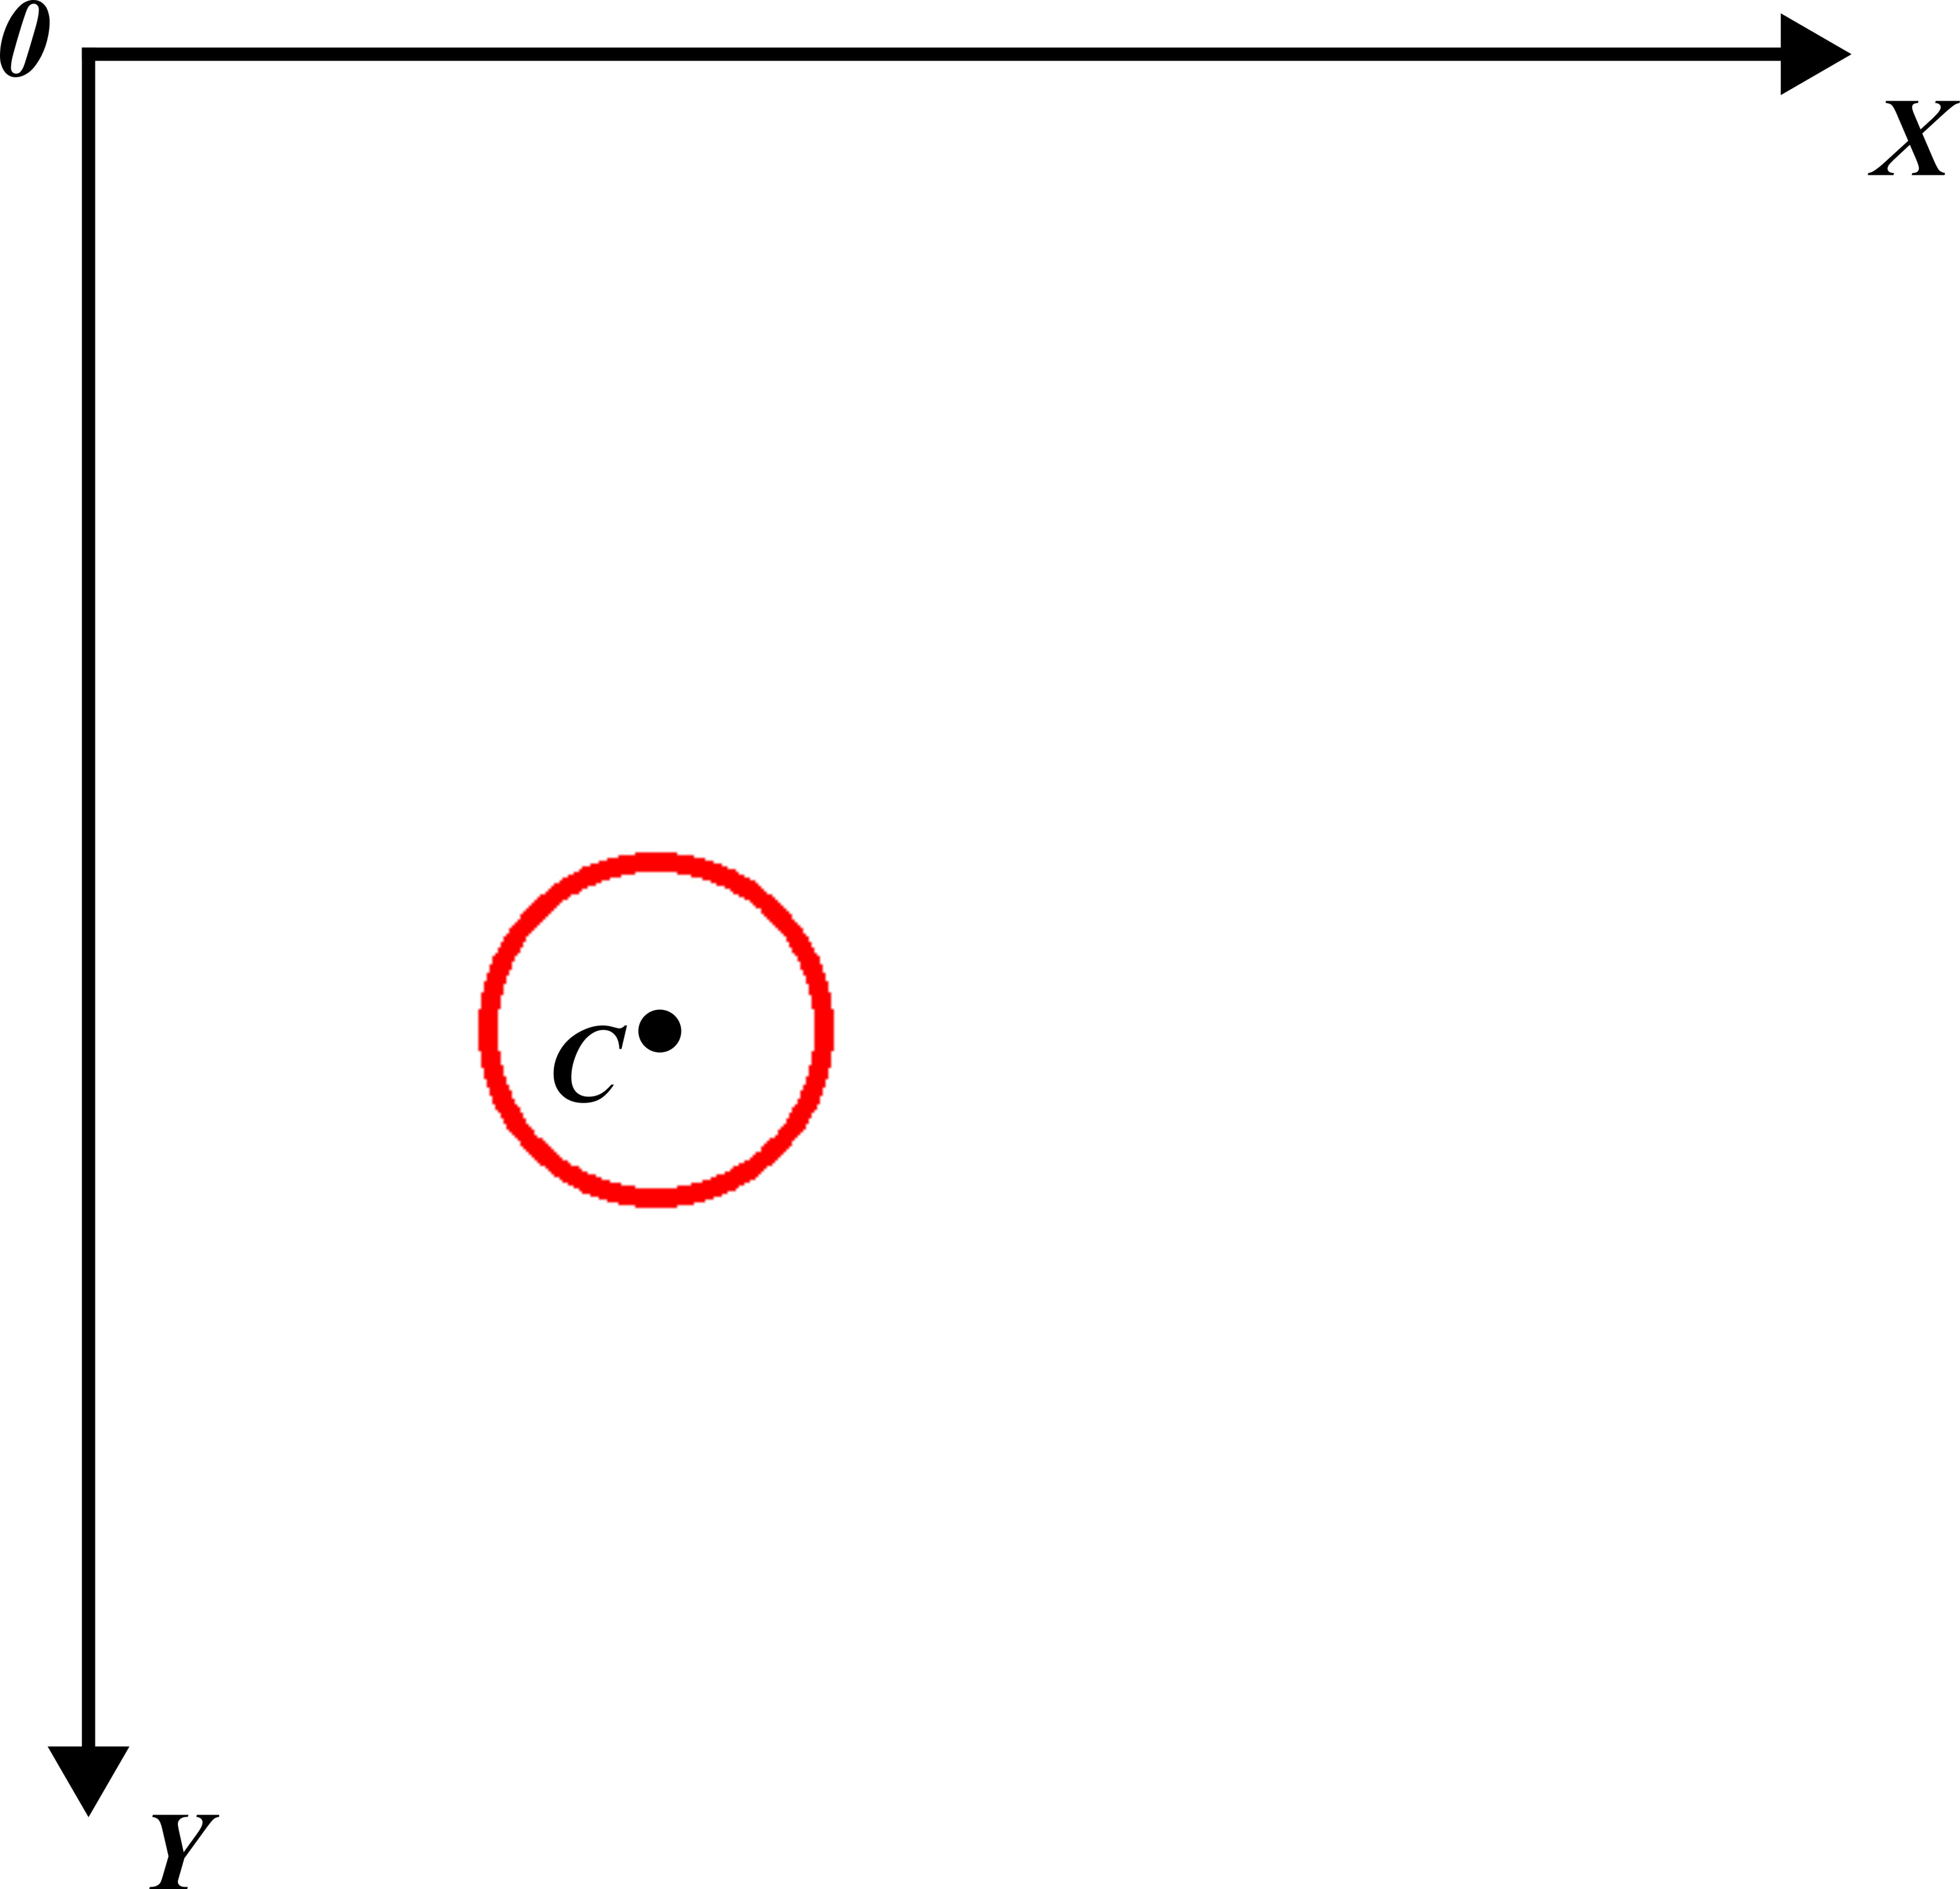
A circle in OpenCV is defined by its center, radius, boundary line color or fill, and thickness of the boundary line. To be able to properly define a circle in OpenCV, we first need to understand the orientation of the OpenCV image coordinate system. The OpenCV image coordinate system is given in the figure below.
The Python script given below will first create an empty image. Then, it will define a circle with the following parameters:
- The coordinates of its center point: $X_{c}=200$ and $Y_{c}=300$
- The circle radius of 60.
- The boundary line thickness of 5.
- The red color of the boundary line.
Then it will display the image with the circle, and finally, it will save the image with the circle as a PNG image file.
The Python script is given below.
import numpy as np
import cv2


# create an image with a white background that serves as a drawing canvas

# set the width and height of the image
heightImage=600
widthImage=600

# a new image with a white background
# BGR (255,255,255)
newImageWhite = np.zeros((heightImage,widthImage,3),np.uint8)
# blue channel
newImageWhite[:,:,0]=255
# green channel
newImageWhite[:,:,1]=255
# red channel
newImageWhite[:,:,2]=255

# uncomment this if you want to show the white image
#cv2.imshow("White Image",newImageWhite)
#cv2.waitKey(0)
#cv2.destroyAllWindows()

# first let us draw a circle with only a boundary
# center point of the circle
xC=200
yC=350

centerPoint=(xC,yC)
radiusCircle=60

# boundary line color of the circle
# red color
colorLine=(0,0,255)

# thickness of the boundary line
lineThickness=5

cv2.circle(newImageWhite,centerPoint,radiusCircle,colorLine,lineThickness)


# show the image
cv2.imshow("White Image",newImageWhite)
cv2.waitKey(0)
cv2.destroyAllWindows()


# save image
cv2.imwrite("imageCircle1.png",
            newImageWhite, [cv2.IMWRITE_PNG_COMPRESSION, 0])
We create the image as a NumPy array of zeros. We then set all the BGR color channels to 255. This will create a white background. We define the circle by using the function “cv2.circle()”:
cv2.circle(newImageWhite,centerPoint,radiusCircle,colorLine,lineThickness)
- The first input “newImageWhite” is the image on top of which the circle will be drawn.
- The second input “centerPoint” is a tuple defining the center point of the circle. The first entry of the tuple is the x coordinate of the center. The second entry of the tuple is the y coordinate of the center.
- The third input “radiusCircle” is the radius of the circle.
- The fourth input “colorLine” is the color of the boundary line. This input is a tuple with three entries defining the BGR color code. In other cases, this can be the BGR color fill of the interior of the circle (this is explained in the sequel).
- The fourth input “lineThickness” is the boundary line thickness. If this parameter is set to -1, then completely filled circle will be drawn on the screen. In our case, this input is 5 and consequently, we only draw the boundary line of the circle.
After we create the circle, we display the image by using
# show the image
cv2.imshow("White Image",newImageWhite)
cv2.waitKey(0)
cv2.destroyAllWindows()
and we save the generated image as a PNG file by using
# save image
cv2.imwrite("imageCircle1.png",
            newImageWhite, [cv2.IMWRITE_PNG_COMPRESSION, 0])
The generated image is given below.

How to Draw a Filled Circle in OpenCV
Here, we explain how to draw a filled circle in OpenCV and Python.
The Python script given below will draw a blue completely filled circle at the coordinates $(x=200,y=300)$ and with the radius of 60.
# import the necessary libraries

import numpy as np
import cv2


# create an image with a white background that serves as a drawing canvas

# set the width and height of the image
heightImage=600
widthImage=600

# a new image with a white background
# BGR (255,255,255)
newImageWhite = np.zeros((heightImage,widthImage,3),np.uint8)
# blue channel
newImageWhite[:,:,0]=255
# green channel
newImageWhite[:,:,1]=255
# red channel
newImageWhite[:,:,2]=255

# uncomment this if you want to show the empty image
#cv2.imshow("White Image",newImageWhite)
#cv2.waitKey(0)
#cv2.destroyAllWindows()

# first let us draw a circle with only a boundary
# center point of the circle
xC=200
yC=350

centerPoint=(xC,yC)
radiusCircle=60

# color fill of the circle interior
# blue color
colorLine=(255,0,0)

# this means that the circle interior is filled
# no line thickness
lineThickness=-1

cv2.circle(newImageWhite,centerPoint,radiusCircle,colorLine,lineThickness)


# show the image
cv2.imshow("White Image",newImageWhite)
cv2.waitKey(0)
cv2.destroyAllWindows()


# save image
cv2.imwrite("imageCircle2.png",
            newImageWhite, [cv2.IMWRITE_PNG_COMPRESSION, 0])
There are several differences between this script and the previous script. First of all, we set the color of the interior of the circle to blue. This is achieved by setting the color BGR code to “colorLine=(255,0,0)”. Then, we set the parameter “lineThickness=-1”. This will tell OpenCV that we want to plot the filled circle. The image is given below.