 by
by In this Robot Operating System 2 tutorial, or ROS 2 tutorial, we explain the basic structure of the ROS2 system by using the Turtlesim simulation environment. The structure consists of a graph connecting nodes and topics. More precisely, by using the Turtlesim example, we explain
1.) How to install the Turtlesim simulation environment and rqt graph. The rqt graph is used to visualize the structure of the ROS 2 system.
2.) How to visualize the active nodes, topics, and their connection by using the rqt or rqt_graph.
3.) How to track and print the data that is published to a specific topic.
4.) How to learn details of the message being sent through the corresponding topics and how to see the data structure type of the message.
Before we start with explanations, we have to explain a few important things. First of all, Turtlesim is a toy model of a 2D mobile robot. Consequently, it is a great simulation example for learning ROS2 and for simulating simple trajectories. Every beginner-level student should start learning ROS 2 by learning how to install, debug, and operate the Turtlesim 2D mobile robot.
The YouTube video accompanying this tutorial is given below.
STEP 1: Install Turtlesim and rqt_graph
The first step is to install Turtlesim and rqt_graph. First, we need to open a new terminal and we need to set up the ROS2 environment. That is, we need to source the setup file. We do this as follows. In the new terminal type:
source /opt/ros/iron/setup.bash
It is always a good idea to verify the environmental variables. We perform that step by typing
printenv | grep -i ROS
If you see something like this
ROS_VERSION=2
ROS_PYTHON_VERSION=3
AMENT_PREFIX_PATH=/opt/ros/iron
ROS_AUTOMATIC_DISCOVERY_RANGE=SUBNET
PYTHONPATH=/opt/ros/iron/lib/python3.10/site-packages
LD_LIBRARY_PATH=/opt/ros/iron/opt/rviz_ogre_vendor/lib:/opt/ros/iron/lib/x86_64-linux-gnu:/opt/ros/iron/lib
PATH=/opt/ros/iron/bin:/usr/local/sbin:/usr/local/bin:/usr/sbin:/usr/bin:/sbin:/bin:/usr/games:/usr/local/games:/snap/bin:/snap/bin
ROS_DISTRO=iron
Then your ROS2 environment is properly initialized and you can continue. Next, we need to install Turtlesim. To perform this step, type in the terminal:
sudo apt update

sudo apt install ros-iron-turtlesim
To verify that Turtlesim is properly installed, type
ros2 pkg executables turtlesim
As the output, you should see this
turtlesim draw_square
turtlesim mimic
turtlesim turtle_teleop_key
turtlesim turtlesim_node
If you see such an output, this means that Turtlesim is properly installed. Next, we need to install rqt. We install rqt by typing
sudo apt update

sudo apt install ~nros-iron-rqt*
STEP 2: Run Turtlesim, teleoperation node, and rqt
In our previous tutorial given here, we explained how to run the Turtlesim simulation. Here, for completeness, we briefly summarize how to run the Turtlesim simulation and the teleoperation node necessary for controlling Turtlesim by using keyboard keys.
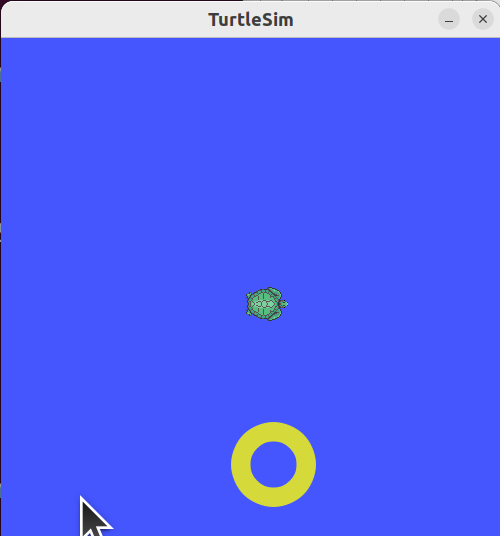
First, we need to run the Turtlesim node. To do that in the terminal type:
ros2 run turtlesim turtlesim_node
You will see the Turtlesim simulation window shown below.
However, we are not able to control the turtle. To be able to control the turtle, we need to run a teleoperation node. To run a teleoperation node, we need to open a new terminal. After opening a new terminal, we type
source /opt/ros/iron/setup.bash

ros2 run turtlesim turtle_teleop_key
The first source command will set up or source the environment. This is the first step when running any ROS program. The second command runs the teleoperation node. While the terminal used to run the teleoperation node is active, you can move the keyboard up, down, left, and right keys to move the robot.
Next, we need to visualize the structure of our ROS2 system. We do that by opening a new terminal, sourcing the environment, and running the rqt_graph node:
source /opt/ros/iron/setup.bash

rqt_graph
These commands will open the rqt_graph which helps us to visualize the structure of the ROS2 system. The graphs are shown below.
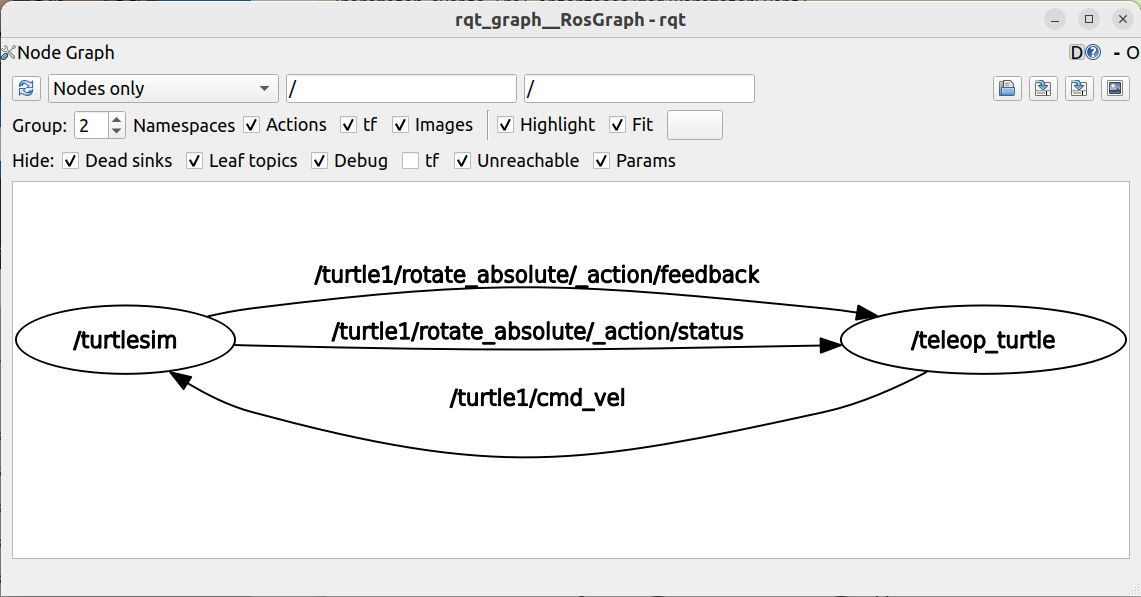
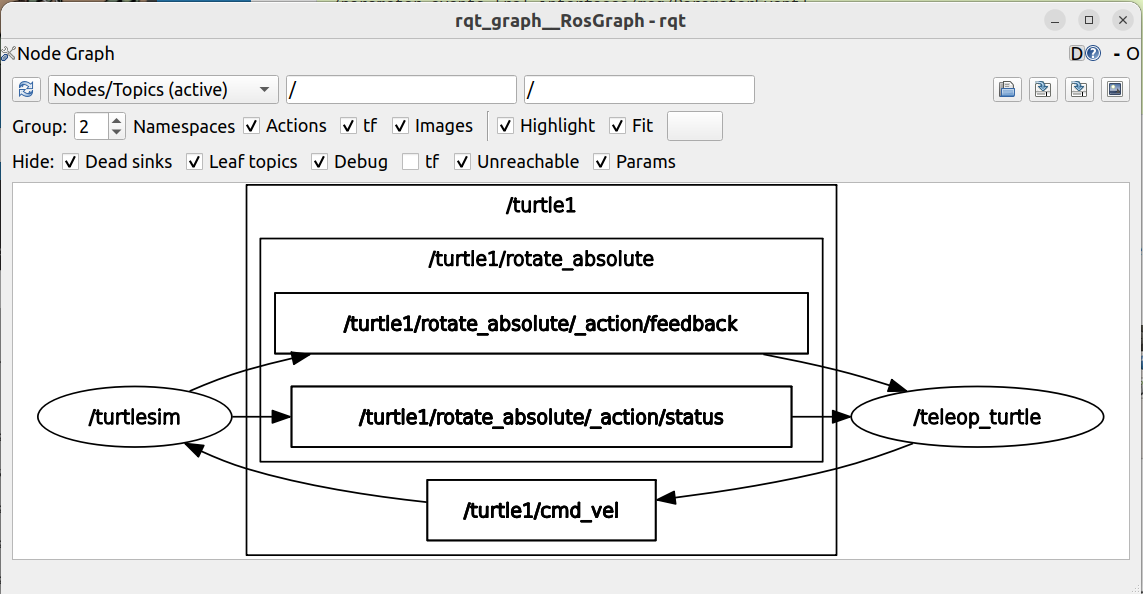
Among other things, the ROS2 system consists of nodes. Roughly speaking, every node can be seen as a ROS subsystem responsible for the proper operation of a subsystem of a real robot. For example, in a real mobile robot, we will have one node controlling the robot wheels. Another node will be responsible for collecting sensor measurements and calculating the position of the robot with respect to some other frame. Another node will be implemented in sensor hardware and it will ensure proper operation of the sensor as well as data collection and data filtering. The nodes in a ROS2 system communicate with each other and transmit data messages by using communication channels or communication buses. These communication links are called topics. By analyzing the rqt_graph we conclude that the teleoperation node called /teleop_turtle transmits a message through the topic called /turtle1/cmd_vel (cmd_vel is an abbreviation for “command velocity” that is used to control the velocity of the robot).
STEP 3: Obtain information about topics that are currently running and information sent through the topic
To obtain a list of topics that are currently running, open a new terminal and type
source /opt/ros/iron/setup.bash

ros2 topic list
As the output we obtain the following
/parameter_events
/rosout
/turtle1/cmd_vel
/turtle1/color_sensor
/turtle1/pose
To obtain more information about the topics, type
ros2 topic list -t
As the result, we obtain
/parameter_events [rcl_interfaces/msg/ParameterEvent]
/rosout [rcl_interfaces/msg/Log]
/turtle1/cmd_vel [geometry_msgs/msg/Twist]
/turtle1/color_sensor [turtlesim/msg/Color]
/turtle1/pose [turtlesim/msg/Pose]
This command shows the list of topics and types (data structures) of messages that are sent. The topic /turtle1/cmd_vel is used to control the position and orientation of the turtle. This topic sends messages of the type geometry_msgs/msg/Twist.
To learn more details about this message type
ros2 interface show geometry_msgs/msg/Twist
The output looks like this
# This expresses velocity in free space broken into its linear and angular parts.

Vector3  linear
	float64 x
	float64 y
	float64 z
Vector3  angular
	float64 x
	float64 y
	float64 z
From this output, we learn important information about the messages geometry_msgs/msg/Twist. We learn that these messages contain information about linear velocity and angular velocity. Both linear and angular velocities are vectors. If we want to control the robot, we need to specify both linear and angular velocities.
By looking at the rqt graph, we conclude that through the “/turtle1/cmd_vel” topic, the teleoperation node sends command messages of the type geometry_msgs/msg/Twist to the simulation node called /turtlesim. These messages contain linear and angular command velocities. To obtain information about the actual values that are sent through the active topic, we type
ros2 topic echo /turtle1/cmd_vel
If you did not move the robot before executing this command, this command will not produce anything. To see the effect of this command, let us move the robot. Go back to the terminal running the teleop node, and move the robot by pressing the arrow keys. Now go back to the terminal running the topic echo command and you will see the output looking like this
For example, by only rotating the robot, the output of the echo command will be
linear:
  x: 0.0
  y: 0.0
  z: 0.0
angular:
  x: 0.0
  y: 0.0
  z: -2.0
---
linear:
  x: 0.0
  y: 0.0
  z: 0.0
angular:
  x: 0.0
  y: 0.0
  z: 2.0
---
linear:
  x: 0.0
  y: 0.0
  z: 0.0
angular:
  x: 0.0
  y: 0.0
  z: -2.0
---
linear:
  x: 0.0
  y: 0.0
  z: 0.0
angular:
  x: 0.0
  y: 0.0
  z: 2.0
If we only control the linear velocity, we obtain
linear:
  x: 2.0
  y: 0.0
  z: 0.0
angular:
  x: 0.0
  y: 0.0
  z: 0.0
---