 by
by In this Linux and Ubuntu video tutorial, we explain how to record video of a computer screen, mouse pointer, and microphone sound in Linux/Ubuntu using a program called Kazam. You will need to record your Ubuntu screen when making video tutorials and documenting your work.
Here is the main motivation for creating this tutorial. A number of viewers of my YouTube channel asked me how I record videos of my screen, mouse pointer, and microphone sound in Ubuntu/Linux. In this tutorial, I explain how to perform this important task that you will most likely need to perform if you want to create a tutorial or a presentation of your work. To record the video, I use a program called Kazam. This is a very nice and easy-to-use program for recording the computer screen. The YouTube video accompanying this tutorial is given below.
STEP 1: Install Kazam
First, we need to install Kazam. Open a Linux terminal, and type:
sudo apt-get update
sudo apt-get upgrade
sudo apt-get install kazam
Let us double-check that Kazam is properly installed. We type the following in terminal
kazam --versionSTEP 2: Set the Kazam recording properties
To open, Kazam, click on “Activities” in the top left corner of the Ubuntu screen, and search for Kazam. Open, Kazam. The following window will appear
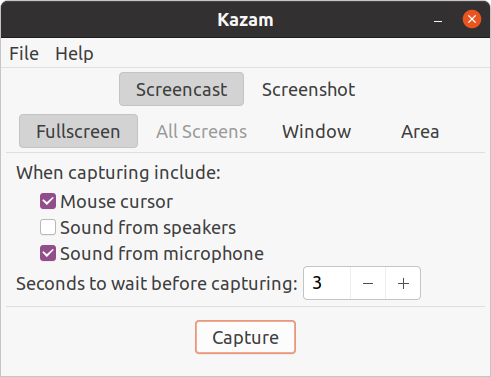
Click on “Fullscreen”, and select the following options: “Mouse cursor” and “Sound from microphone”. Then, click on “File”, and then click on “Preferences”. The following window will appear.

Click on general and adjust the speaker and microphone. Then, click on “Screencast”, and the following window will appear
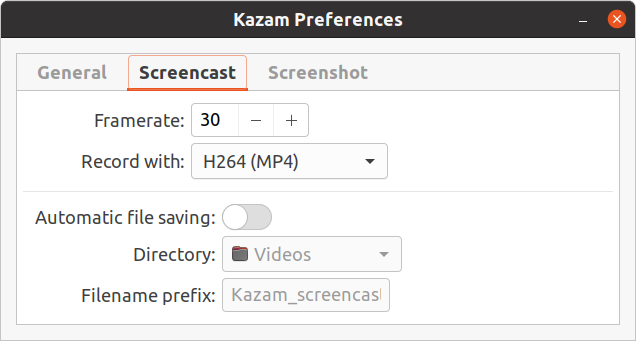
and set the “frame rate” and “Record with”. Usually, I record my videos with 30 frames per second and I record them by using “H264 (MP4)” recording format.
Another thing that you need to adjust is the microphone recording level. You need to adjust that by using Ubuntu Settings. To open “Settings”. Click on Activities in Ubuntu, and search for “Settings”, and find the “Sound” option. Find the option called “Input”. Adjust the recording volume by moving the toolbar.
To record the screen, go back to Kazam and click on capture. While the video is being recorded you will notice a small icon representing a camera with a red recording circle in the top right corner of the computer screen.
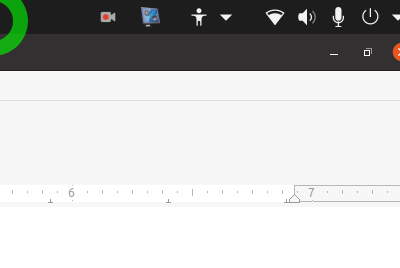
To stop recording click on that icon and click on “Finish Recording”. Then, a screen with a saving option will appear and there you can specify the file name of the recorded video as well as the location for saving the video.
There are also shortcuts for start recording and stop recording. To start recording press “WINDOWS KEY+CTRL+R”. To stop recording, press “WINDOWS KEY + CTRL + F”.