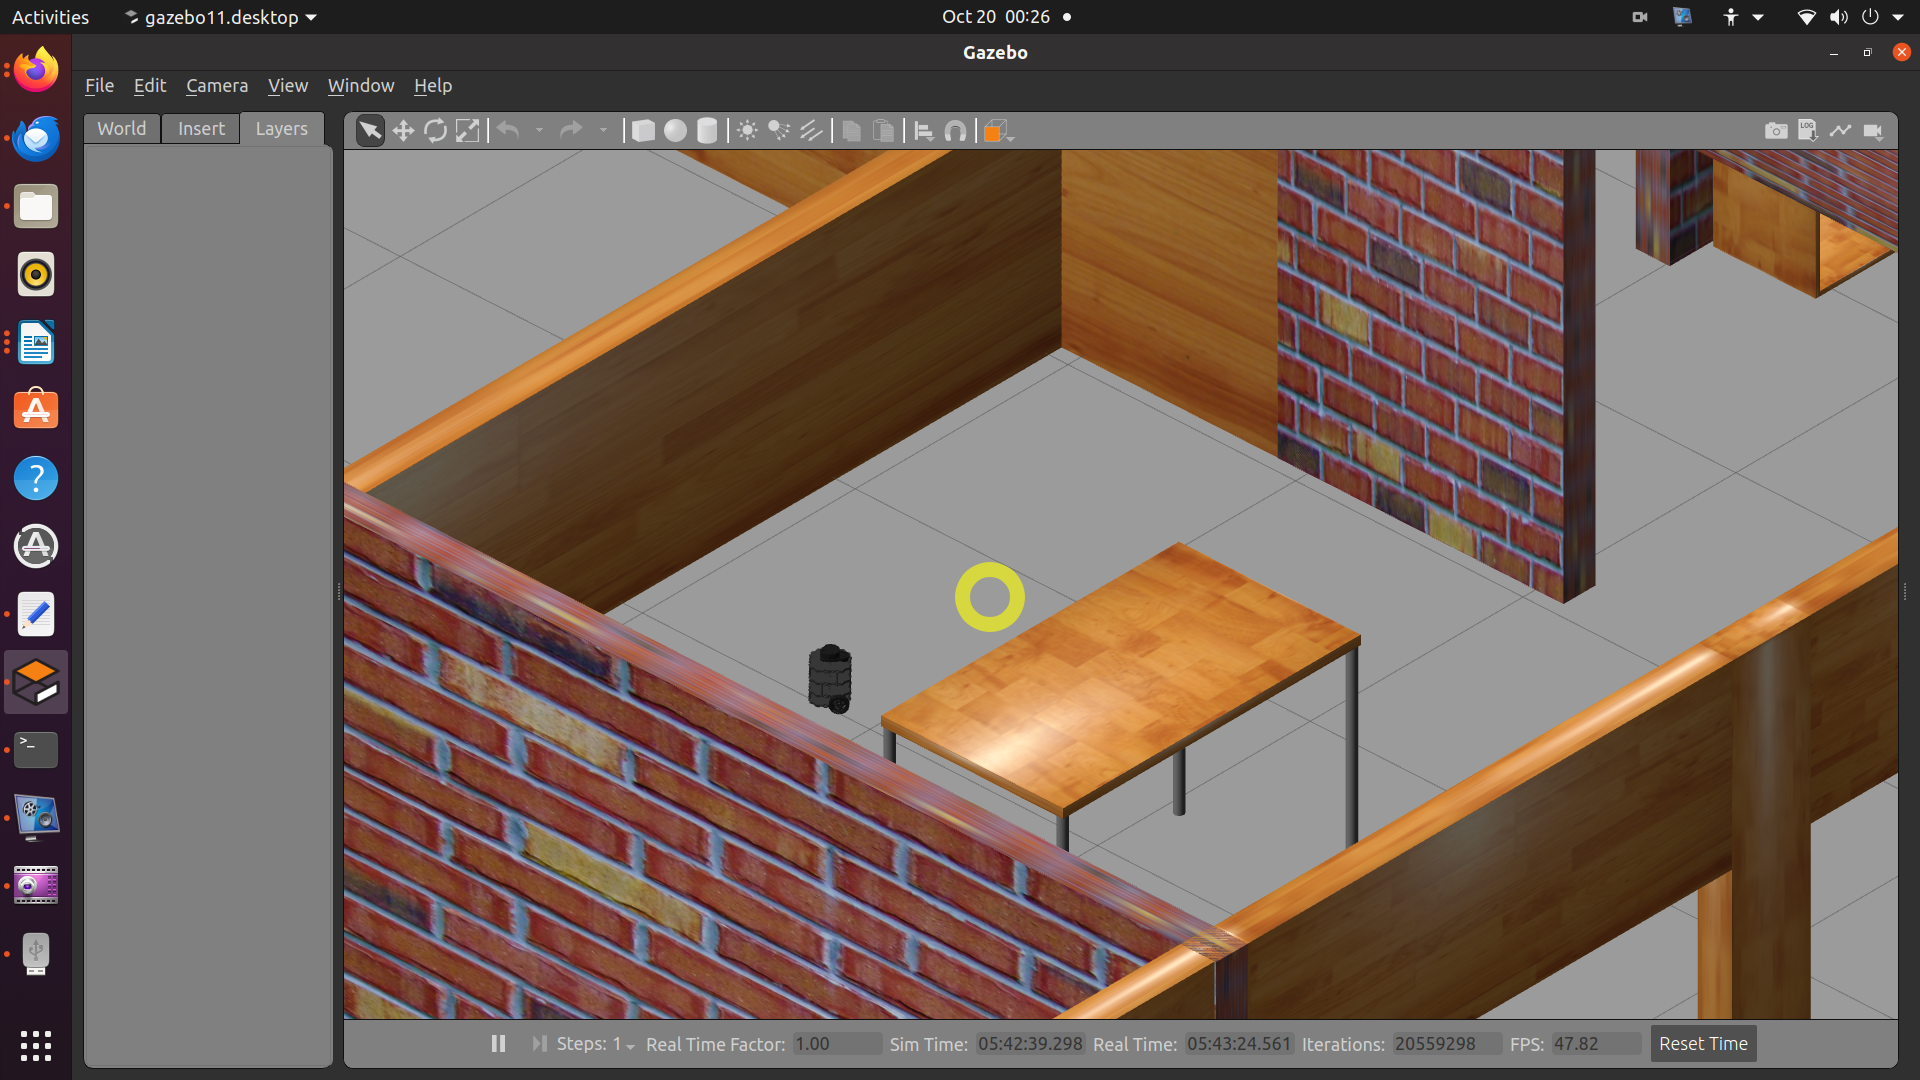
In this tutorial, we will learn how to install the TurtleBot 3 robot model in ROS Noetic, and we will learn how to visualize this robot in Gazebo. Gazebo software environment is an amazing 3D simulation engine. It consists of an integrated differential equation solver and OpenGL rendering engine. Gazebo can simulate sensors and actuators as well as advanced path planning, obstacle avoidance, and SLAM algorithms.
The main motivation for creating this video tutorial comes from the fact that in practice you will often need a simulation environment and a digital twin of a robot to verify path planning, navigation, and SLAM algorithms. A very popular robotic concept is TurtleBot. It is a differential drive robot with cameras, lidars, and sensors that can be used to verify and experimentally test advanced robotic algorithms. Also, we noticed that online there are a number of tutorials that explain how to install the TurtleBot simulation environment. However, these tutorials are either incomplete or they are obsolete and they will not work for ROS Noetic Distribution. Consequently, we created this tutorial to once for all clarify the TurtleBot 3 installation process.
More precisely, in this Robot Operating System (ROS) and robotics tutorial, we will learn how to
- Properly Install TurtleBot 3 simulation package in ROS
- Visualize the TurtleBot 3 robot in the Gazebo simulation environment
- Load different simulation worlds in Gazebo
- Move TurtleBot 3 in Gazebo graphical simulation environment
The YouTube tutorial accompanying this post is given below.
By the end of this tutorial, you will be able to simulate a mobile robot in an office/house space shown in the figure below.

STEP 1: Create Workspace Folders and Clone the Packages
Here, we need to mention that the installation process presented below is tested in ROS Noetic distribution. The first step is to create workspace folders and clone the packages from an online GitHub repository. First, open a Linux terminal window and type
mkdir -p ~/test_turtlebot/src
cd ~/test_turtlebot/src
These two code lines will create a workspace folder called “test_turtlebot” and inside of that folder a subfolder calles “src”. You can change the name of the workspace folder as you wish. However, the name of the subfolder “src” should not be changed. The second command will change the current folder to the subfolder “src”
Then, in the currently active subfolder “src”, we clone (copy from) the remote repository the following TurtleBot 3 packages:
git clone https://github.com/ROBOTIS-GIT/turtlebot3.git
git clone https://github.com/ROBOTIS-GIT/turtlebot3_msgs.git
git clone https://github.com/ROBOTIS-GIT/turtlebot3_simulations.git
After executing these commands, the folder structure of the remote repository will be copied to the local “src” folder. Next, we change the active folder
cd ~/test_turtlebot
Then, we make the packages and workspace by typing
catkin_make
In order to be able to use the created packages, we need to run the source command:
source ~/test_turtlebot/devel/setup.bash
By executing this command, we sourced “setup.bash” file which contains the configuration parameters of our packages.
STEP 2: Simulate TurtleBot Robot in Gazebo
As you can read on this webpage, the Turtle Bot 3 package comes with 2 robot options: Burger and Waffle Pi. We use Burger in our simulations. Consequently, in the same terminal window that is used to install the packages, we type
export TURTLEBOT3_MODEL=burger
Next, let us run the Gazebo simulation. We do that by typing:
roslaunch turtlebot3_gazebo turtlebot3_empty_world.launch
This command will create an empty map in Gazebo, with the CAD model of TurtleBot 3. However, we cannot move the robot in this environment. To be able to move the robot, we need to open a new terminal window, and to run a teleop node that will enable us to control the robot by using the keyboard keys. After opening a new terminal (while keeping the old terminal open), type
source ~/test_turtlebot/devel/setup.bash
This command will source the workspace. Then, we need to select the robot by typing
export TURTLEBOT3_MODEL=burger
Finally, we can run the teleop node by typing
roslaunch turtlebot3_teleop turtlebot3_teleop_key.launch
As explained in the video tutorial, we control the robot motion by pressing the keyboard keys “a,s,d,x” and “w”. This will enable us to control the robot. Now, go back to the simulation environment, and try to control the robot. You still will not be able to control the robot. To control the robot, the terminal which is used to start the teleop node has to be active. So keep this terminal active, and try to move the robot (you can do that by simply moving the terminal to the edge of the screen and by clicking on the terminal and keeping the mouse pointer in the area of the terminal). You will be able to move the robot.
Besides an empty Gazebo simulation world. We can use two other worlds that can be initiated like this (make sure that you first closed the original Gazebo simulation, and make sure that you abort the current Gazebo simulation by pressing CTRL+C in the original terminal):
roslaunch turtlebot3_gazebo turtlebot3_world.launch
and
roslaunch turtlebot3_gazebo turtlebot3_house.launch
The last Gazebo world represents a house which is a very important world for testing nagivation and SLAM algorithms.