 by
by In this machine learning and AI tutorial, we explain how to install and run locally the olmOCR-7B model. olmOCR-7B is an amazing optical character recognition (OCR) model that can be used for image, PDF, and document conversion to text. The model can even recognize script letters and hand-written digits. We explain how to install and run locally olmOCR-7B. The YouTube tutorial is given below.
Installation Instructions for olmOCR-7B
In this tutorial, we are using Linux Ubuntu 24.04 operating system. Everything explained in this tutorial can be generalized to other Linux Ubuntu versions. If you are on Windows, then install Windows Subsystem for Linux, and then you can follow this tutorial.
- First, you need to make sure that you have the NVIDIA CUDA Compilers and the NVIDIA CUDA Toolkit installed on your system. To install NVIDIA CUDA Toolkit and NVIDIA CUDA compilers, follow the tutorial given here.
- Secondly, you need to install Anaconda. To install Anaconda, follow the tutorial given here.
Then, open a terminal, and type
sudo apt-get update && sudo apt-get upgradeYou will need to install poppler-utils and additional fonts for rendering PDF images:
sudo apt-get install poppler-utils ttf-mscorefonts-installer
sudo apt-get install msttcorefonts fonts-crosextra-caladea
sudo apt-get install fonts-crosextra-carlito gsfonts lcdf-typetools
Then, create a workspace folder, and create and activate Conda virtual environment:
cd ~
mkdir olmocr
cd olmocr
conda create -n olmocr python=3.11
conda activate olmocr
Next, install the necessary libraries:
pip install olmocr
pip3 install torch torchvision torchaudio
pip install transformers
pip install pillow
Finally, create and copy an image with some hand-written text to the workspace folder. Here is one example of the image.
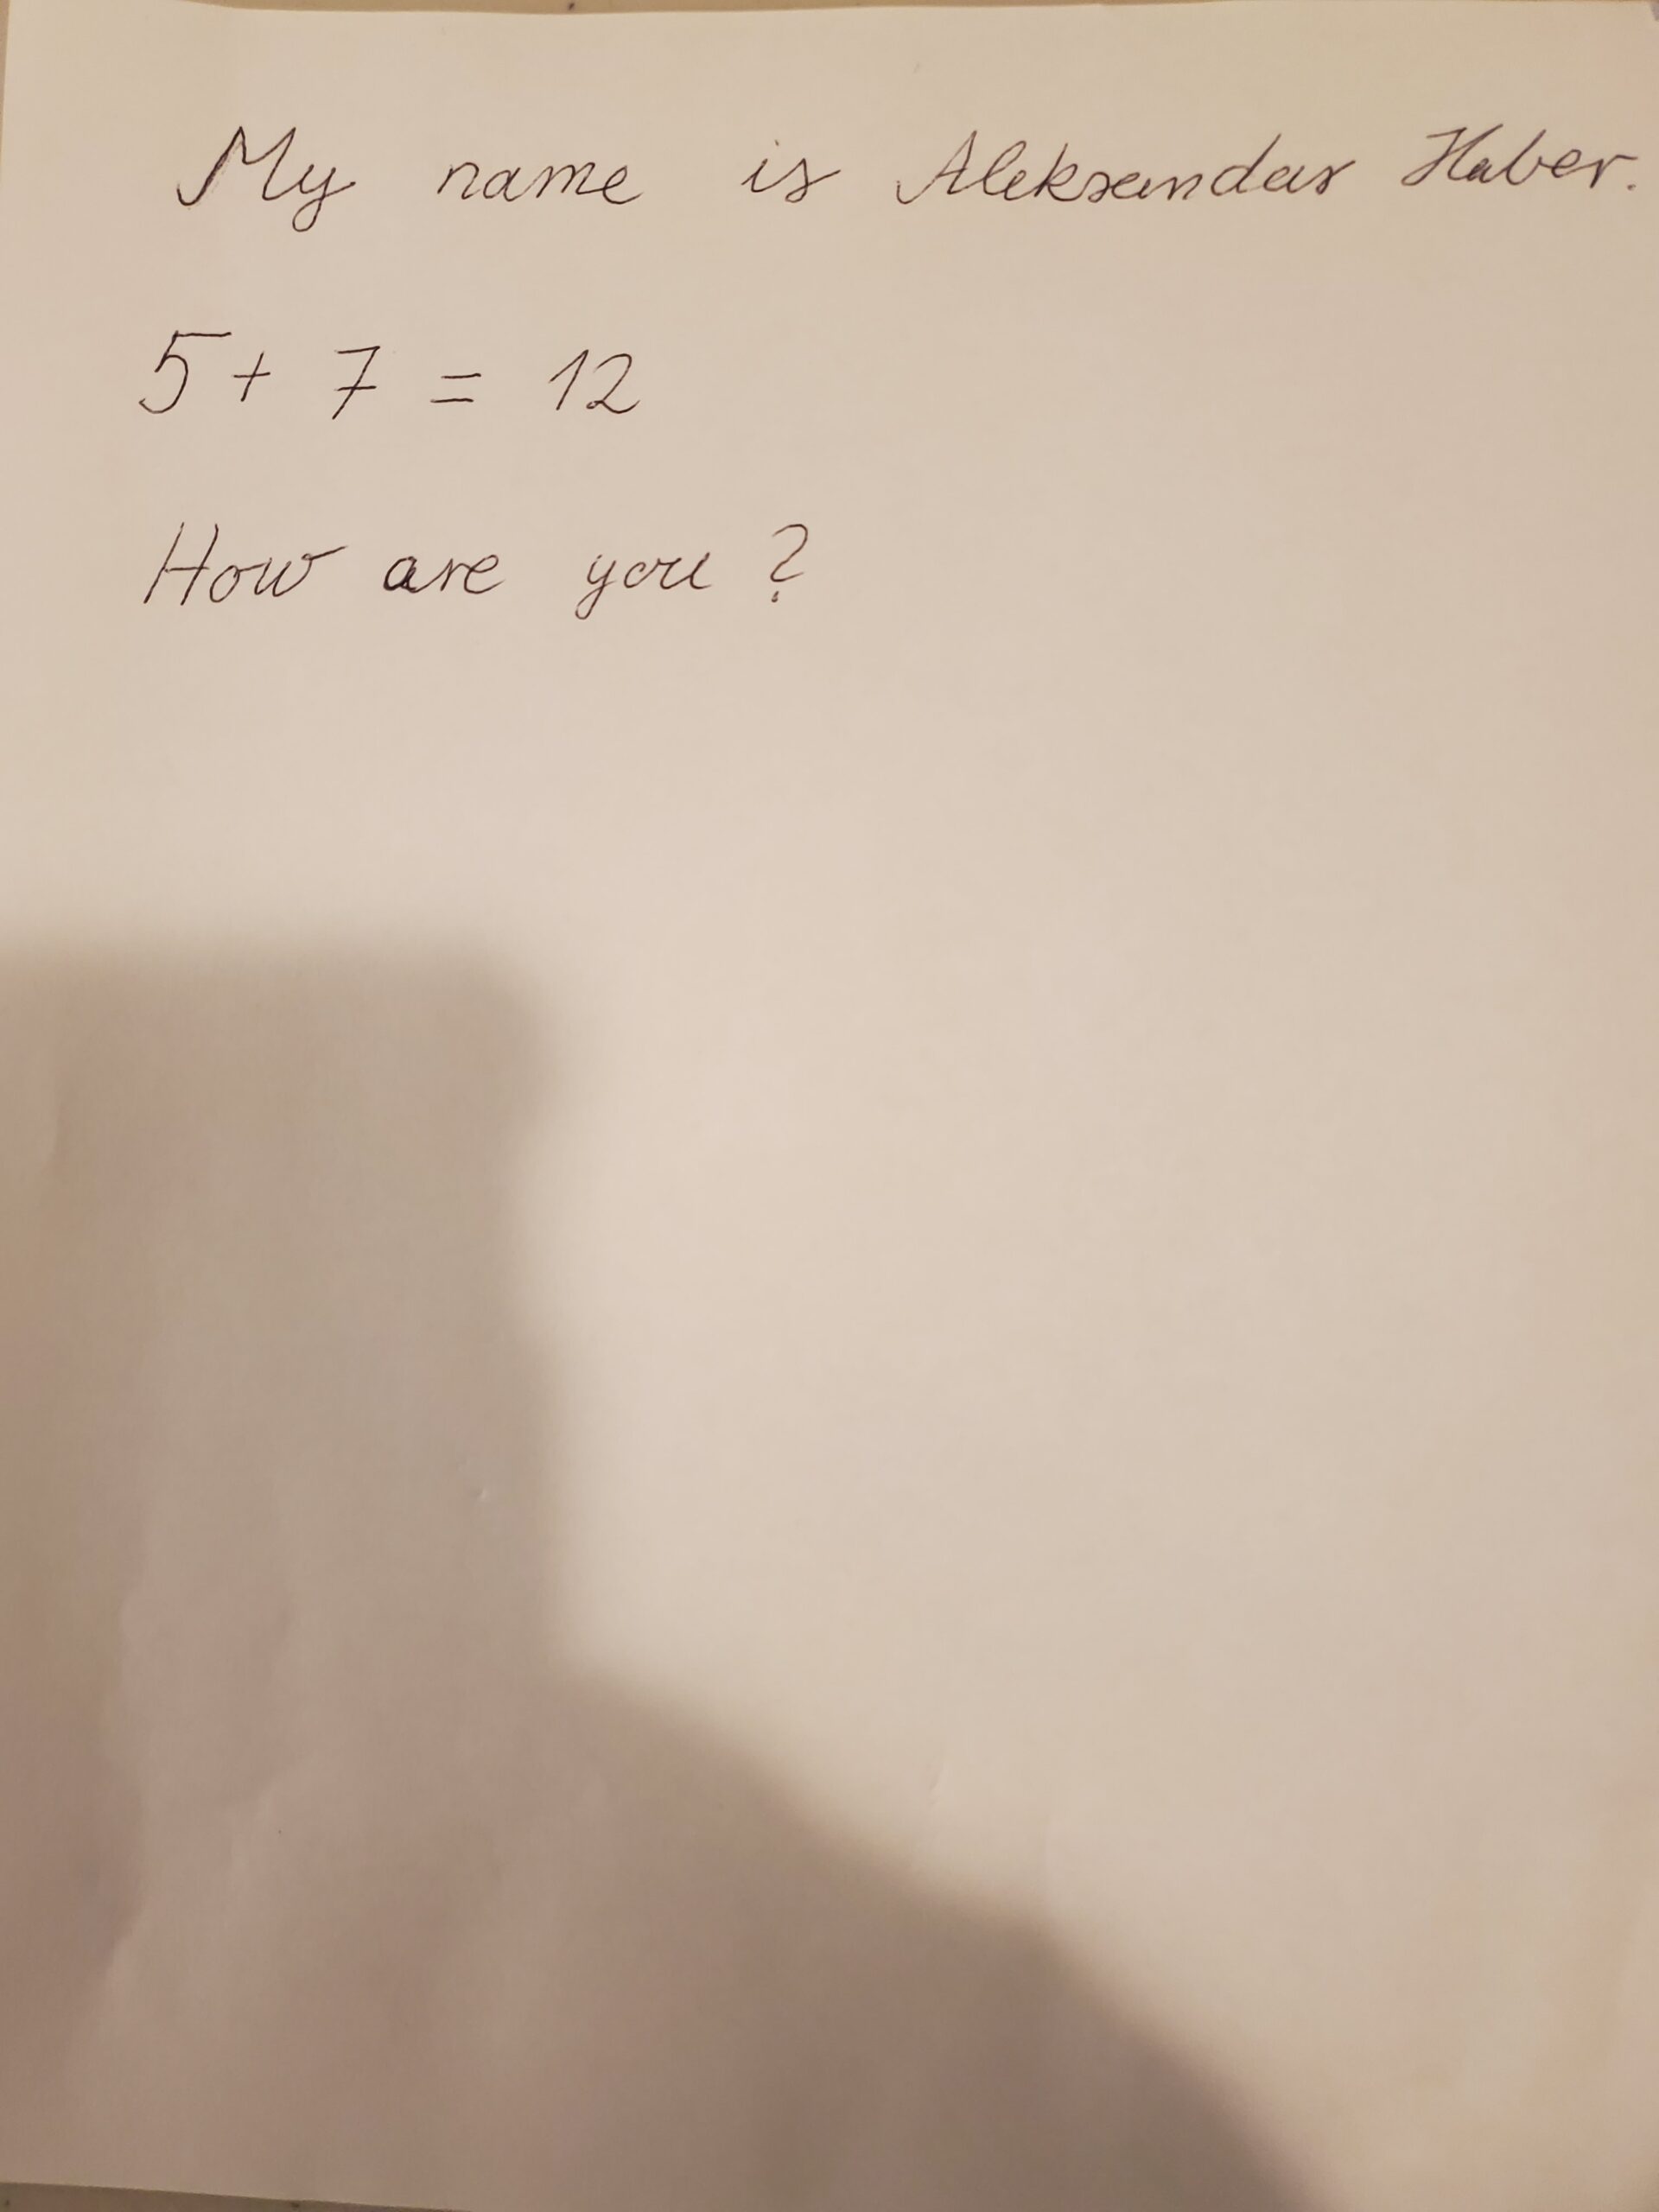
Save this image as a PDF file “test.pdf” in the workspace folder. The Python code is given below. For the code explanation, see the YouTube tutorial.
import torch
import base64
import urllib.request

from io import BytesIO
from PIL import Image
from transformers import AutoProcessor, Qwen2VLForConditionalGeneration

from olmocr.data.renderpdf import render_pdf_to_base64png
from olmocr.prompts import build_finetuning_prompt
from olmocr.prompts.anchor import get_anchor_text

# Initialize the model
model = Qwen2VLForConditionalGeneration.from_pretrained("allenai/olmOCR-7B-0225-preview", torch_dtype=torch.bfloat16).eval()
processor = AutoProcessor.from_pretrained("Qwen/Qwen2-VL-7B-Instruct")
device = torch.device("cuda" if torch.cuda.is_available() else "cpu")
model.to(device)

# Grab a sample PDF
# urllib.request.urlretrieve("https://molmo.allenai.org/paper.pdf", "./paper.pdf")

# Render page 1 to an image
image_base64 = render_pdf_to_base64png("./test.pdf", 1, target_longest_image_dim=1024)

# Build the prompt, using document metadata
anchor_text = get_anchor_text("./test.pdf", 1, pdf_engine="pdfreport", target_length=4000)
prompt = build_finetuning_prompt(anchor_text)

# Build the full prompt
messages = [
            {
                "role": "user",
                "content": [
                    {"type": "text", "text": prompt},
                    {"type": "image_url", "image_url": {"url": f"data:image/png;base64,{image_base64}"}},
                ],
            }
        ]

# Apply the chat template and processor
text = processor.apply_chat_template(messages, tokenize=False, add_generation_prompt=True)
main_image = Image.open(BytesIO(base64.b64decode(image_base64)))

inputs = processor(
    text=[text],
    images=[main_image],
    padding=True,
    return_tensors="pt",
)
inputs = {key: value.to(device) for (key, value) in inputs.items()}


# Generate the output
output = model.generate(
            **inputs,
            temperature=0.8,
            max_new_tokens=150,
            num_return_sequences=1,
            do_sample=True,
        )

# Decode the output
prompt_length = inputs["input_ids"].shape[1]
new_tokens = output[:, prompt_length:]
text_output = processor.tokenizer.batch_decode(
    new_tokens, skip_special_tokens=True
)


with open("response.txt", "w", encoding="utf-8") as text_file:
    text_file.write(text_output[0])

print(text_output[0])
# ['{"primary_language":"en","is_rotation_valid":true,"rotation_correction":0,"is_table":false,"is_diagram":false,"natural_text":"Molmo and PixMo:\\nOpen Weights and Open Data\\nfor State-of-the']
This code will recognize the text and characters on the image and store the text in the text file called “response.txt”:
{"primary_language":"en","is_rotation_valid":true,"rotation_correction":0,"is_table":false,"is_diagram":false,"natural_text":"My name is Aleksandar Haber.\n\n5 + 7 = 12\n\nHow are you?"}