 by
by In this tutorial, we explain how to create Docker images and containers of simple Python programs, and how to run the containerized Python program on a local computer. The assumption is that you do not know anything about Docker, and you want to learn how to start using Docker. Later on, once you learn the basics, you will easily pick up other details about Docker. The YouTube video accompanying this webpage is given below.
Motivation for Creating This Tutorial
The motivation for creating this tutorial comes from the fact that online and in books you will rarely find concise explanation on how to create minimal Docker images and containers for Python applications and programs. Students and people who are not familiar with Docker, will often have a hard time understanding how to create a simple Docker image of a Python application. This is especially the case for robotics or mechanical engineering students who did not take computer science classes. Students or engineers often do not have time or patience to read 100 pages of manuals or first several chapters of books to learn something that can often be learned in 10 or 15 minutes. We observed that a number of tutorials available online are either incomplete or not written for beginners.
Prerequisites:
You have to install Docker Desktop for Windows. You can download and install Docker Desktop for Windows here. However, the installation of Docker desktop for Windows can sometimes be trickly. That is why we have created a separate video tutorial on how to install Docker Desktop on Windows. The tutorial is given here.
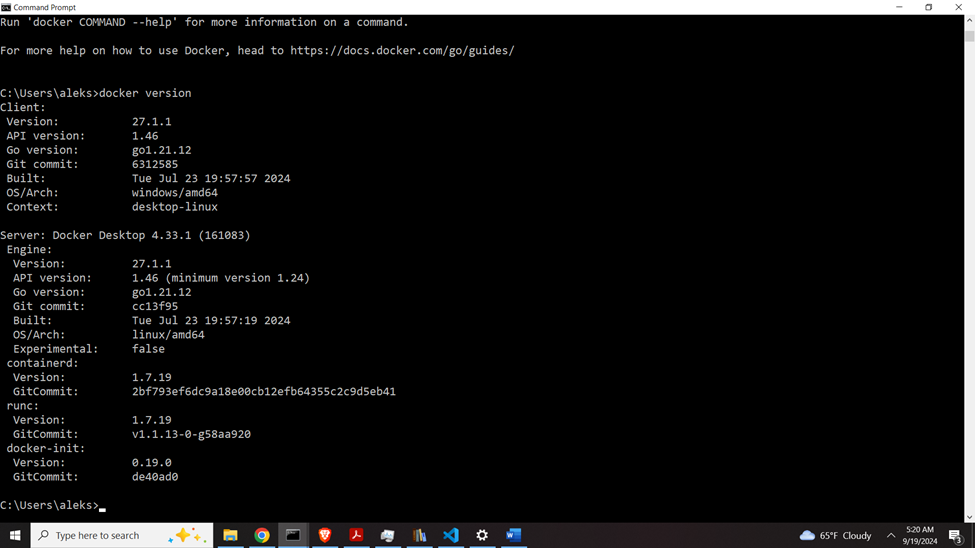
To make sure that Docker is properly installed. Open a terminal (Windows command prompt) and type
docker versionand the output should look like this:
How to create Docker images and Containers of a simple Python Program
First let us create a workspace folder and a simple Python file. Open a new terminal, and in that terminal type
cd\
mkdir codes
cd codes
mkdir testDocker
cd testDocker
In this base folder, let create our Python program:
import numpy as np
import scipy
print("Our First Container Doing Matrix Calculus!")
matrix1=np.array([[1,2],[3,4]])
matrix2=np.array([[1,3],[7,8]])
matrix3=np.matmul(matrix1,matrix2)
matrix4=scipy.linalg.inv(matrix2)
matrix5=np.matmul(matrix3,matrix4)
print(matrix1)
print(matrix5)
print("End of execution")
Save this program as test1.py . This code tests and performs basic matrix operations. It depends on two libraries NumPy and SciPy. Our goal is to create Docker Image and Container such that we can run this application.
To create a Docker image, we need to create a file in the workspace folder called Dockerfile . This file does not have extensions and it should be precisely written. Create an empy Dockerfile, and enter this content:
# Here we set the version (image) of Python that we want to use
# That is, we pull down a tagged Python base image
# there are several options over here
# FROM python:<version> - this image might be large ~ 1 GB
# FROM python:<version>-alpine - this is also a smaller image ~ 100MB
# or this:
FROM python:3.12-slim
# set the name of the work directory of the container
WORKDIR /app
# copies all the source files from the build folder (the first period) into the WORKDIR (second period)
COPY . .
# Install pip requirements
RUN python -m pip install -r requirements.txt
# this is the command that Docker will execute whenever its start a container
CMD ["python", "test1.py"]
Let us explain this file line by line (see also the comments in the file). The line
FROM python:3.12-slim is used to pull the base Python image with the version 3.12. Namely, our container has to be self-contained, and consequently, we need to include Python. The version name “-slim” means that we are pulling a lightweight version of Python to save space. Then, by using
WORKDIR /appwe specify the work directory of the container. Then, the line
COPY . .copies all the source files (the first period) to the workspace directory (the second period). Then, by using the line
RUN python -m pip install -r requirements.txtwe install the Python libraries that are in the file “requirements.txt” (we still need to define this file). Finally, the line
CMD ["python", "test1.py"]is used to execute the Python file. This is done automatically inside of the container.
Then, in addition to this file, we need a requirements.txt file that will tell to our Docker Python libraries that it needs to execute. Create an empty requirements.txt file in the workspace folder and enter this in the file:
numpy
scipy
Now we are ready to build a Docker project and create our image. To do that, type this:
docker build -t docapp:ver1 .Here, the name of the image is “docapp:ver1”
To see the list of docker images, type this
docker images To run a container of our image simply type this:
docker run docapp:ver1and the program will run. The output is
Our First Container Doing Matrix Calculus!
[[1 2]
 [3 4]]
[[1. 2.]
 [3. 4.]]
End of execution
To erase the image, you need to type this:
docker image rm -f docapp:ver1