 by
by What is covered in this tutorial: In this tutorial, we explain how to create, compile, and run ROS2 packages in Docker containers. We explain how to perform these tasks from scratch. That is, we will start from zero and we will teach you how to create packages and how to properly embed them inside of Docker containers. We will then explain how to run packages by using the created Docker containers. This tutorial is based on ROS2 Humble, and everything explained in this tutorial can easily be generalized to ROS2 Jazzy or even other ROS2 versions. To illustrate the main ideas and not to blur them with too many ROS2 implementation issues, we will create a publisher and a subscriber ROS2 nodes and we will embed them inside of a package.
Motivation: In this tutorial, we present a minimal working example. Even this minimal working example is not trivial and it takes a significant amount of time and effort to properly implement it. The main motivation for creating this tutorial comes from the fact that online you will rarely find a tutorial explaining how to implement docker containers in ROS2 from scratch. Although there are a number of tutorials out there, our impression is that they are written for more advanced users and a number of crucial steps are either skipped or not implemented. In sharp contrast, in this tutorial, we thoroughly explain how to perform all the steps.
In this tutorial, we will write ROS2 nodes and a ROS2 package from scratch. After we write the package, we will explain how to write Docker and entry pointer files and how to embed everything inside of the container. We will also create a separate video tutorial that will start from cloning the nodes and packages. That tutorial will be for people who perfectly understand the process of creating packages in ROS2, and who just need to learn how to embed the packages inside of the Docker container.
The YouTube tutorial accompanying this webpage is given below.
Copyright Notice and Code License
This manual, code files and the lesson video should not be copied, redistributed, or publicly posted on public or private websites or social media platforms. This lesson and the code files are the original work and the ownership of Aleksandar Haber. You have the right to use the provided code files and this lesson for personal educational use and they should not be posted on public or private code repositories. Any commercial use is not allowed without the author’s written permission. The code and the lesson should not be used for commercial purposes. The code files and the manual should not be used as lecture material on online learning platforms and in official university courses. Without the permission of the author, this lesson, provided code files, and this manual should not be used to produce academic papers, student reports, or other documents. This lesson and the accompanying material should not be used to train an AI algorithm or a large language model.
STEP 0 – Prerequisites (Ubuntu 22.04, ROS2 Humble and Docker Engine)
To implement this tutorial, you need to have
- Ubuntu 22.04. To install Ubuntu, follow our tutorial whose link is given here. However, everything explained in this tutorial applies to other Ubuntu versions.
- ROS2 Humble. To install ROS2 Humble, follow our tutorial whose link is given here. However, everything explained in this tutorial can be used in other ROS2 distributions.
- Docker Engine. To install Docker Engine in Ubuntu, follow our tutorial whose link is given here.
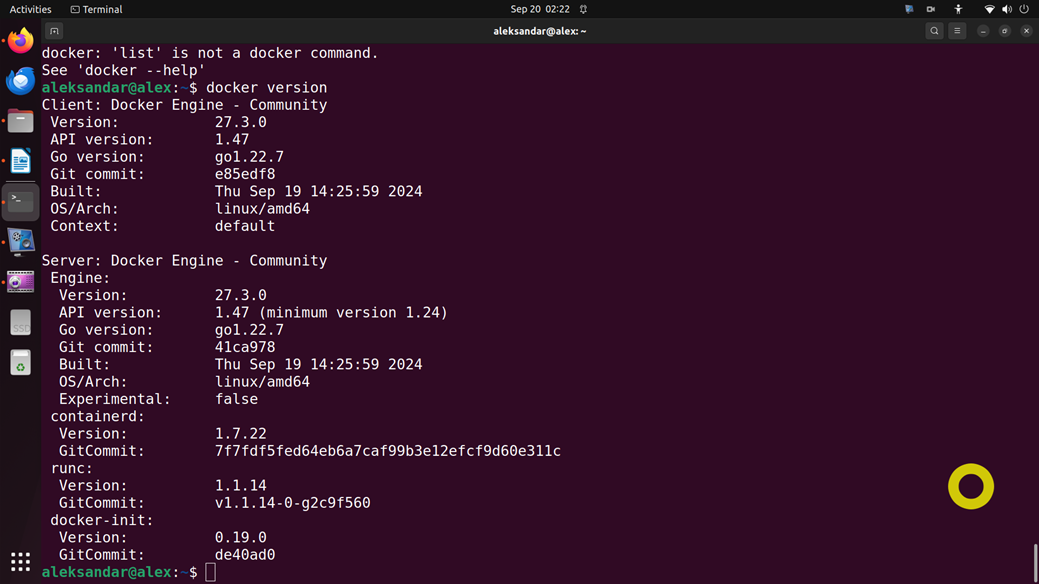
Once Docker is installed, we can verify the installation by opening a terminal and by typing:
docker versionIf Docker is properly installed, the output should look like this
STEP 1 – Create Source Files of the Nodes and Packages
First, we need to source the ROS2 environment:
source /opt/ros/humble/setup.bashNext, we need to create workspace and src folders:
mkdir -p ~/ws_pub_sub/srcThe next step is to create our package. To do that, we need to type:
cd ~/ws_pub_sub/src
ros2 pkg create --build-type ament_python publisher_subscriber
The name of the package is “publisher_subscriber”. The next step is to implement the publisher node. The publisher node should be created in the folder: “~/ws_pub_sub/src/publisher_subscriber/publisher_subscriber/“. Navigate to the folder:
cd ~/ws_pub_sub/src/publisher_subscriber/publisher_subscriber/In this folder create the publisher node file called “publisher.py“. The content of the file is given below.
# Publisher node demonstration
# Author: Aleksandar Haber

# the package std_msgs contains data types used to communicate ROS2 messages
from std_msgs.msg import String

# rclpy is the ROS2 client library for Python
import rclpy
# Here, we import the Node class since we will create a Python node
from rclpy.node import Node

# this is the name of the topic that will be used to communicate messages
# between the publisher and subscriber nodes
# note that the same topic name should be used in the subscriber node
topicName='communication_topic'

# here, we embed our Node in a class
# the class called PublisherNode inherits from the class called Node
# that is, the class called PublisherNode is a child class of the parent class Node

class PublisherNode(Node):

    # this is the constructor for the child class
    def __init__(self):
        # here, we call the constructor of the parent class
        super().__init__('publisher_node')
        # here, we create a publisher node
        # we specify the type of ROS2 message that will be sent (String)
        # we specify the topic name (topicName)
        # we specify the queue size - buffer size (20)
        self.publisherCreated = self.create_publisher(String, topicName, 20)
        # this is a counter that will count how many messages are being sent
        self.counter = 0
        # this is the communication period in seconds
        # how often we will be sending messages from the publisher to the subscriber
        communicationPeriod = 1
        # this function will define the time period of communication and it will
        # specify the name of the callback function that is called every communicationPeriod seconds
        # in our case, the name of the function is "self.callBackFunctionPublisher"
        self.period = self.create_timer(communicationPeriod, self.callBackFunctionPublisher)


    # this is the callback function
    def callBackFunctionPublisher(self):

        # we create an empty Message data structure
        messageToBeSent = String()
        # we are sending this string
        messagePythonString= 'This is message number %d' %self.counter
        # fill-in the data to be sent
        messageToBeSent.data = messagePythonString

        # send the message through the topic
        self.publisherCreated.publish(messageToBeSent)
        # update the message counter
        self.counter += 1
        # print the info in the terminal window that is running the publisher node
        self.get_logger().info('Published Message: "%s"' % messageToBeSent.data)


# this is the entry point function
def main(args=None):

    # initialize rclpy
    rclpy.init(args=args)

    # create the publisher node - this will call the default constructor
    publisherNode = PublisherNode()

    # this will spin the Node, that is, it will make sure that the proper
    # callback function is called
    rclpy.spin(publisherNode)

    # here, we destroy and shutdown
    publisherNode.destroy_node()
    rclpy.shutdown()


if __name__ == '__main__':
    main()
Next, let us create the subscriber node. The subscriber node file should be placed in the same folder as the publisher node. The name of the subscriber node file should be “subscriber.py“. The content of the subscriber node file is given below.
# Subscriber node demonstration
# Author: Aleksandar Haber


# the package std_msgs contains data types used to communicate ROS2 messages
from std_msgs.msg import String

# rclpy is the ROS2 client library for Python
import rclpy

# Here, we import the Node class since we will create a Python node
from rclpy.node import Node


# this is the name of the topic that will be used to communicate messages
# between the publisher and subscriber nodes
# note that the same topic name should be used in the publisher node
topicName='communication_topic'

# here, we embed our Node in a class
# the class called SubscriberNode inherits from the class called Node
# that is, the class called SubscriberNode is a child class of the parent class Node

class SubscriberNode(Node):

    def __init__(self):

        # same idea as in the publisher node
        super().__init__('subscriber_node')

        # here, we create a subscriber node
        # we specify the type of ROS2 message that will be sent (String)
        # we specify the topic name (topicName)
        # we specify the callback function for handling the recieved messages
        # we specify the queue size - buffer size (20)
        self.subscriberCreated = self.create_subscription(String,topicName,self.callbackFunctionSubscriber, 10)

        # this is used to prevent variable warning
        self.subscriberCreated  # prevent unused variable warning

    # this is the callback function
    # this function will be called every time a message is received

    def callbackFunctionSubscriber(self, receivedMessage):
        # we print a received message in the terminal window running the subscriber
        self.get_logger().info('We received the message:  "%s"' % receivedMessage.data)


# this is the entry point function
def main(args=None):

    # initialize rclpy
    rclpy.init(args=args)
    # create the subscriber node - this will call the default constructor
    subscriberNode = SubscriberNode()
    # spin the node, this will make sure that the proper callback function is called
    rclpy.spin(subscriberNode)

    # destroy the node
    subscriberNode.destroy_node()
    rclpy.shutdown()


if __name__ == '__main__':
    main()
The next step is to add the permissions for these two files such that we can execute them:
cd ~/ws_pub_sub/src/publisher_subscriber/publisher_subscriber/
chmod +x publisher.py
chmod +x subscriber.py
Type the following command to verify the execution permission
ls -laThe output should look like this:
total 16
drwxrwxr-x 2 aleksandar aleksandar 4096 Sep 20 03:09 .
drwxrwxr-x 5 aleksandar aleksandar 4096 Sep 20 03:06 ..
-rw-rw-r-- 1 aleksandar aleksandar    0 Sep 20 03:06 __init__.py
-rwxrwxr-x 1 aleksandar aleksandar 3103 Sep 20 03:09 publisher.py
-rwxrwxr-x 1 aleksandar aleksandar 2240 Sep 20 03:10 subscriber.py
This means that these files can now be executed.
The next step is to add the dependencies. Namely, our package depends on the standard ROS libraries: “rclpy” and “std_msgs”. To add the dependencies, enter
cd ~/ws_pub_sub/src/publisher_subscriberAnd in this folder, edit the file called “package.xml“. Add the following two lines to the file “package.xml“:
<exec_depend>rclpy</exec_depend>
<exec_depend>std_msgs</exec_depend>
Next, we need to specify the entry points for our package. We do that by editing the file called “setup.py” in the folder “~/ws_pub_sub/src/publisher_subscriber“
cd ~/ws_pub_sub/src/publisher_subscriberIn the file “setup.py”, you need to find and edit this dictionary
   entry_points={
        'console_scripts': [
        ],
    },
After the edits, this dictionary should look like this
entry_points={
        'console_scripts': [ 'publisher = publisher_subscriber.publisher:main',
        'subscriber = publisher_subscriber.subscriber:main'
        ],
    },
We also need to double-check the content of the file called “setup.cfg”. Most likely, you do not need to change this file. Type the following
cd ~/ws_pub_sub/src/publisher_subscriber
And make sure that the following lines exist in the file “setup.cfg“
[develop]
script_dir=$base/lib/publisher_subscriber
[install]
install_scripts=$base/lib/publisher_subscriber
This tells to ROS2 to put executable files in lib. ROS2 run will search for files in this folder. Before building the actual packages, it is very important to verify that all the dependencies are properly installed
cd ~/ws_pub_sub/
rosdep install -i --from-path src --rosdistro humble -y
If everything is properly installed, the output should be
#All required rosdeps installed successfullyWe are now ready to create the Docker image and the container.
STEP 2 – Create Docker File and Entry point File
The next step is to create a Docker file defining the image and container, and an entry point file that is used to specify additional parameters. First, navigate to the workspace folder
cd ~/ws_pub_sub/In that folder, create the Docker file. The Docker file name is “Dockerfile“. The content of this file is given below.
# this is the image of ROS2 that is pulled (downloaded an included in the local image)
FROM osrf/ros:humble-desktop

# we are using bash
SHELL ["/bin/bash", "-c"]

# here we specify the work directory inside of our container, everything will be placed inside
WORKDIR /app

# here, we are copying "src" folder from our workspace folder to the newly created folder
# ws_pub_sub/src inside of our container. That is, we are creating "ws_pub_sub" folder
# int the container and another subfolder inside of that folder called "src"
# the path in the container is /app/ws_pub_sub/src
COPY src ws_pub_sub/src

# here we are starting from /app and moving to /app/ws_pub_sub and we are sourcing the
# base environment that is now inside of our container and we are building the package
RUN cd ws_pub_sub && \
    source /opt/ros/humble/setup.bash && \
    colcon build

# here, we are copying another file from our local computer to the root folder "/" (forward slash)
# inside of our container
# see entrypoint.sh file for more details
COPY entrypoint.sh /

# here we are specifying the entry point file
ENTRYPOINT ["/entrypoint.sh"]
# after we run the package the command "bash" will be executed, and
# we will enter a local bash terminal inside of our container
CMD ["bash"]
For a complete explanation of this Docker file, watch our YouTube tutorial. Next, in the folder “~/ws_pub_sub/” (the same folder in which Dockerfile is created) create the entry point file. The name of the file should be “entrypoint.sh“. The content of this file is given below.
#!/bin/bash

# this tells to shell to exit if any command returns a non zero exit status
# non-zero error is an indication of failure in Unix systems
set -e

# this two commands will source the overlay and underlay
# such that we can run our package
source /opt/ros/humble/setup.bash
source /app/ws_pub_sub/install/setup.bash

# This means that we are doing everything in this  entrypoint.sh script,
# then in the same shell, we will run the command the user passes in on the command line.
# (if the use passes a command)
exec "$@"
After you have created the entry point file, make sure that you set the execution permissions for this file by typing this in the Linux terminal.
chmod +x entrypoint.shIf you do not set the execution permissions, the Docker container will not work!
STEP 3 – Build the Docker Image and Run the Docker Container
Now we are ready to build our image. Let us do that:
docker build -t ros_demo2 .The name of the image is “ros_demo2”. Behind the scenes, and image of the ROS Humble will be downloaded from the Docker repository and it will be included in our local image. Then, the ROS2 command “colcon build” will be executed and the package inside of our image will be compiled such that we can execute it later on once we start the container. Also, some other configuration steps will be performed.
Now, if you type
docker imagesYou should see the newly created image
REPOSITORY    TAG       IMAGE ID       CREATED          SIZE
ros_demo2     latest    ff94a976d031   21 seconds ago   3.44GB
hello-world   latest    d2c94e258dcb   16 months ago    13.3kB
To start our container, we need to type
docker run -it --rm ros_demo2:latestThe output should look like this
root@ae62248017df:/app#This means that our container has started! We are now in the Bash shell of our container! We can now execute all Bash and ROS2 commands inside of this local shell (local terminal). We can type this
ros2 pkg listto see the list of all available packages inside of our container. You will see a number of standard ROS2 packages. This is because we have included an image of ROS2 Humble inside of our image and container. In the list, you should see our newly created package:
publisher_subscriberWe can run our publisher node like this
ros2 run publisher_subscriber publisher

[INFO] [1726832471.301293900] [publisher_node]: Published Message: "This is message number 0"
[INFO] [1726832472.290742118] [publisher_node]: Published Message: "This is message number 1"
[INFO] [1726832473.290584140] [publisher_node]: Published Message: "This is message number 2"
[INFO] [1726832474.290746388] [publisher_node]: Published Message: "This is message number 3"
Then, let us open a new terminal to run a subscriber node. Open a new terminal and type
docker run -it --rm ros_demo2:latestThe output should look like this:
root@a610a5cc297d:/app#Let us list all the topics
ros2 topic list/communication_topic
/parameter_events
/rosout
The topic called “/communication_topic” is the topic that we defined in our publisher and subscriber nodes. This means that our second container sees the communication topics from the first container that is used to communicate the message. Then, we can run our subscriber node like this
ros2 run publisher_subscriber subscriberThe output is
[INFO] [1726832704.302203583] [subscriber_node]: We received the message:  "This is message number 233"
[INFO] [1726832705.291336916] [subscriber_node]: We received the message:  "This is message number 234"
[INFO] [1726832706.291710185] [subscriber_node]: We received the message:  "This is message number 235"
[INFO] [1726832707.289141262] [subscriber_node]: We received the message:  "This is message number 236"
[INFO] [1726832708.291492503] [subscriber_node]: We received the message:  "This is message number 237"
Finally, let us open a third terminal and type
docker psThis command will list all the currently active containers. The output is
CONTAINER ID   IMAGE              COMMAND                 CREATED         STATUS         PORTS     NAMES
a610a5cc297d   ros_demo2:latest   "/entrypoint.sh bash"   2 minutes ago   Up 2 minutes             gallant_hoover
ae62248017df   ros_demo2:latest   "/entrypoint.sh bash"   7 minutes ago   Up 7 minutes             jolly_wilbur
We can manually stop any of the containers by using the “docker stop” command and the name of the container. For example, this command will stop the subscriber node:
docker stop gallant_hooverTo stop the publisher node (container), type this
docker stop jolly_wilburFinally let us learn how to erase the ROS2 image we created. We should do that if we do need the image and in order to save some space since the size of the image is more than 3GB on our local disk. To do that, we need to type
docker image rm -f ros_demo2:latestAfter this command, you should type
docker images To make sure that the created image is erased. That is all!