 by
by
In this tutorial, we explain how to correctly install PyTorch in Anaconda or Conda virtual environments on Windows computers.
Motivation: It is suggested to install and use PyTorch as well as other Python packages in virtual environments. We noticed that some people are struggling with the installation of PyTorch in virtual environments. We created this tutorial to clarify all the steps.
There are two types of Python virtual environments:
a) Classical Python virtual environments created by using
python -m venv <name of the environment>
b) Anaconda or Conda virtual environments created using:
conda create -n <name of the environment>.
Our experience shows that sometimes it is easier to install Python packages and programs in Anaconda / Conda virtual environments, especially if there are a number of dependencies. However, this is our experience, which might not generalize to every case.
The YouTube tutorial accompanying this webpage is given below.
Prerequisites
– You have to have Anaconda installed on your system. Install Anaconda by visiting this website.
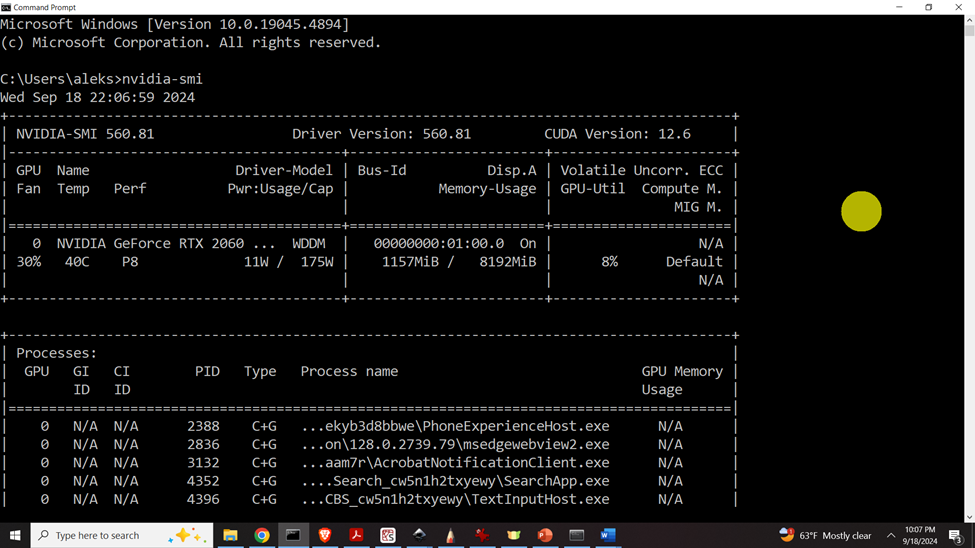
– You need to have a GPU. Open a command prompt and type:
nvidia-smiAnd the output should look like this:
if you have a GPU on your system.
– Also, it is a good idea to install NVIDIA (R) Cuda compiler drivers. To check if the drivers are already installed, open a terminal and type
nvcc --versionThe output should look like this:
nvcc: NVIDIA (R) Cuda compiler driver
Copyright (c) 2005-2022 NVIDIA Corporation
Built on Wed_Sep_21_10:41:10_Pacific_Daylight_Time_2022
Cuda compilation tools, release 11.8, V11.8.89
Build cuda_11.8.r11.8/compiler.31833905_0
If the drivers are not installed, then you can install them by visiting this website and selecting your version of CUDA. On some computers, and in some scenarios, after installing PyTorch and while importing, you might see this error:
OSError: [WinError 126] The specified module could not be found. Error loading "C:\codes\testPyTorch\env1\Lib\site-packages\torch\lib\fbgemm.dll" or one of its dependencies.To fix this error and problem, you need to download and install Visual Studio with C++. To install Visual Studio C++ and compilers and go to this link.
Installation Procedure
The first step is to create a test folder. Open an Anaconda Prompt and type
cd\
mkdir codes
cd codes
mkdir testPyTorch
cd testPyTorch
Next, let us create conda virtual environment:
conda create -n env1
conda activate env1
To install PyTorch, we need to go to this website and select Windows, Conda, CUDA (make sure that the CUDA version is the correct – in accordance with nvcc –version). The selection table should produce the installation command that you need to type. In our case, it is:
conda install pytorch torchvision torchaudio pytorch-cuda=11.8 -c pytorch -c nvidiaThen, in this environment, let us start Visual Studio code (or some other Python editor)
code .Type this Python code to test the pytorch installation
import torch

device = torch.device("cuda" if torch.cuda.is_available() else "cpu")

print(f"Using device: {device}")

devNumber=torch.cuda.current_device()

print(f"Current device number is: {devNumber}" )

devName=torch.cuda.get_device_name(devNumber)

print(f" GPU name is: {devName}")
If this code runs without errors, then the PyTorch GPU version is properly installed.
To deactivate the anaconda environment, type this in the terminal
conda deactivate
Finally, keep in mind that PyTorch might occupy around 3GB of disk space. Consequently, if you do not plan to use the test environment we created, erase the environment by typing:
conda remove --name env1 --allMake sure that the environment is erased by typing:
conda info --envs