 by
by In this Large Language Model (LLM) and machine learning tutorial, we explain how to run Llama 3.2 1B and 3B LLMs on Raspberry Pi in Linux Ubuntu. In this tutorial, we use Raspberry Pi 4. However, the performance and speed of running the models will be better on Raspberry Pi 5. Almost everything explained in this tutorial applies to Raspberry Pi 5. The only difference is that the process of overclocking the processor will be different since you need to use different settings and parameters that are more suitable for Raspberry Pi 5. The YouTube tutorial is given below.
Important Notes
In this tutorial, we will be using Raspberry Pi 4 with 4GB of RAM. To enhance the performance of Raspberry Pi 4, we will overclock its GPU and CPU. Furthermore, we will increase the swap memory file size in order to be able to run the 3B model. This is very important otherwise, we will not be able to run the 3B model since it cannot fit in our memory. On the other hand, if you are using Raspberry Pi 4 with 8GB RAM, this might not be necessary. However, we suggest everyone to increase the swap memory size. This will increase the stability and make sure that the applications do not stop due to the lack of RAM memory. On the other hand, if you are using Raspberry Pi 5, you can also try to increase the swap memory. Here is the disclaimer regarding overclocking and swap memory adjustment:
Disclaimer: We do not take any responsibility if after overclocking, the system becomes unstable or crashes. In our case, the system remained stable after overclocking. We have a heat sink and a cooling fan attached to our Raspberry Pi that keeps the temperature constant. However, it might happen that if Raspberry Pi is not properly cooled, the overclocking process might overheat the processors and create irreparable damage. We do not take any responsibility for this or if your system crashes after overclocking. The crash of the system can easily be repaired by reverting the settings. Also, we do not take any responsibility if after changing the swap file size, the system becomes unstable.
In this tutorial, we are using Linux Ubuntu 24.04. However, you can also use any other supported version of Linux Ubuntu. We created a separate video tutorial explaining how to install Linux Ubuntu 24.04 on Raspberry Pi. The YouTube tutorial is given below
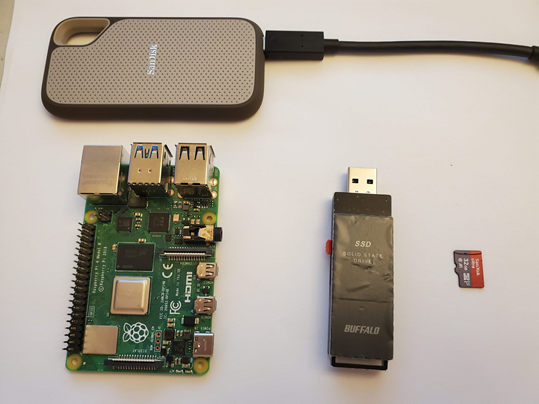
Instead of using micro-SD cards to run Linux Ubuntu, which are known to be very slow, we are using an external Solid State Drive (SSD). The SSD drive is connected by using a USB 3.0 Raspberry Pi port. That is, we installed Linux Ubuntu on the SSD. Our SSD is shown in the figure below. It is made by Buffalo and it has a capacity of 1000 GB. You can also use a SanDisk SSD or any other USB-based SSD.
STEP 1: Overclock GPU/CPU and Increase the Swap File Size
In the first iteration, you might consider to skip the overclocking step. Also, if you are using Raspberry Pi 5, you can either skip this step or use the correct overclocking parameters (search online).
Here are the important notes to keep in mind when overclocking:
– The standard CPU frequency of Raspberry Pi 4 is 1500 MHz.
– Online it is reported that Raspberry Pi4 remains stable up to 1950 MHz, and instabilities have been reported above this frequency. In our case, we will use a frequency of 1800 MHz just to be on the safe side.
– The standard GPU frequency is 500 MHz. We have noticed that it is OK to push this to 750 MHz.
Before you overclock you have to make sure that you have a fan attached to the Raspberry Pi 4 and that heat sinks are attached to the CPU and GPU. Also, make sure that you have a power supply that is rated for at least 3.5A.
To overclock, open a terminal and run this:
sudo apt update && sudo apt upgradeThen, you need to edit the configuration file:
sudo nano /boot/firmware/config.txtAt the end of the file enter this
over_voltage=5
arm_freq=1800
gpu_freq=750
Here, we are overclocking the CPU to 1800 MHz and the GPU to 750 MHz. Also, we are setting the voltage level to 5 (these are not volts, this is just a voltage number that is converted to the voltage level by the system). Save the file and exit.
To implement these changes we need to restart the system. However, before we restart the system, let us increase the swap file size.
Loosely speaking (this is not 100% correct statement, but the statement that roughly explains the purpose of the swap memory), swap memory will “virtually increase” RAM size. On the other hand, it will occupy some extra space on your SD card or on SSD. It will be used in addition to the regular RAM memory, and especially when the RAM memory is totally consumed. That is, the applications can store their data and processes in the swap memory. By increasing the swap memory we can improve the stability and prevent some applications from crashing.
To increase the swap file size, perform the following steps.
Show the current swap partitions and memory:
sudo swapon --showBefore we can make any changes, we need to disable the swap memory:
sudo swapoff -aWe need to erase the current swap file:
sudo rm /swapfileThe following code line will change the swap memory size to 10G (I have enough space on my SSD and I can do that):
sudo fallocate -l 10G /swapfileNext, set the permissions such that only the root user can change the swap file size:
sudo chmod 600 /swapfileTo implement the changes, type this
sudo mkswap /swapfileFinally, you need to enable back the swap memory and swap file:
sudo swapon /swapfileRestart the computer, and overclocking and swap file changes will be implemented. Then, open a terminal to check the status:
sudo swapon --showYou can also open the program called “top” to see the changes. Type in the terminal
topand you will see the memory consumption.
STEP 2: Install Ollama and Llama 3.2 1B and 3B models
First, we have to make sure that our computer allows for inbound connections on port 11434. To do that, open a terminal and type
sudo ufw allow 11434/tcpTo install Ollama in Linux Ubuntu, open a terminal and type
curl -fsSL https://ollama.com/install.sh | shTo verify the installation, open a web browser and type:
127.0.0.1:11434If Ollama is not running, then open a terminal and type
ollama serveThen, open a terminal and type
ollama serveand
ollama listIf you see the response, it means that the Ollama is installed. To download the 1B and 3B models, in the terminal type this
ollama pull llama3.2:1b
ollama pull llama3.2:3b
To run the 1B model, we need to type
ollama run llama3.2:1band to run the 3B model, we need to type
ollama run llama3.2:1band the model will be executed. To exit the model, we need to type
/bye