 by
by In this tutorial, we explain how to install, run, and use a lidar (Slamtec lidar) on Raspberry Pi, ROS2, and Linux Ubuntu. We explain how to clone the ROS2 package for running the lidar and how to build it. Then, we explain how to run the lidar in Raspberry Pi.
Prerequisites and Important Notes
- In this tutorial, we use a Slamtec lidar. In particular, we are using a Slamtec RPLIDAR A1M8 lidar. However, if you are using any other lidar produced by Slamtec, you can use this tutorial. We will explain how to install any Slamtec lidar device. In particular, a Slamtec RPLIDAR A1M8 lidar has a range of 12 meters and an update frequency of 10 Hz. It costs less than $100, and it is an excellent device for learning robotics, SLAM, and navigation, as well as building a low-cost mobile robot. It is a USB lidar that can directly be interfaced with a desktop computer or Raspberry Pi.
- You need to have a Raspberry Pi 4 or 5. In this tutorial, we are using Raspberry Pi 4 with 4GB RAM. We overclocked the GPU and CPU of our Raspberry Pi 4 to improve its performance. We created a separate tutorial on how to overclock the Raspberry Pi 4. The tutorial is given here.
- You have to have a working installation of Linux Ubuntu and ROS2. In this tutorial, we are using Linux Ubuntu 24.04 and ROS2 Jazzy. However, with almost no modifications (only one word has to be changed in the installation instructions), you can also use this tutorial in the case of any other ROS2 and Linux Ubuntu versions, such as ROS2 Humble and Linux Ubuntu 22.04. However, ROS2 Jazzy is the newest version of ROS2, and if you are new to ROS2, then we suggest to start learning ROS2 since it will be officially supported until 2029. We created a video tutorial on how to install Linux Ubuntu 24.04 and ROS2 Jazzy. The link to the tutorial is given here. Other versions of ROS2 will not be supported after 2027.
Installation Instructions
Open a terminal, source the ROS2 environment, and create a workspace directory:
source /opt/ros/jazzy/setup.bash
cd ~
mkdir -p ~/ws_lidar/src
cd ~/ws_lidar/src
Then, clone the remote repository:
git clone https://github.com/Slamtec/sllidar_ros2.gitThen, build the ROS2 package:
cd ~/ws_lidar/
colcon build --symlink-install
You will see some compilation warnings. You can ignore these compilation errors. Then, you need to source the created package:
source ~/ws_lidar/install/setup.bashThen, attach your lidar to the Raspberry Pi. The next step is to assign the proper permission to the USB port to which the lidar is connected. Type this:
ls -la /dev | grep USBThe output should look something like this
crw-rw---- 1 root dialout 188, 0 Sep 29 22:33 ttyUSB0This means that the name of our device is “ttyUSB0”. In your case, you might see some other name and number, and you need to use that name. To set the permissions, we need to execute this:
sudo chmod 777 /dev/ttyUSB0This will allow everyone to read, write, and execute this file. This is all we need.
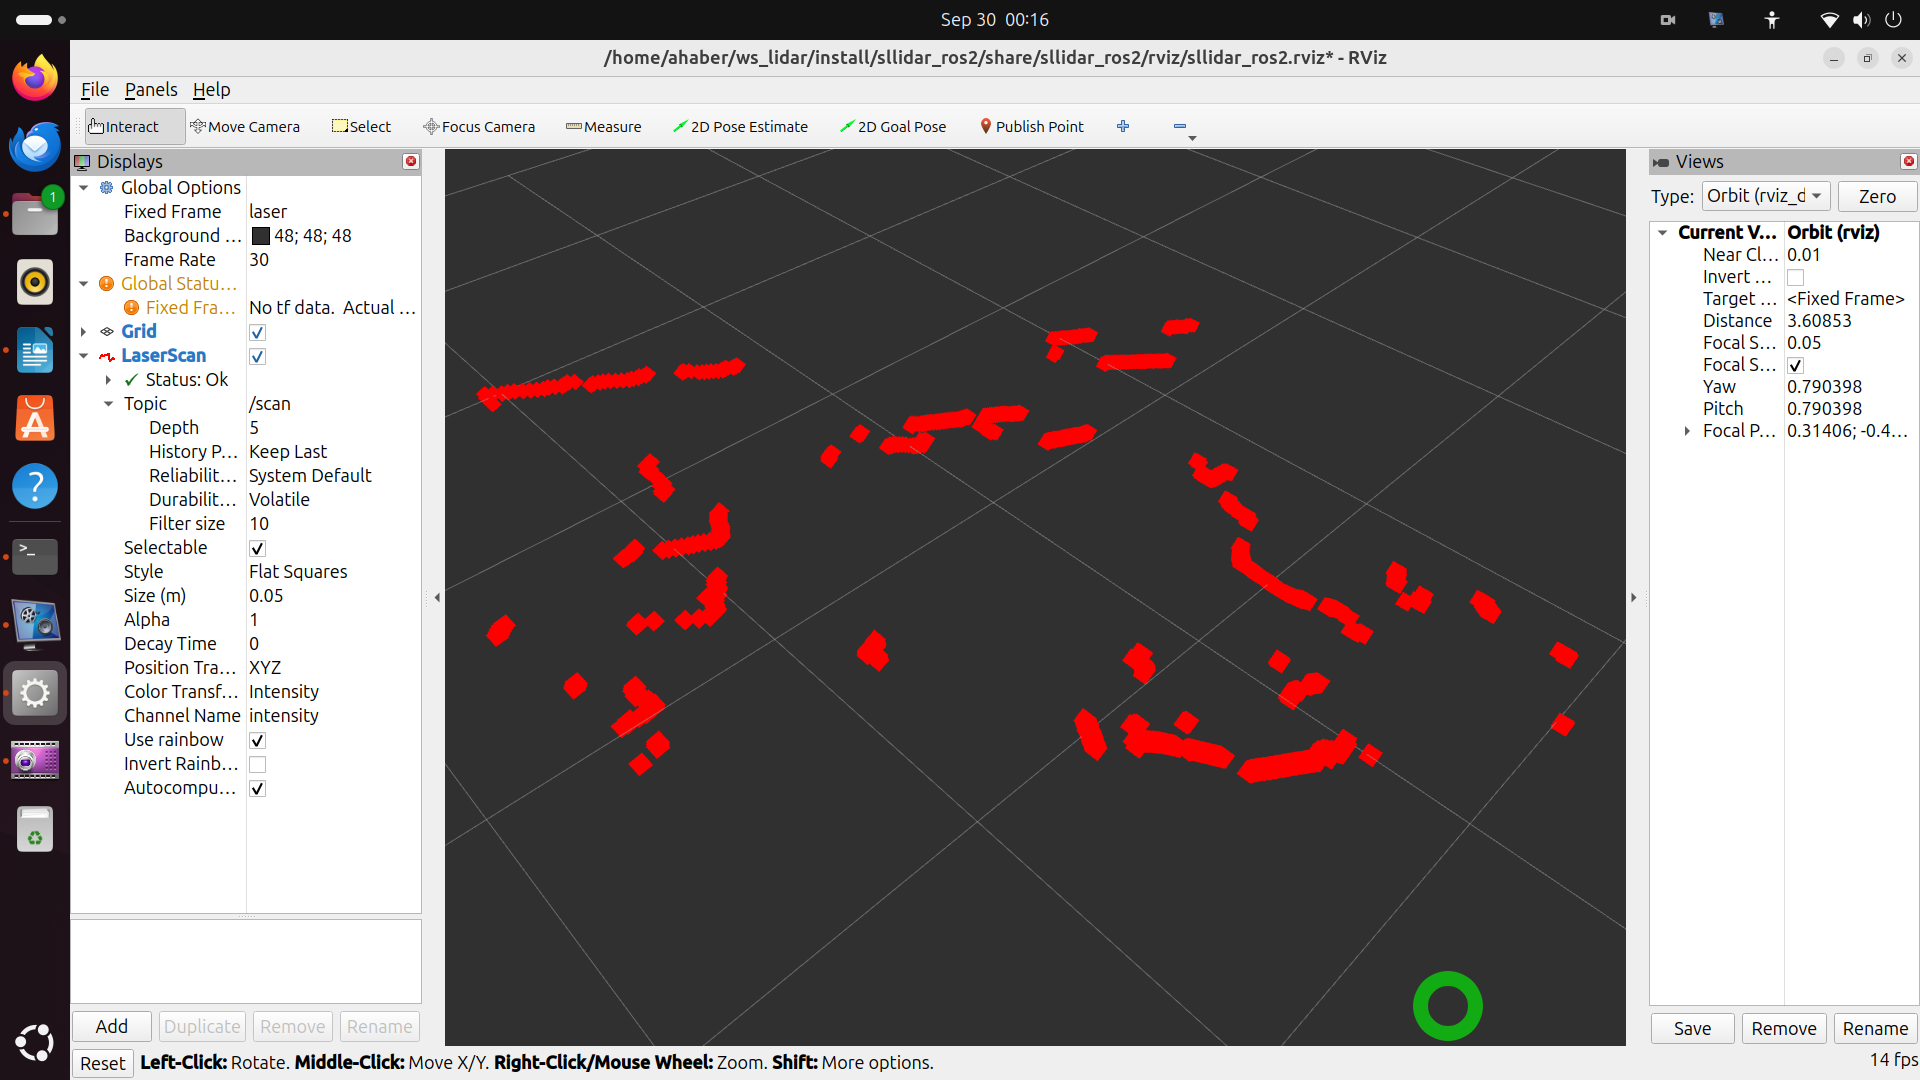
Finally, we can run our lidar. To run our RPLIDAR A1 lidar, we need to execute this:
ros2 launch sllidar_ros2 view_sllidar_a1_launch.pyRviz will open, and you will see the screen shown below showing the measurements performed by the Lidar:
On the other hand, if you want to run some other Slamtec lidars, you need to execute the launch files in this folder:
~/ws_lidar/src/sllidar_ros2/launchYou can list all the files by typing this:
ls -la ~/ws_lidar/src/sllidar_ros2/launchYou just need to select the launch Python file.
For example,
To run RPLIDAR A2M7:
ros2 launch sllidar_ros2 view_sllidar_a2m7_launch.pyTo run RPLIDAR A2M8
ros2 launch sllidar_ros2 view_sllidar_a2m8_launch.pyTo run RPLIDAR A2M12 :
ros2 launch sllidar_ros2 view_sllidar_a2m12_launch.pyTo run RPLIDAR A3:
ros2 launch sllidar_ros2 view_sllidar_a3_launch.pyTo run RPLIDAR C1 :
ros2 launch sllidar_ros2 view_sllidar_c1_launch.pyTo run RPLIDAR S1:
ros2 launch sllidar_ros2 view_sllidar_s1_launch.pyTo run RPLIDAR S2:
ros2 launch sllidar_ros2 view_sllidar_s2_launch.py
ros2 launch sllidar_ros2 view_sllidar_s2e_launch.py
To run RPLIDAR S3:
ros2 launch sllidar_ros2 view_sllidar_s3_launch.pyTo run RPLIDAR T1 :
ros2 launch sllidar_ros2 view_sllidar_t1_launch.pyTo run RPLIDAR S1(TCP connection):
ros2 launch sllidar_ros2 view_sllidar_s1_tcp_launch.py