 by
by In this Linux and Docker tutorial, we explain how to correctly install Docker Desktop on Linux Ubuntu. We thoroughly explain all the steps. The main motivation for creating this tutorial comes from the fact that the installation of Docker Desktop in Linux Ubuntu might be highly non-trivial for students and people who are not familiar with Linux systems.
Docker is a collection of Platform as a Service (PaaS) programs that use virtualization to run and manage programs in packages which are also known as containers. The program that manages and hosts the containers is called Docker Engine. Docker Desktop is a collection of Docker tools, an extension, and a GUI for the Docker Engine. It is free for personal use.
Containers run independently from each other, and they are isolated from one another. Containers contain their own software, configuration files, and libraries. Also, different containers can communicate with each other by using channels. You can use Docker to run Robot Operating System, Machine Learning Programs, and different applications and programs.
General website:
https://docs.docker.com/desktop/install/linux-install
Ubuntu additional instructions:
https://docs.docker.com/desktop/install/ubuntu
However, you have to be an experienced Linux user to understand these steps. Consequently, we created this tutorial to explain all the steps.
The YouTube tutorial is given below.
An older version of this tutorial is given here:
Prerequisites For Installing Docker Desktop on Linux Ubuntu
1. 64-bit Ubuntu Linux 22.04 or 24.04 system and support for hardware virtualization.
To check the Linux distribution, type:
lsb_release -aHardware virtualization needs to be enabled to run Docker Desktop. The hardware virtualization is enabled in the system BIOS. System BIOS is started by restarting the computer, and by pressing a certain keyboard key. In the case of my computer (HP Omen), I need to press ESC and F10 to enter BIOS. There there is an option to turn ON hardware virtualization. In fact, the hardware virtualization was automatically enabled on my machine. In your case, starting BIOS might require a different keyboard key. However, the principle is the same.
To check hardware virtualization, open a terminal and type:
lscpu | grep "Virtualization"or
egrep -c '(vmx|svm)' /proc/cpuinfoor
sudo apt install cpu-checker

kvm-ok
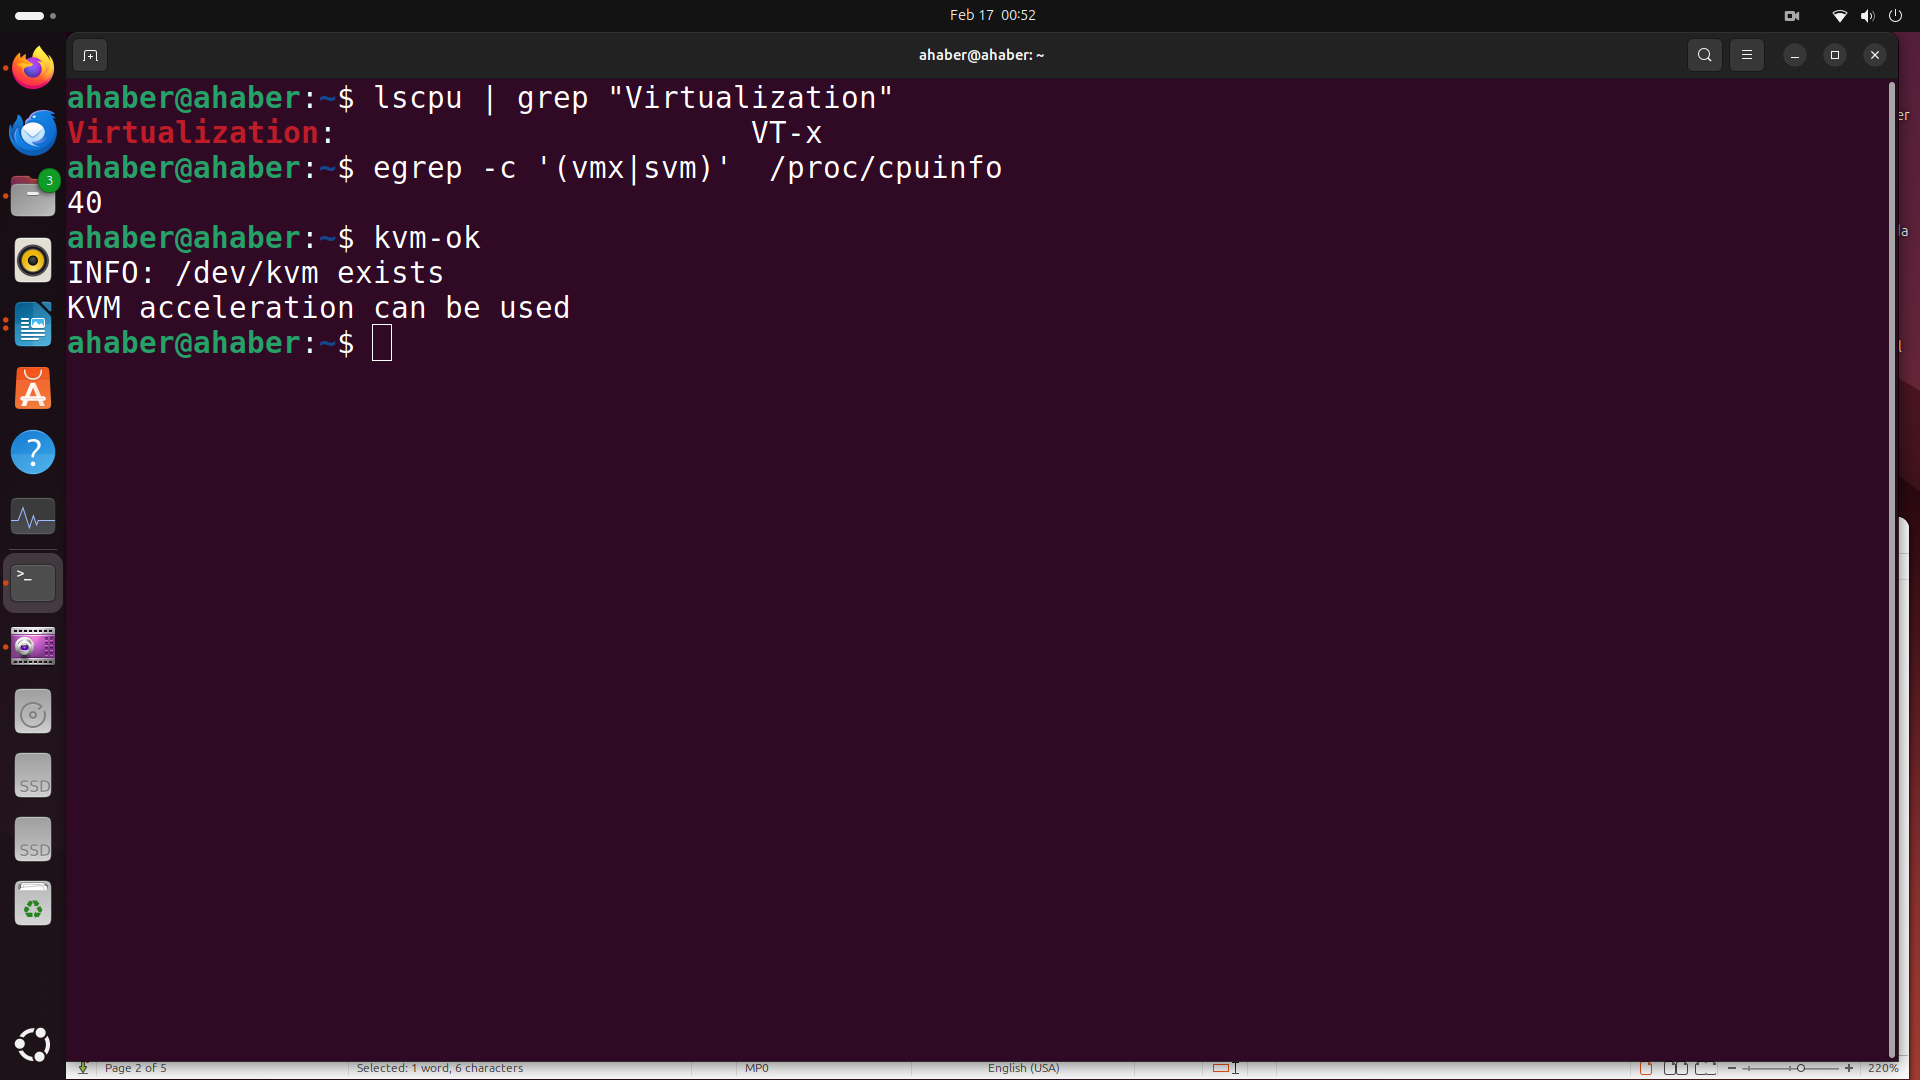
2. KVM virtualization support. The KVM module should load automatically if the host has virtualization support.
To check if the KVM modules are enabled, run, in the terminal write this:
lsmod | grep kvmTo manually load
modprobe kvmFor Intel processors
modprobe kvm_intelFor AMD processors
modprobe kvm_amdSet up KVM device user permissions. To check ownership of /dev/kvm, run:
ls -al /dev/kvm
sudo usermod -aG kvm $USER
3. QEMU must be version 5.2 or later.
To do that
sudo apt-get update
sudo apt-get upgrade
sudo apt-get install qemu-system
4. It is required to have systemd init system. Since Ubuntu is based on Debian, it uses the systemd init system.
5. Gnome, KDE, or MATE Desktop environment.
To check your environment, in desktop, type
echo $XDG_CURRENT_DESKTOP
gnome-shell --version
In our case, it is GNOME
6. Configuring ID mapping should be enabled in user namespaces. Note that for Docker Desktop version 4.35 and later, this is not required anymore.
Make sure that you see something like this, when you run the commands
cat /etc/subuid
aleksandar:100000:65536
cat /etc/subgid
aleksandar:100000:65536
If not, then
grep "$USER" /etc/subuid >> /dev/null 2&>1 || (echo "$USER:100000:65536" | sudo tee -a /etc/subuid)
 grep "$USER" /etc/subgid >> /dev/null 2&>1 || (echo "$USER:100000:65536" | sudo tee -a /etc/subgid)
7. Install Standard Unix Password Manager
sudo apt-get install passInstallation of Docker Desktop on Linux Ubuntu
Go to
https://docs.docker.com/engine/install/ubuntu/#install-using-the-repository
and follow the instructions:
sudo apt-get update
sudo apt-get install ca-certificates curl
sudo install -m 0755 -d /etc/apt/keyrings
sudo curl -fsSL https://download.docker.com/linux/ubuntu/gpg -o /etc/apt/keyrings/docker.asc
sudo chmod a+r /etc/apt/keyrings/docker.asc
echo \
"deb [arch=$(dpkg --print-architecture) signed-by=/etc/apt/keyrings/docker.asc] https://download.docker.com/linux/ubuntu \
$(. /etc/os-release && echo "${UBUNTU_CODENAME:-$VERSION_CODENAME}") stable" | \
sudo tee /etc/apt/sources.list.d/docker.list > /dev/null
sudo apt-get updateThe next step is to download the most recent Deb packages. To do that, go to the webpage and download the file (see section Install Docker Desktop)
https://docs.docker.com/desktop/setup/install/linux/ubuntu
or click this link
The file will be downloaded in the ~/Downloads file
Next, open a terminal and type
cd ~
cd Downloads
sudo apt-get update
sudo apt-get install ./docker-desktop-amd64.de
This should install Docker Desktop. Ignore the error message shown below.
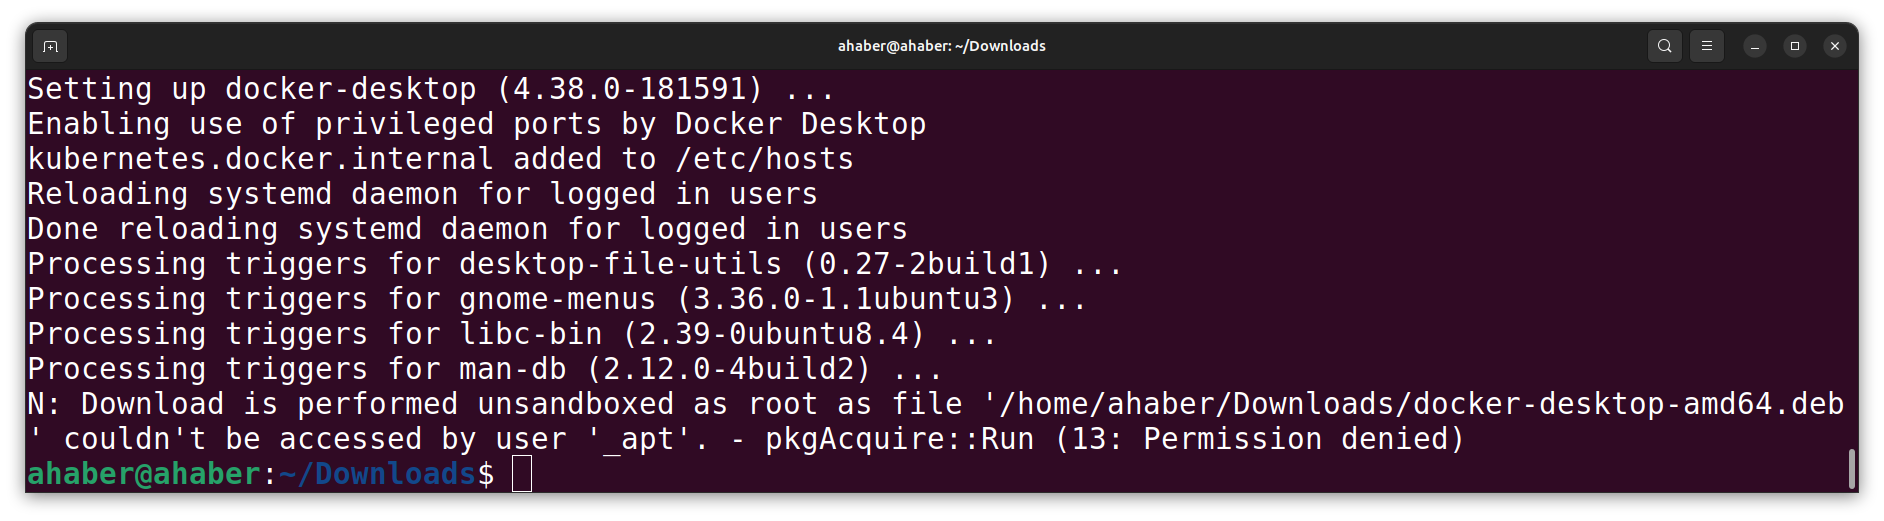
To start Docker Engine, click on Show Apps and search for Docker Desktop. Then, accept the license and register (or skip). This will start Docker Engine
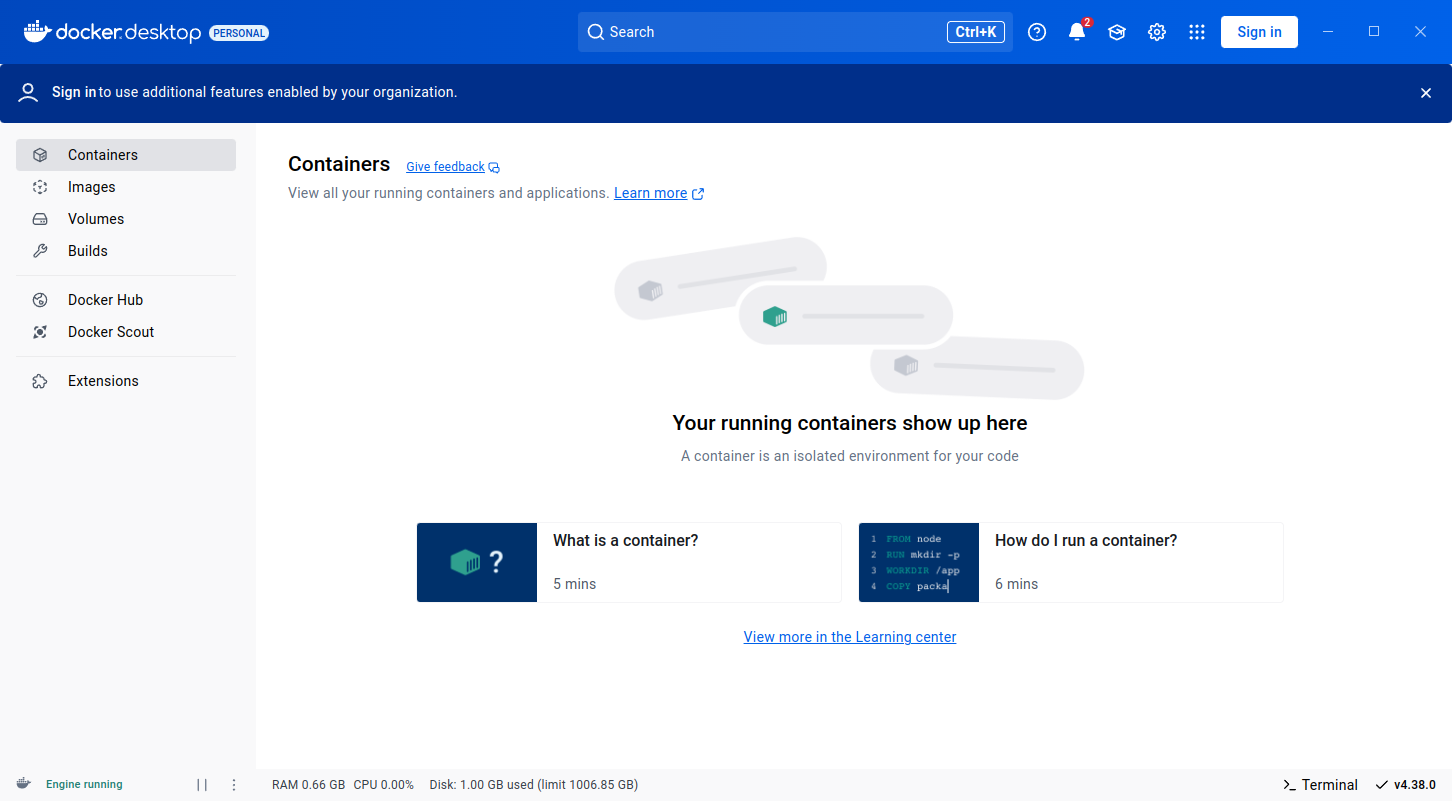
To manually start Docker Desktop from the command line, type this
systemctl --user start docker-desktopCheck the versions
docker compose version

docker --version

docker version
To enable Docker Desktop to start on sign in
systemctl --user enable docker-desktopTo stop Docker Desktop
systemctl --user stop docker-desktop
To upgrade the Docker desktop:
sudo apt-get install ./docker-desktop-amd64.deb