 by
by • In this tutorial, we explain how to download, install and run locally DeepSeek Janus-Pro multimodal understanding models. We explain how to install models on Windows and how to run models in Python.
• First, let us explain what are multimodal understanding models and multimodal deep learning. Multimodal understanding is the ability to interpret, analyze, describe, and understand multiple and simultaneous sources of visual, sound, text information, and data. In other words, multimodal understanding or multimodal learning is a branch of deep learning that integrates and analyzes simultaneously different types of data, such as audio, images, videos, and text. These different types of data are usually called modalities.
• Janus-Pro is a multimodal understanding model. It can also be used for image generation. It comes in two size: 1B model and 7B model.
• In this tutorial, we will explain how to use Janus-Pro for multimodal tasks, and in the next one, we will explain how to use it for image generation.
• We will install the Janus-Pro on a Windows computer. To correctly install the model, you need to install Microsoft Visual Studio C++ compilers and NVIDIA CUDA Toolkit and compilers.
• We will explain a simple Python script for running the model. Link to the code will be provided in the description below.
• Note that online instruction for installing the model given on the GitHub page are mainly written for Linux systems. Consequently, we will have to make significant modifications in order to be able to run the model on a Windows computer.
• Our computer has the following specifications: NVIDIA 3090 GPU, Intel i9 processor and 64 GB RAM.
The YouTube tutorial with the installation instructions is given below.
Software Prerequisites
You need to have
- Python installed on your computer. In our tutorial, we are using Python 3.12. To download Python, go to the official website and download and install Python (do not install 3.13 since PyTorch CUDA might not work).
- You need to install Microsoft Visual Studio C++ 2022 and C++ Compilers (Community Edition).
- You need to install NVIDIA CUDA Toolkit.
- You need to install Git for Windows.
Installation of Janus Pro
First of all, open a command prompt, and pull the remote repository
cd\

git clone https://github.com/deepseek-ai/Janus
Next, navigate to the folder and create two subfolders model1 and model2. model1 folder will be used to download Janus-Pro 1B and model2 folder will be used to download Janus-Pro 7B
cd Janus
mkdir model1
mkdir model2
Next, create a Python virtual environment and install the huggingface_hub library that is used for downloading remote models from the Huggingace repository
python -m venv env1
env1\Scripts\activate.bat
pip install huggingface_hub
Next, create a python script for downloading the first model
from huggingface_hub import snapshot_download

snapshot_download(repo_id="deepseek-ai/Janus-Pro-1B",
                  local_dir="C:\\Janus\\model1")
and a Python script for downloading the second model
from huggingface_hub import snapshot_download

snapshot_download(repo_id="deepseek-ai/Janus-Pro-7B",
                  local_dir="C:\\Janus\\model2")
Execute these scripts. These scripts should download the model files from the remote Huggingface repository. After these two models are downloaded, we need to install the necessary libraries. First of all we need to install PyTorch CUDA. To do that, go to the PyTorch website, and use the selection table to generate the installation command

In our case the generated command is
pip3 install torch torchvision torchaudio --index-url https://download.pytorch.org/whl/cu126
Then, before installing the other libraries, edit these two files in the downloaded Janus folder (see the video tutorial for more details):
requirements.txt
pyproject.toml
From these two files erase the lines that mention torch
torch==2.0.1 (requirements.txt) and “torch>=2.0.1” (from pyproject.toml)
Note that if you do not install PyTorch CUDA independently and if you do not erase these two lines, then during the execution of the Python test code (given below), you might see these two errors
raise AssertionError(“Torch not compiled with CUDA enabled”)
AssertionError: Torch not compiled with CUDA enabled
Then, install PyTorch and eliminate these two lines, run the installation command in the virtual environment
pip install -e .Next, you need to obtain the image for testing the code. Our image is given below.
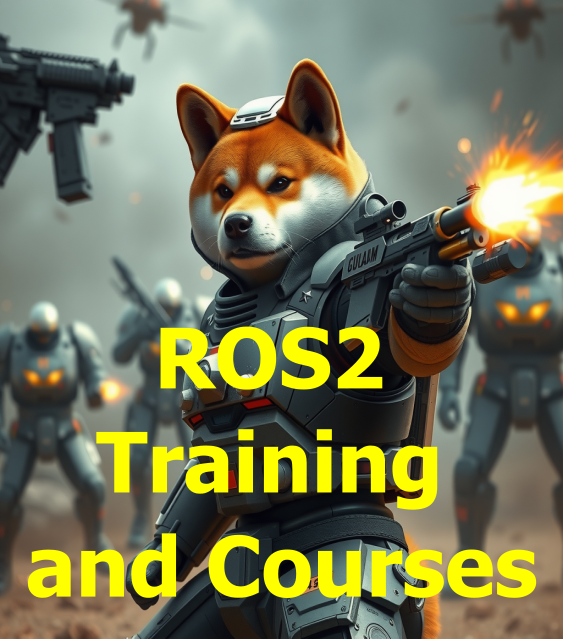
You can freely download and use this image. Save this image as test1.png in the Janus installation folder. The code for testing the Janus-Pro is given below.
import torch
from transformers import AutoModelForCausalLM
from janus.models import MultiModalityCausalLM, VLChatProcessor
from janus.utils.io import load_pil_images

# specify the path to the model
# first model
# model_path = "c:\\Janus\\model1"
# second model
model_path = "c:\\Janus\\model2"
vl_chat_processor: VLChatProcessor = VLChatProcessor.from_pretrained(model_path)
tokenizer = vl_chat_processor.tokenizer

vl_gpt: MultiModalityCausalLM = AutoModelForCausalLM.from_pretrained(
    model_path, trust_remote_code=True
)
vl_gpt = vl_gpt.to(torch.bfloat16).cuda().eval()

question="Describe the image and is the entity on the image dangerous?"
image='test1.png'
conversation = [
    {
        "role": "<|User|>",
        "content": f"<image_placeholder>\n{question}",
        "images": [image],
    },
    {"role": "<|Assistant|>", "content": ""},
]

# load images and prepare for inputs
pil_images = load_pil_images(conversation)
prepare_inputs = vl_chat_processor(
    conversations=conversation, images=pil_images, force_batchify=True
).to(vl_gpt.device)

# # run image encoder to get the image embeddings
inputs_embeds = vl_gpt.prepare_inputs_embeds(**prepare_inputs)

# # run the model to get the response
outputs = vl_gpt.language_model.generate(
    inputs_embeds=inputs_embeds,
    attention_mask=prepare_inputs.attention_mask,
    pad_token_id=tokenizer.eos_token_id,
    bos_token_id=tokenizer.bos_token_id,
    eos_token_id=tokenizer.eos_token_id,
    max_new_tokens=512,
    do_sample=False,
    use_cache=True,
)

answer = tokenizer.decode(outputs[0].cpu().tolist(), skip_special_tokens=True)
print(f"{prepare_inputs['sft_format'][0]}", answer)
This model should produce the following response
The image depicts a futuristic scene with a character that resembles a dog, wearing advanced armor and wielding a weapon. The background features other armored figures and flying drones, suggesting a combat or training environment. The text on the image reads "ROS2 Training and Courses," indicating that the image is likely related to training or educational content for ROS2, a robotics operating system.

Regarding the entity's danger, the character appears to be equipped for combat, suggesting it could be dangerous in a hypothetical scenario. However, the image is clearly a fictional representation and not meant to be taken literally.