In this brief computer vision tutorial, we explain how to install the You Only Look Once (YOLO) computer vision model. In this tutorial, we will install YOLO version 11. However, everything explained in this tutorial works for older or newer versions (after January 2025) of YOLO. The YOLO algorithm can be used for standard operations in computer vision: object detection, segmentation, classification, pose estimation, as well as for other computer vision tasks. The YouTube tutorial is given below.
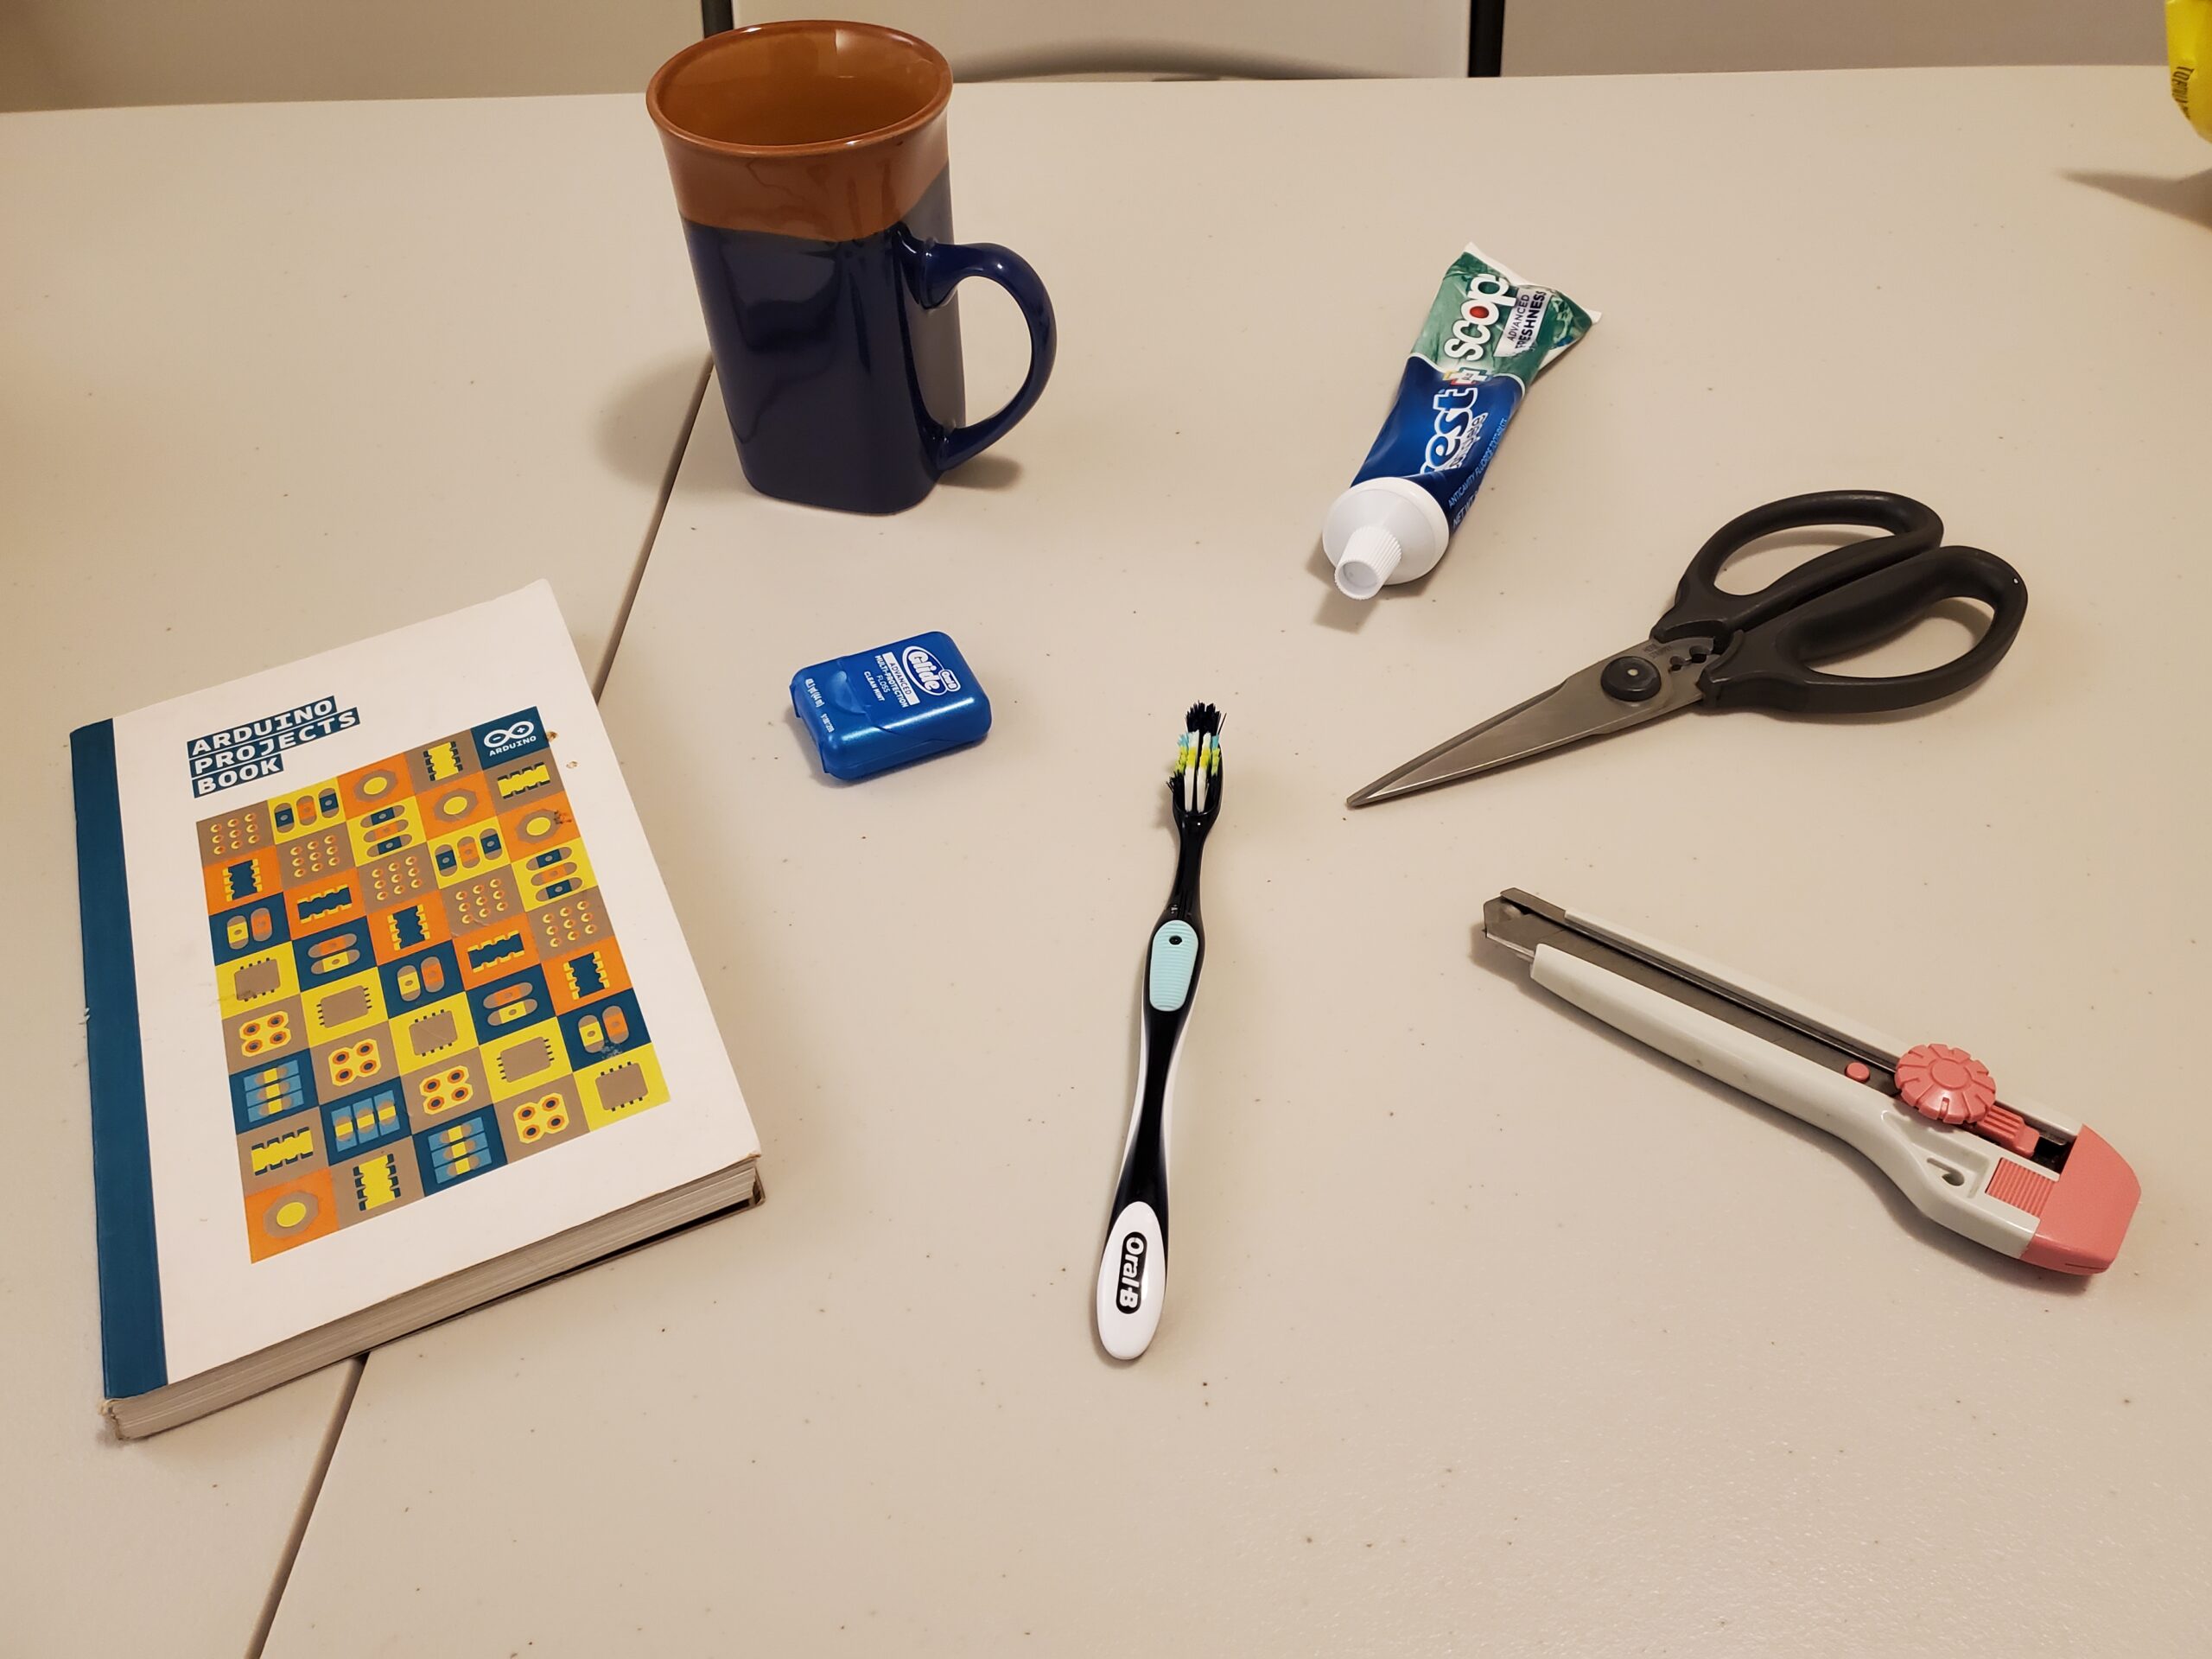
Here is a brief demonstration of the performance of the algorithm. We randomly placed several objects on a table and took the photo of the scene by using our phone camera. Note that this is a real raw photo and not some overly processed photo found on the internet. The raw image is given below.

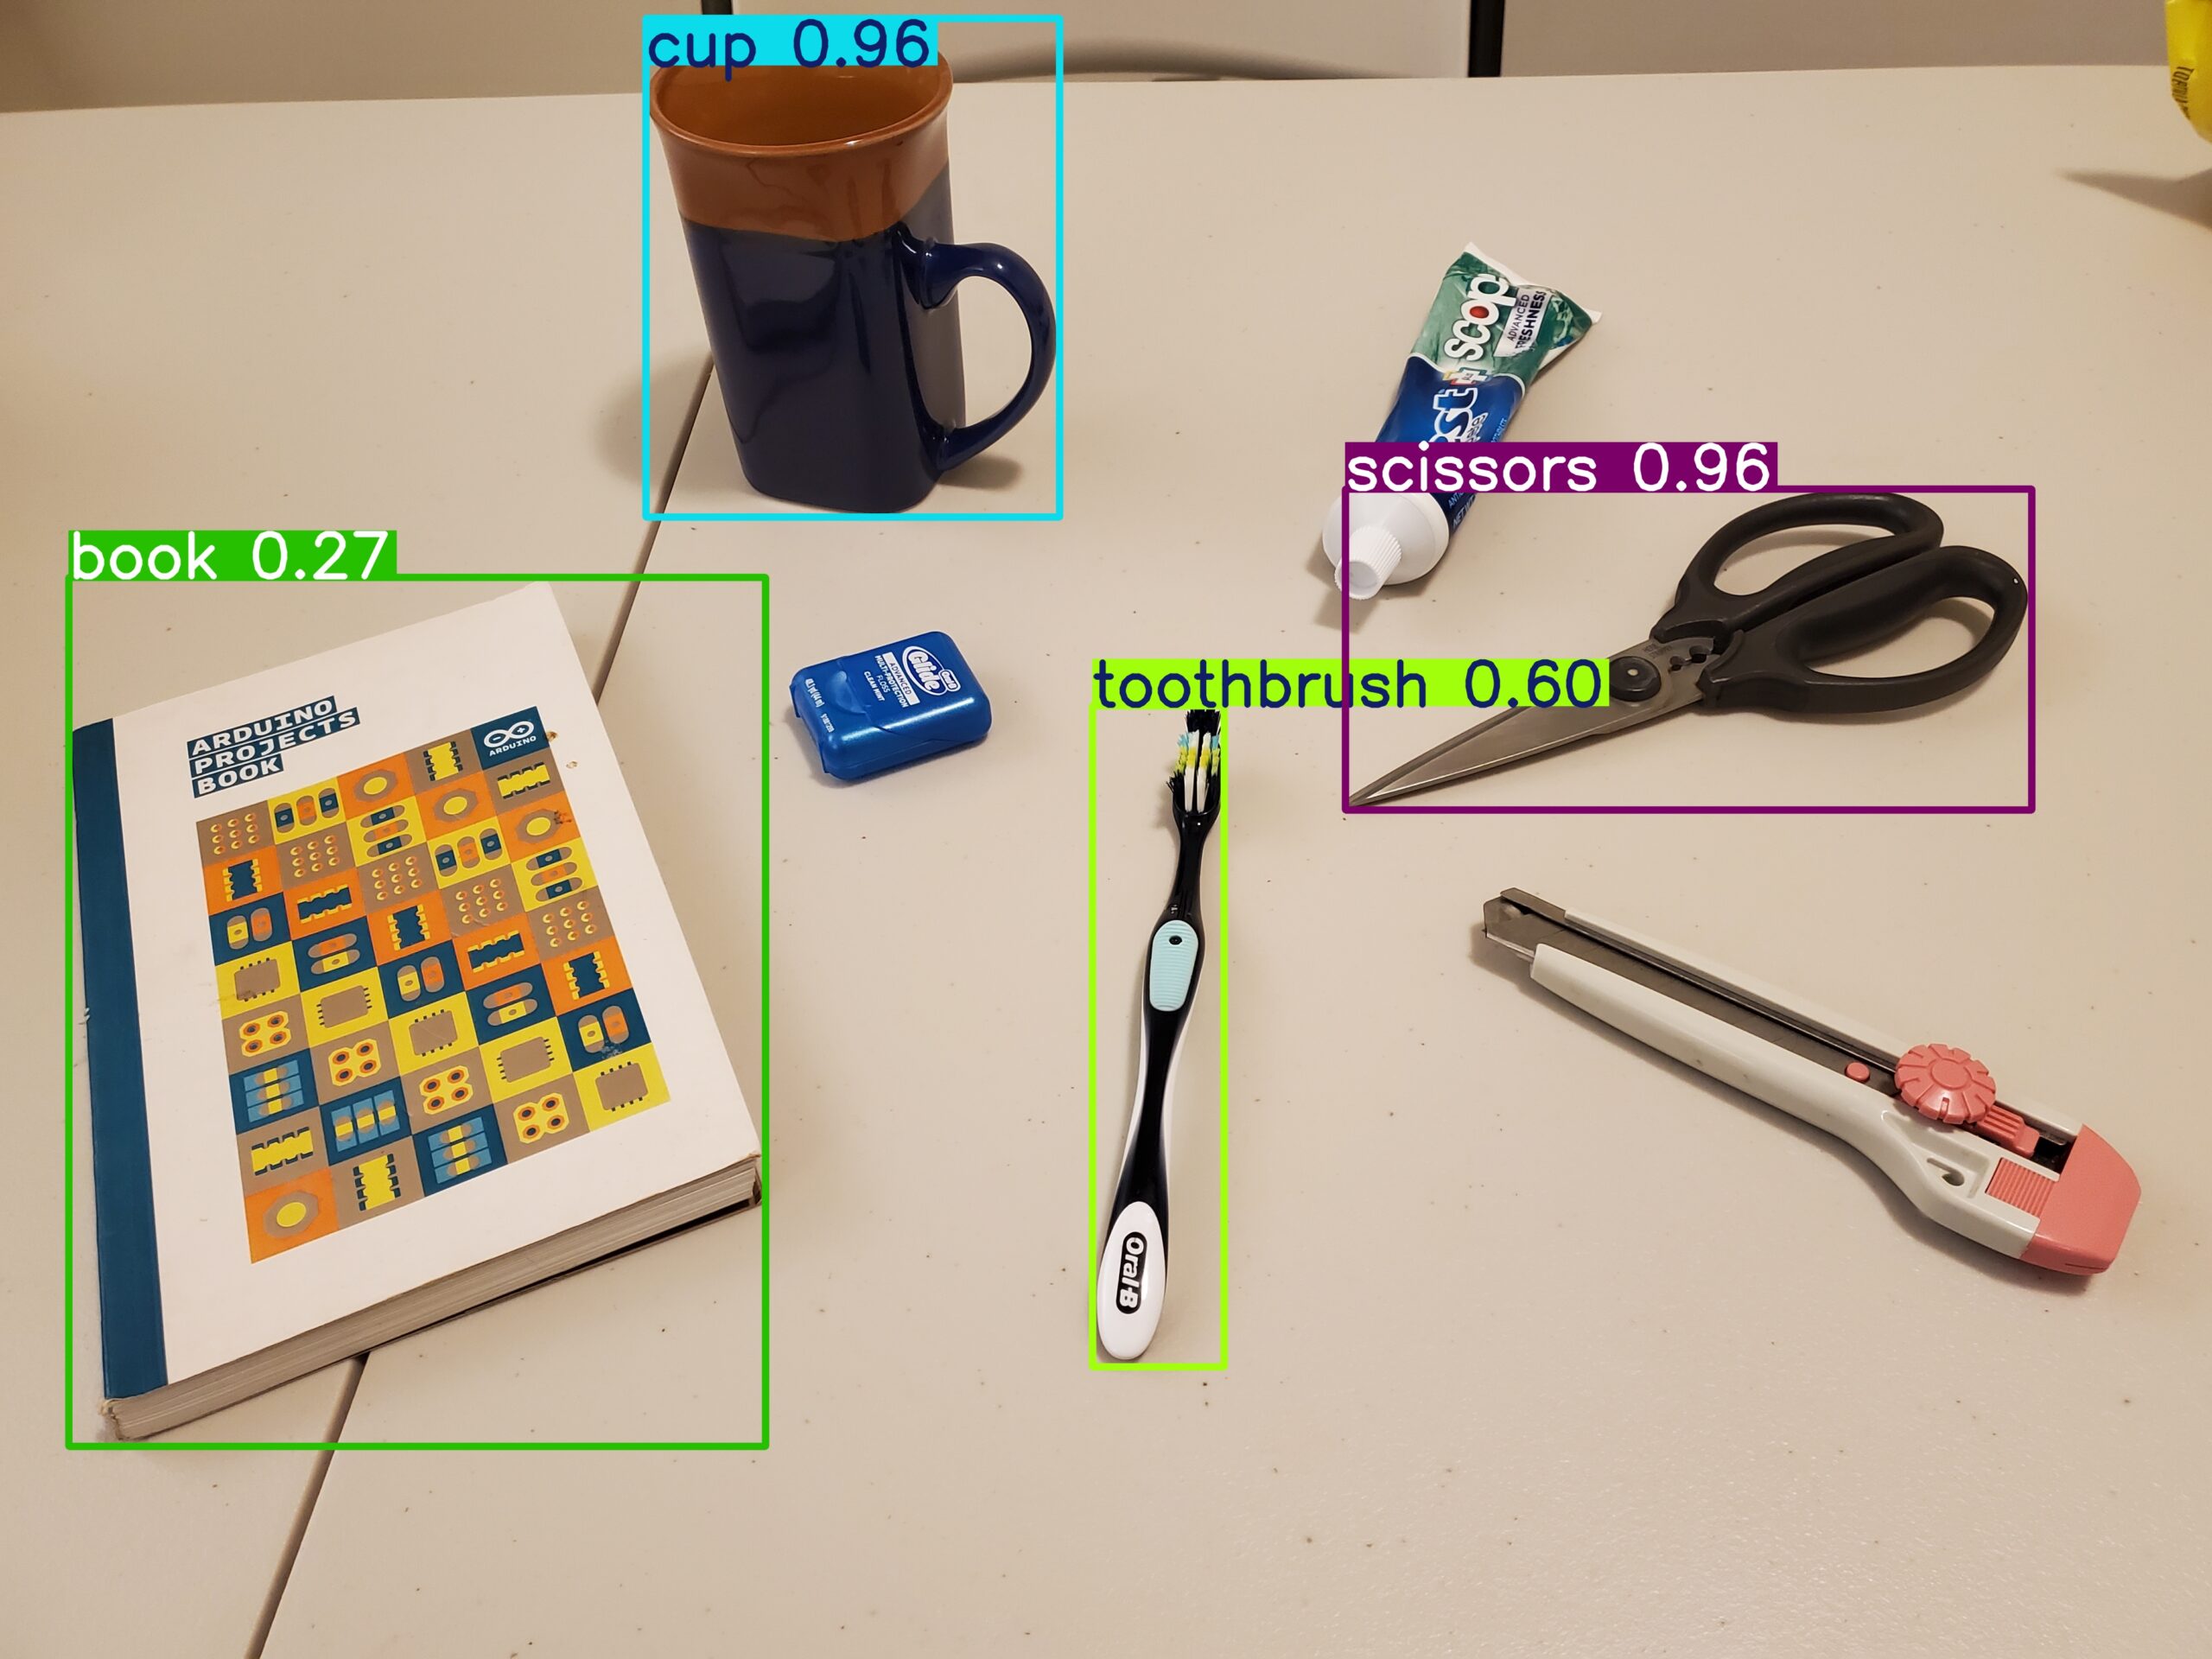
The image produced by YOLO is given below.

Prerequisites
- Python version 3.9-3.12 – This is mainly necessary for installing the PyTorch CUDA version locally. Namely, PyTorch CUDA version requires Python 3.9-3.12. If you are reading this after January 2025, then it might be possible to install the PyTorch CUDA version on Python 3.13 or later. Check the PyTorch CUDA website for prerequisites.
- You can run YOLO on CPU only. However, we suggest to run it on a GPU. You should have an NVIDIA GPU which supports CUDA.
- You should install Microsoft Visual Studio C++ with C++ compilers. This is necessary for installing and running the PyTorch CUDA. Go to this website and download and install the Microsoft Visual Studio C++ Community edition.
- Make sure that you have Git installed on your system as well as Git support for large-scale files. Git can be installed by going to this website and downloading the installation file and running it. The git support for large files should be installed from this website.
Installation instructions
First, open Windows Command Prompt, and check the Python version
python --version If Python is installed, you should see the Python version. Next, create the workspace folder
cd\
mkdir testYolo
cd testYolo
Create the Python virtual environment and activate
python -m venv env1
env1\Scripts\activate.bat
Install the necessary libraries
pip install setuptoolsThen install PyTorch CUDA. Visit this website to get the installation command. Then run the generated command:
pip3 install torch torchvision torchaudio --index-url https://download.pytorch.org/whl/cu124Then install YOLO. The best strategy is to install the newest branch directly from GitHub
pip install git+https://github.com/ultralytics/ultralytics.git@mainThen copy a test image to the workspace folder and write the test Python code given below.
from ultralytics import YOLO

# Run inference on an image
# yolo11n.pt, yolo11s.pt, yolo11m.pt, yolo11l.pt, yolo11x.pt
model = YOLO("yolo11l.pt")
results = model("test2.jpg")  # results list

# Process results list
for result in results:
    boxes = result.boxes  # Boxes object for bounding box outputs
    masks = result.masks  # Masks object for segmentation masks outputs
    keypoints = result.keypoints  # Keypoints object for pose outputs
    probs = result.probs  # Probs object for classification outputs
    obb = result.obb  # Oriented boxes object for OBB outputs
    #result.show()  # display to screen
    result.save(filename="result.jpg")  # save to disk