 by
by In this Linux and Raspberry Pi tutorial, we explain how to install Ubuntu Linux on Raspberry Pi and how to overclock the CPU and GPU of Raspberry Pi to improve the performance. We also explain how to increase the swap memory file size in order to additionally improve the performance. The YouTube video is given below.
Summary and Important Notes
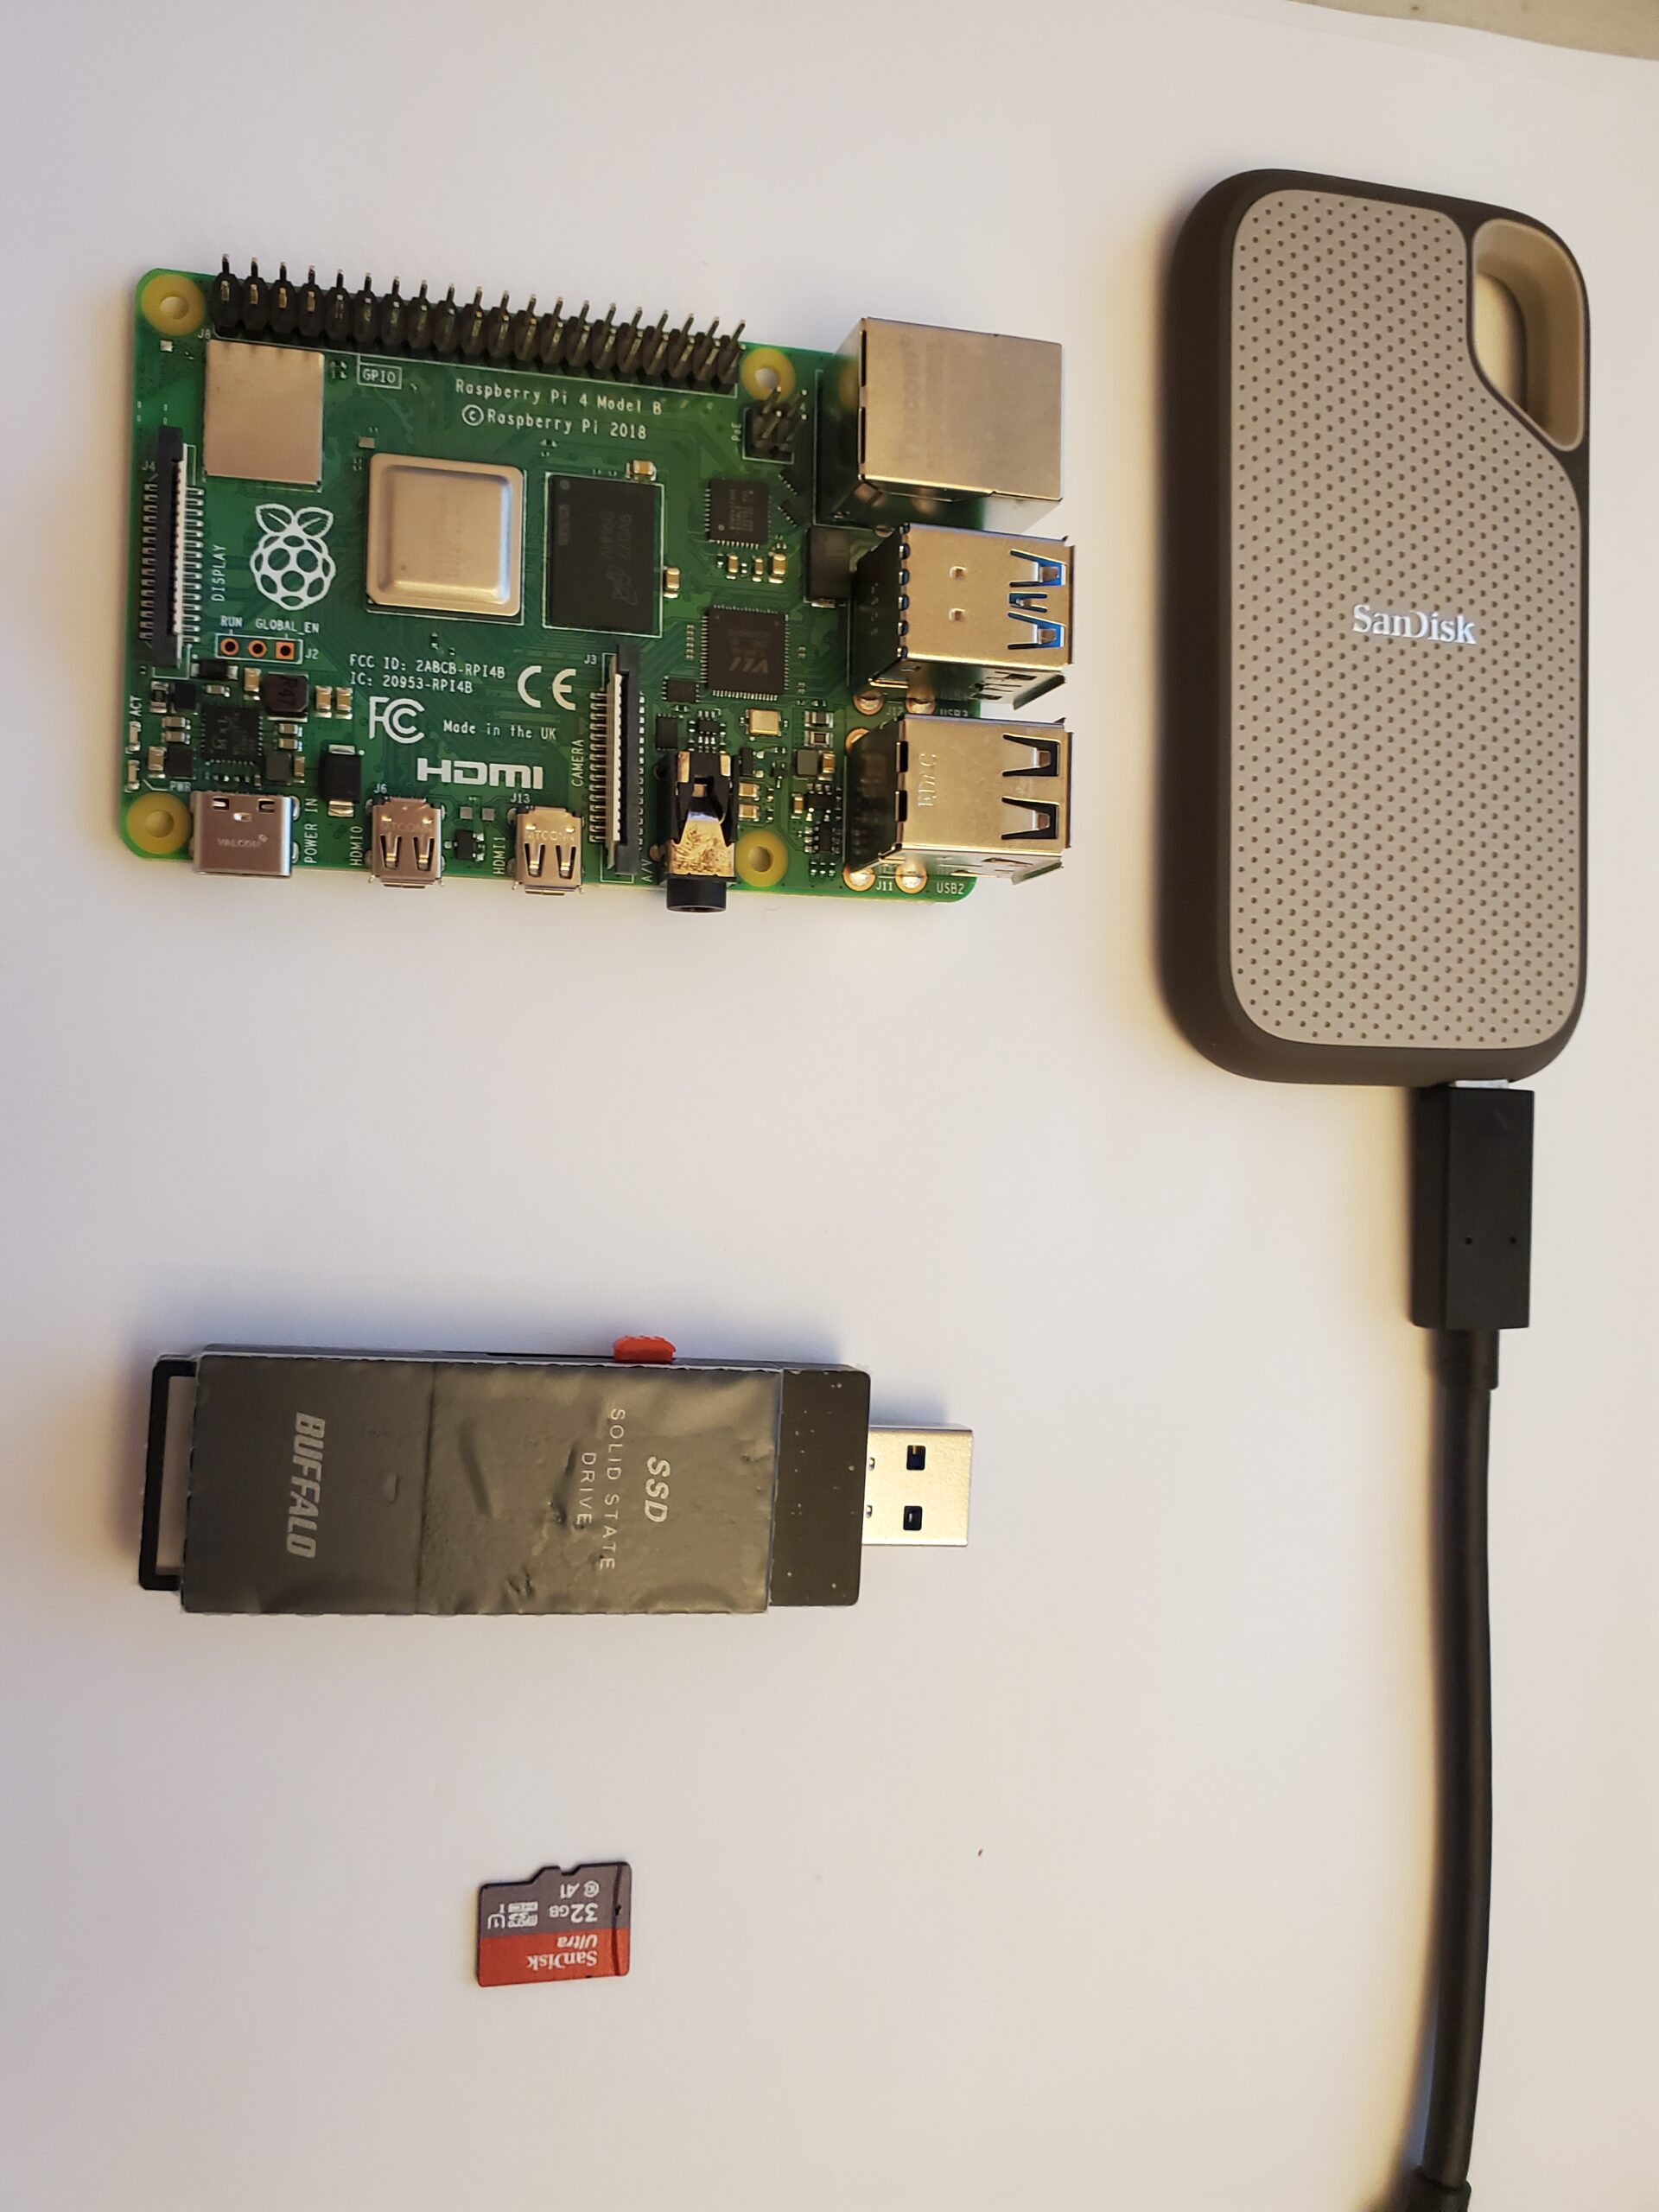
- The first step is to create a Linux Ubuntu installer by creating a bootable Solid-State Drive (SSD) or a micro-SD card. In this tutorial, we will be using an SSD. If you do not need to perform fast read or write disk operations, then you can also use a micro-SD card. Then, in this tutorial, we will explain how to install Ubuntu 24.04. However, everything explained in this tutorial applies to any other supported Ubuntu distribution. Finally, we use Raspberry Pi 4 with 4GB RAM. However, you can also use any other version of Raspberry Pi 4 (which has at least 4GB RAM) or Raspberry Pi 5.
- Then, after the first step is completed, we will boot the Raspberry Pi by using the created bootable medium from Step 1 and we will install the Ubuntu Linux Desktop and configure the system.
- Then, we will optimize the performance in order to improve the speed. We will overclock the Raspberry Pi CPU and GPU. Furthermore, we will increase the size of the swap file in order to improve stability and performance.
Disclaimer: We do not take any responsibility if after overclocking, the system becomes unstable or crashes. In our case, the system remained stable after overclocking. We have a heat sink and a cooling fan attached to our Raspberry Pi that keeps the temperature constant. However, it might happen that if Raspberry Pi is not properly cooled, the overclocking process might overheat the processors and create irreparable damage. We do not take any responsibility for this or if your system crashes after overclocking. The crash of the system can easily be repaired by reverting the settings.
Installation Procedure
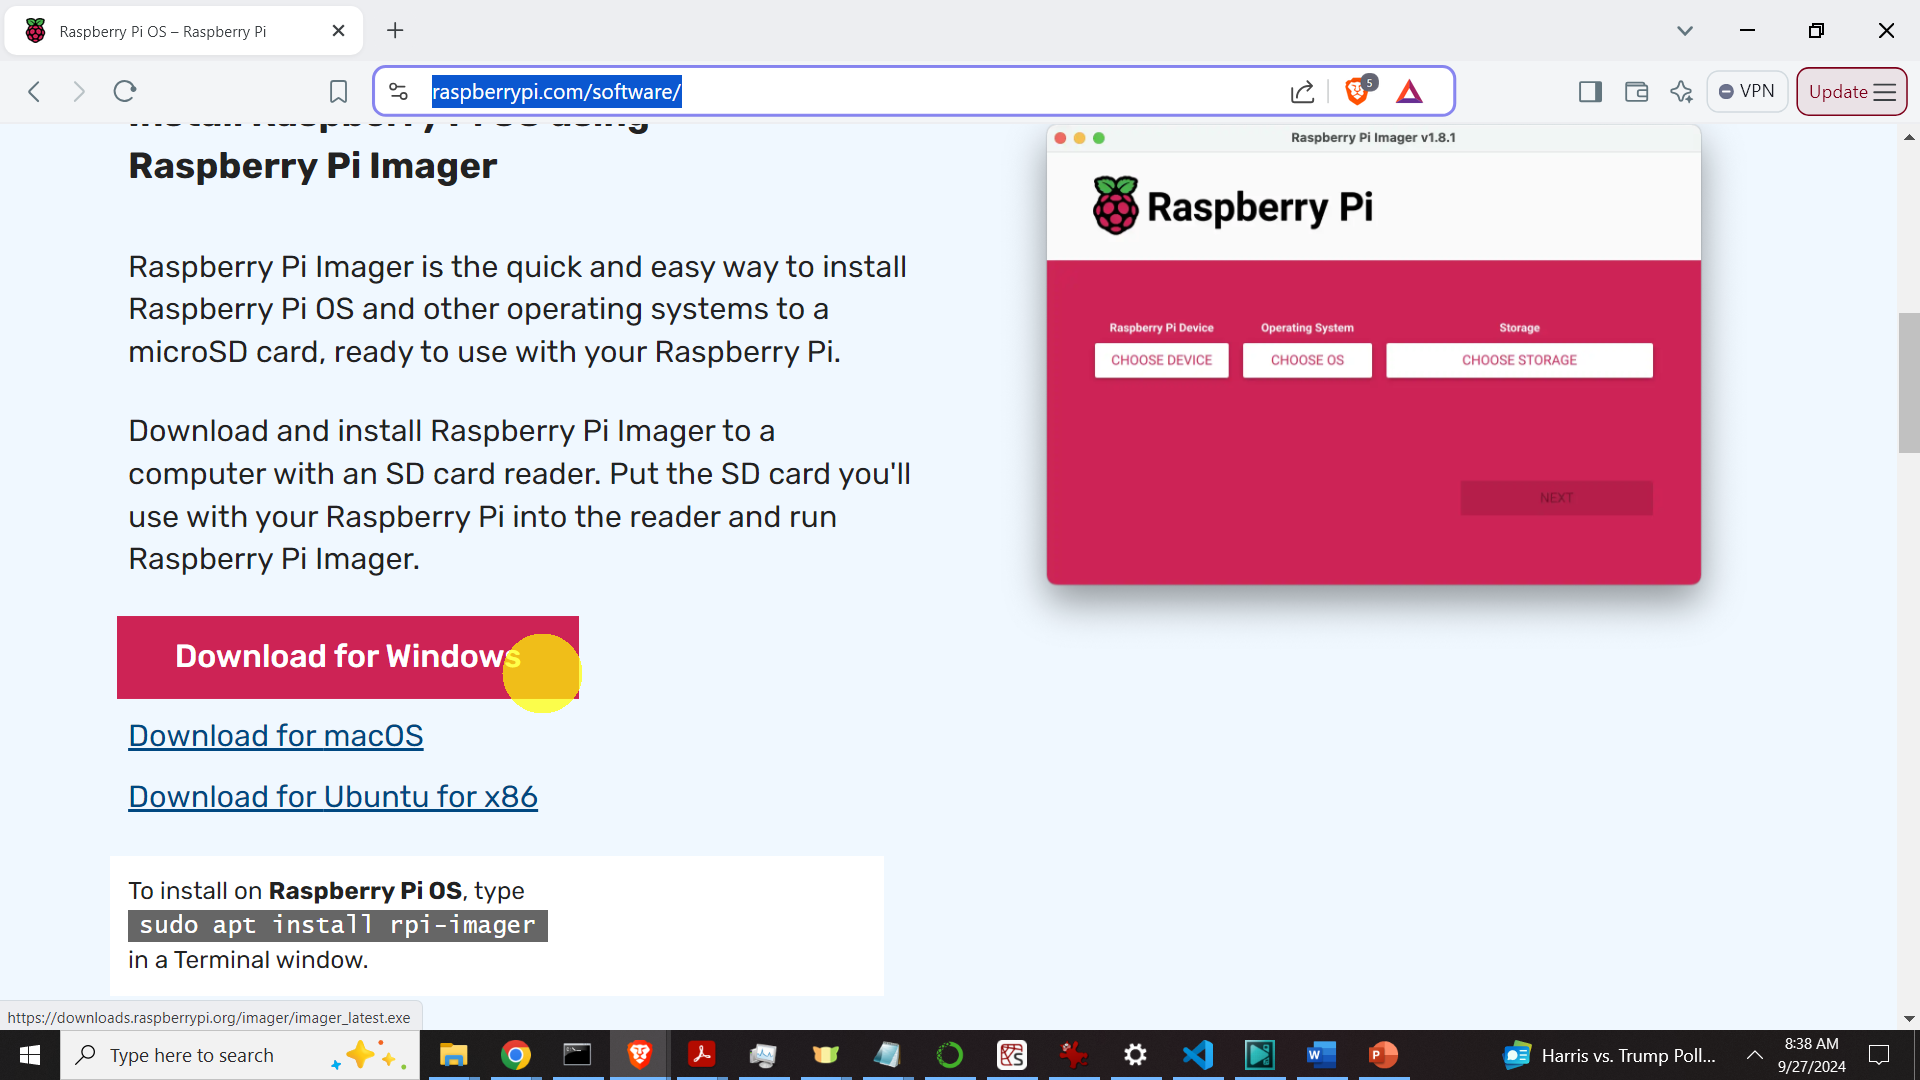
The first step is to create a bootable disk. To do that, go to this website:
https://www.raspberrypi.com/software
and download the Raspberry Pi Imager.
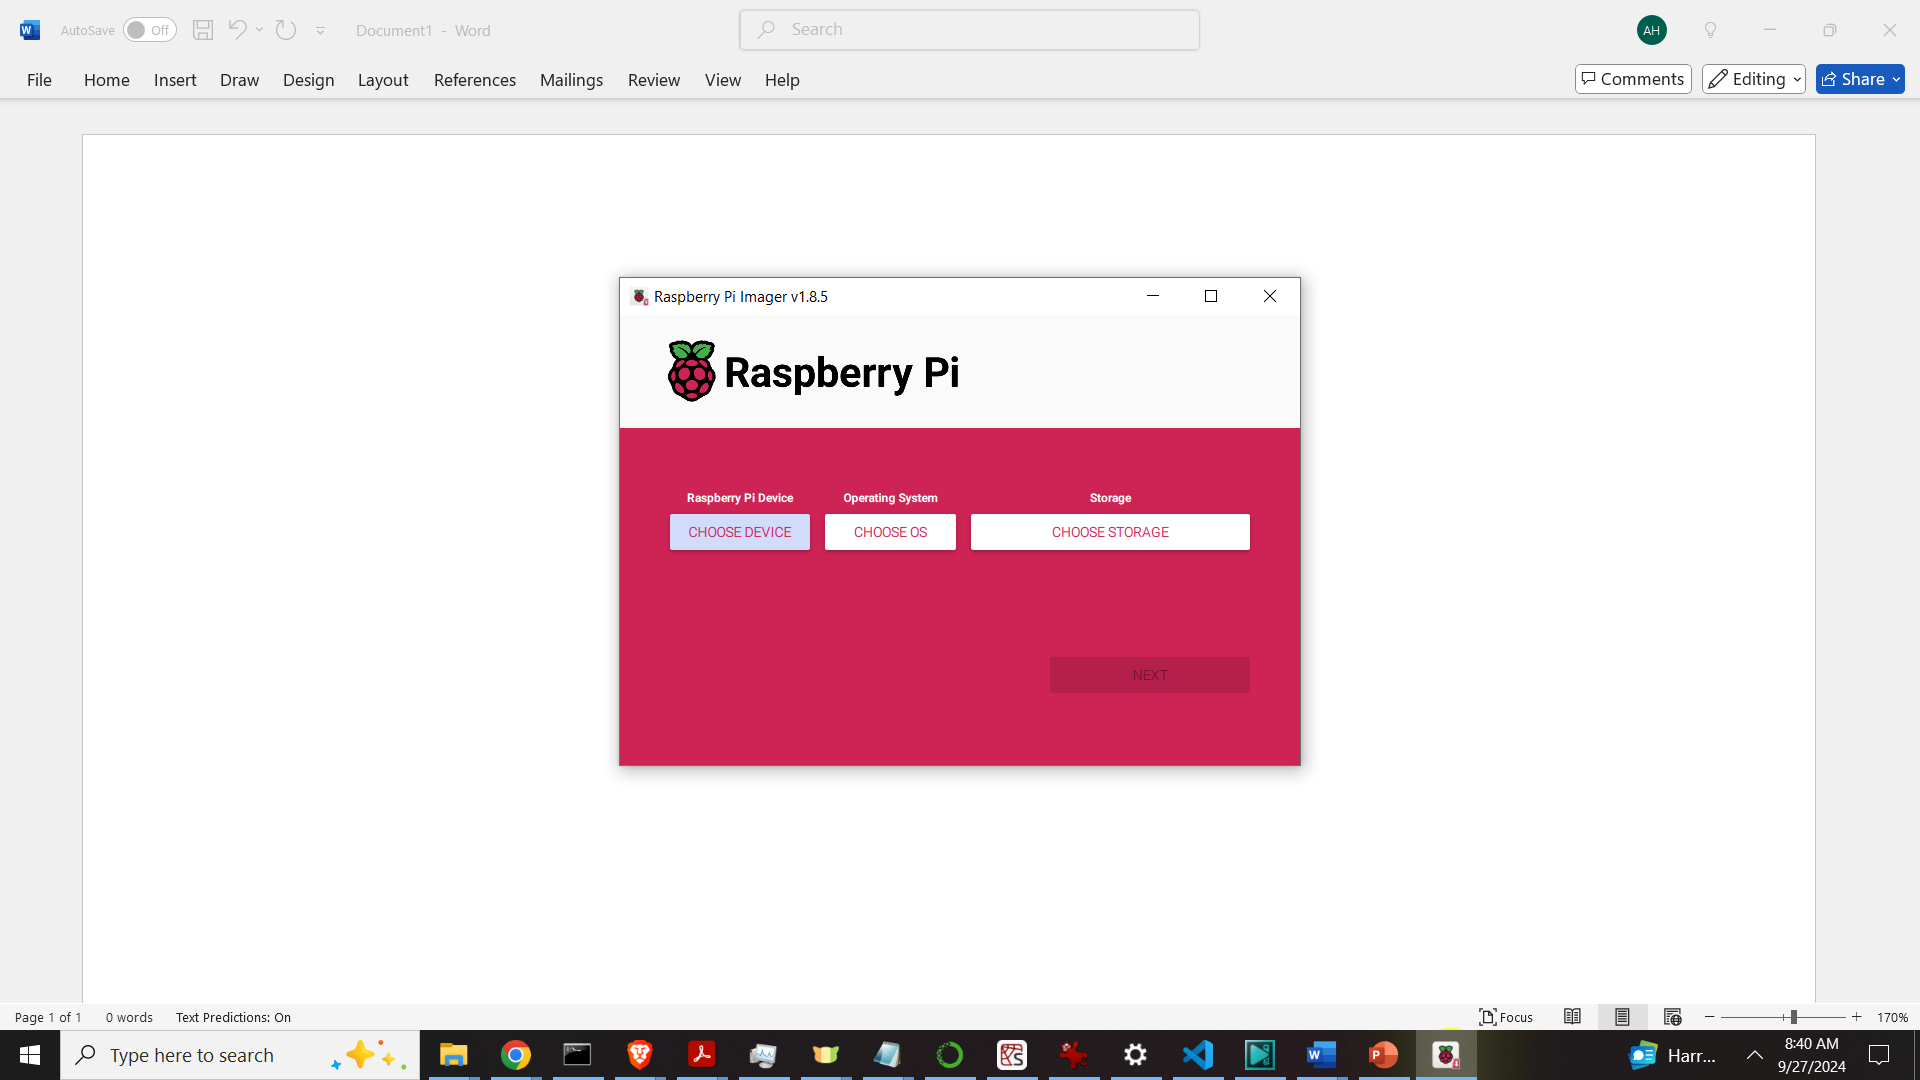
Then, install the Raspberry Pi Images. Then, select the devise by clicking on “CHOOSE DEVICE”
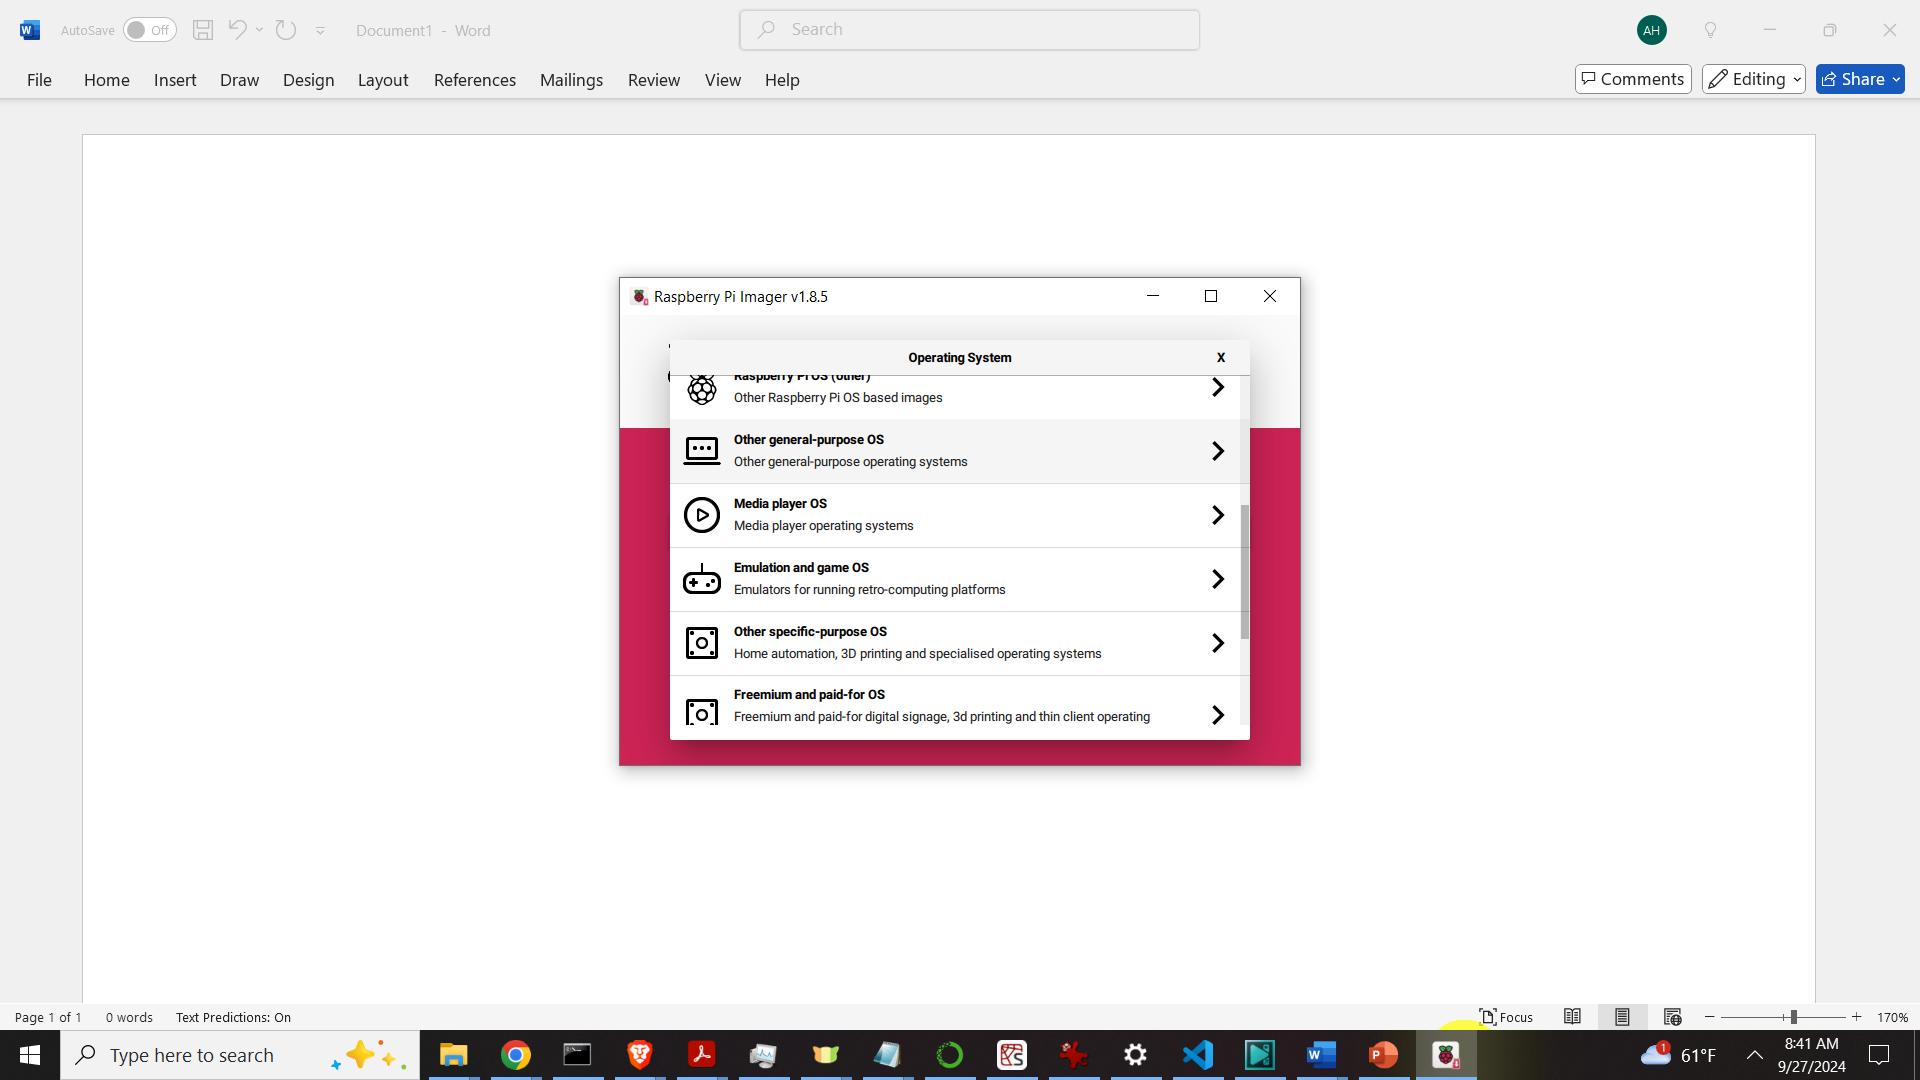
Then, click on “CHOOSE OS”, and then on “Other general-purpose OS”
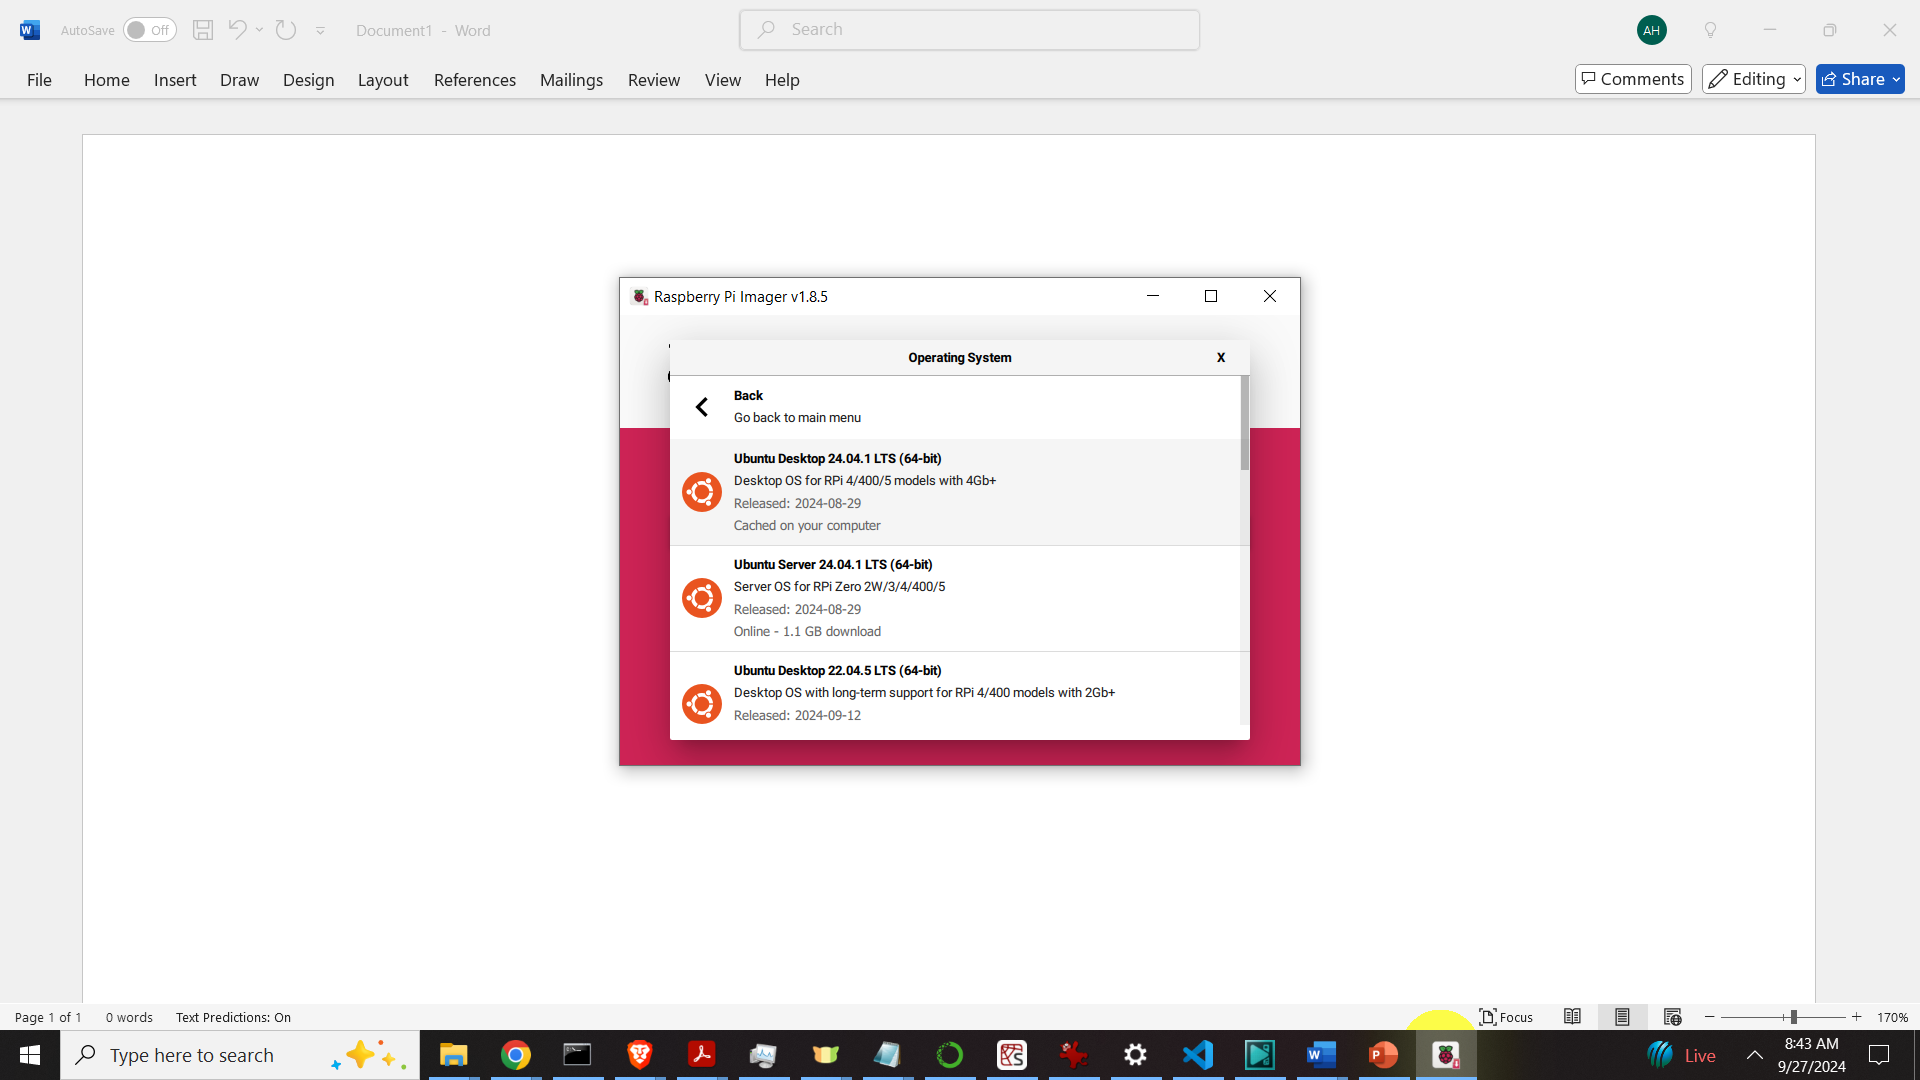
and then click on “Ubuntu”
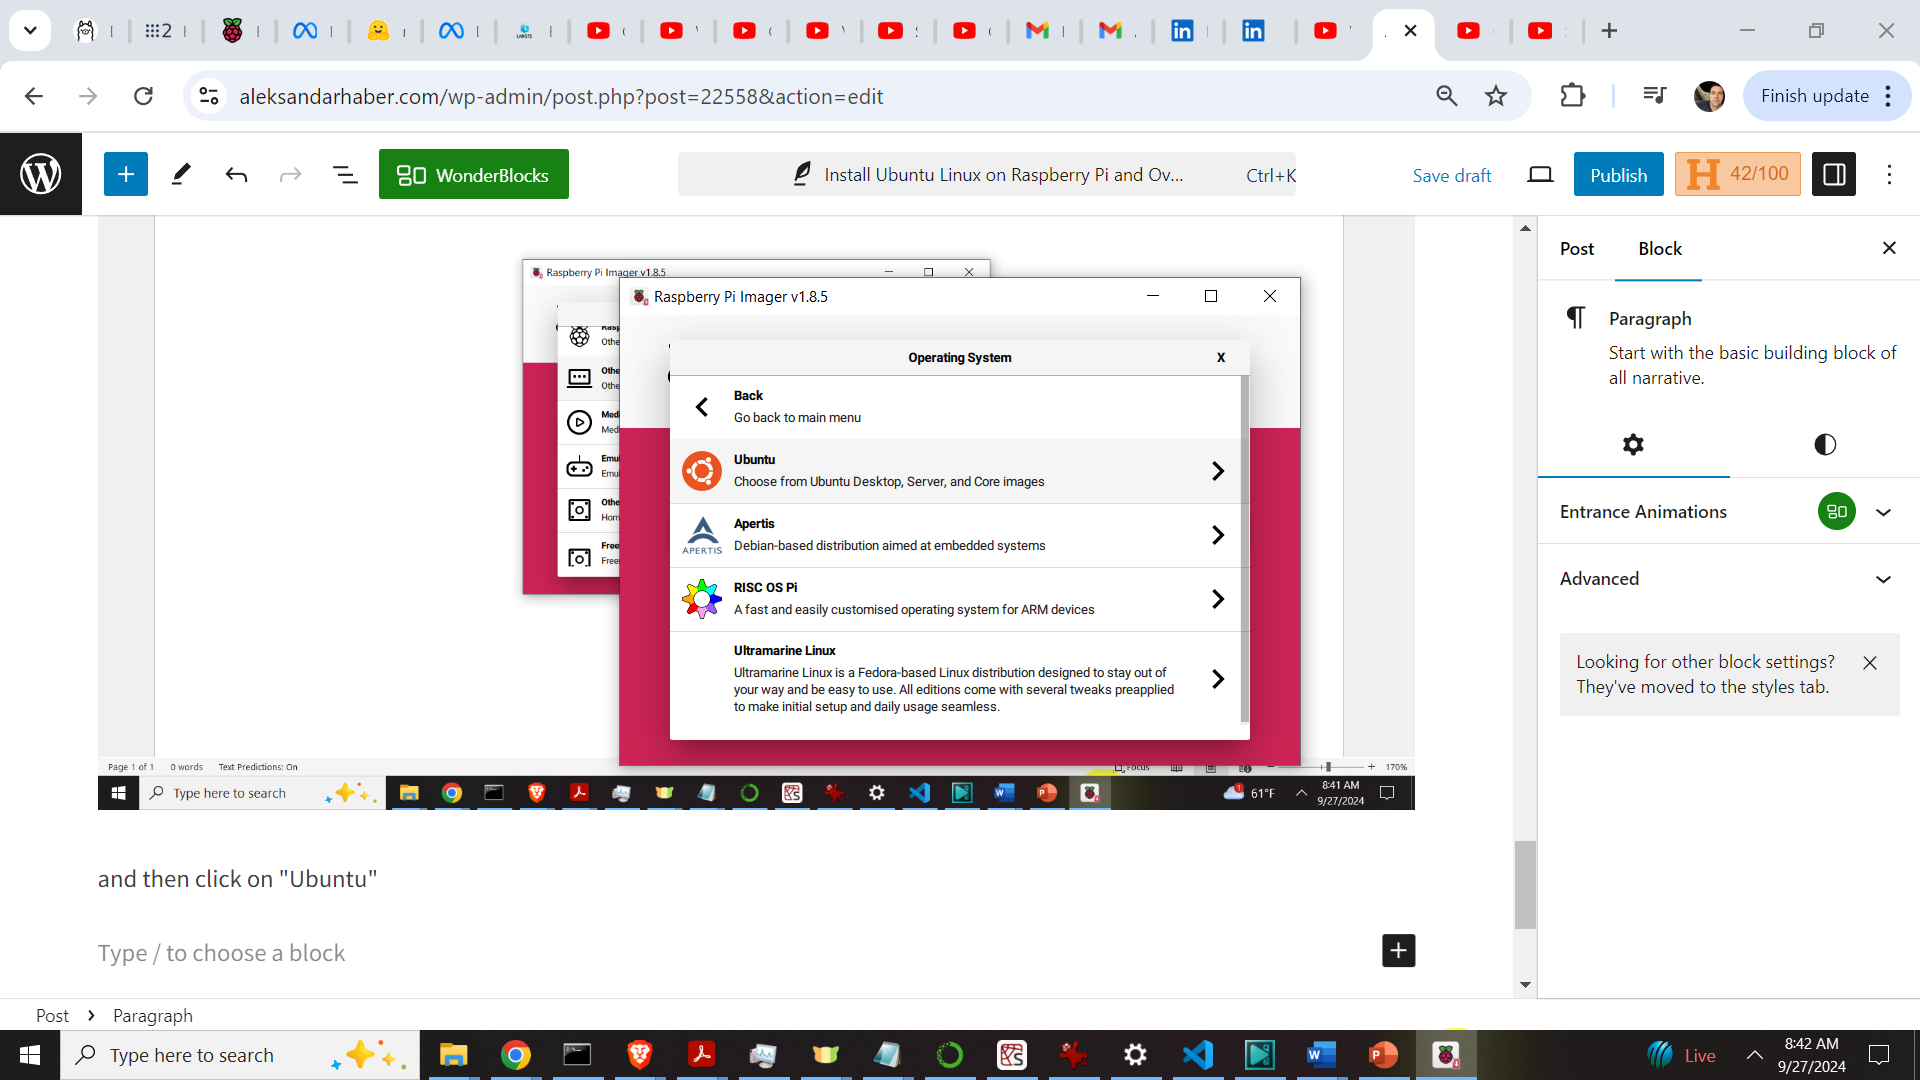
and finally select the Ubuntu distribution. In our case, we will select Desktop Ubuntu 24.04
Then, insert your SSD drive or a micro-SD card, and click on “CHOOSE STORAGE” and select your drive

After that click on NEXT, and the bootable disk will be created.
Once the bootable disk is created, insert it in your Raspberry Pi, and boot the Raspberry Pi. The installation process will automatically start. You have to select your Time Zone, configure your Internet connection, and set up your username and password. After Ubuntu Desktop is installed, Raspberry Pi will automatically load Ubuntu and you can use it.
Overclock CPU and GPU of Raspberry Pi
If you are using Raspberry Pi 4, you might consider to increase the speed of your CPU and GPU by overclocking. This will increase the speed of execution of some programs. However, as explained at the beginning of this tutorial, inappropriate overclocking can create instability or in the extreme case, burn your CPU or GPU. Consequently, it is important to have proper cooling system. If you are using Raspberry Pi 5, you might not even need to overclock since Raspberry Pi 5 is faster than Raspberry Pi 4.
- The standard CPU frequency of Raspberry Pi 4 is 1500 MHz.
- Online it is reported that Raspberry Pi4 remains stable up to 1950 MHz, and instabilities have been reported above this frequency.
- The standard GPU frequency is 500 MHz. We have noticed that it is OK to push this to 750 MHz.
- Before you overclock you have to make sure that you have a fan attached to the Raspberry Pi 4 and that heat sinks are attached to the CPU and GPU.
- Also, make sure that you have a power supply that is rated for at least 3.5A.
To overclock Raspberry Pi 4:
Open a terminal and run this
sudo apt update && sudo apt upgradeOpen the configuration file
sudo nano /boot/firmware/config.txtAdd the following lines at the end of the file in order to overclock both the CPU and GPU:
#overclocking
over_voltage=6
arm_freq=2000
gpu_freq=750
After that restart Raspberry Pi.
After Raspberry Pi starts again, open a terminal and type
sudo watch -n1 cat /sys/devices/system/cpu/cpu0/cpufreq/scaling_cur_freqand the CPU frequency will be displayed periodically. Try to run some application to see how the CPU frequency changes.
Increase the swap memory and swap memory file size in Raspberry Pi
Loosely speaking (this is not 100% correct statement, but the statement that roughly explains the purpose of the swap memory), swap memory will “virtually increase” RAM size. On the other hand, it will occupy some extra space on your SD card or on SSD. It will be used in addition to the regular RAM memory, and especially when the RAM memory is totally consumed. That is, the applications can store their data and processes in the swap memory. By increasing the swap memory we can improve the stability and prevent some applications from crashing.
To increase the swap file size, perform the following steps.
Show the current swap partitions and memory:
sudo swapon --showor you can type this
free -hBefore we can make any change, we need to disable the swap memory:
sudo swapoff -aThe following code line will change the swap memory size to 10G (I have enough space on my SSD and I can do that):
sudo fallocate -l 10G /swapfileInstead of 10G, which stands for 10 gigabytes, you select any other value as long as you have enough free space on your SSD or a micro-SD card.
Next, set the permissions such that only the root user can change the swap file size:
sudo chmod 600 /swapfileTo implement the changes, type this
sudo mkswap /swapfileFinally, you need to enable back the swap memory and swap file:
sudo swapon /swapfileRestart the computer, and then open a terminal to check the status:
sudo swapon --showYou can also open the program called “top” to see the changes. Type in the terminal
topor you can use “htop”:
sudo apt install htop
htop