In this tutorial, we explain how to install and run the You Only Look Once (YOLO) computer vision model on Raspberry Pi 5, Linux Ubuntu, and Python. The standard abbreviation for the You Only Look Once model is the YOLO model. In this tutorial, we will install YOLO version 11. However, everything explained in this tutorial works for older or newer versions (after January 2025) of YOLO. The YOLO algorithm can be used for standard operations in computer vision: object detection, segmentation, classification, pose estimation, as well as for other computer vision tasks. The complete YouTube tutorial is given below.

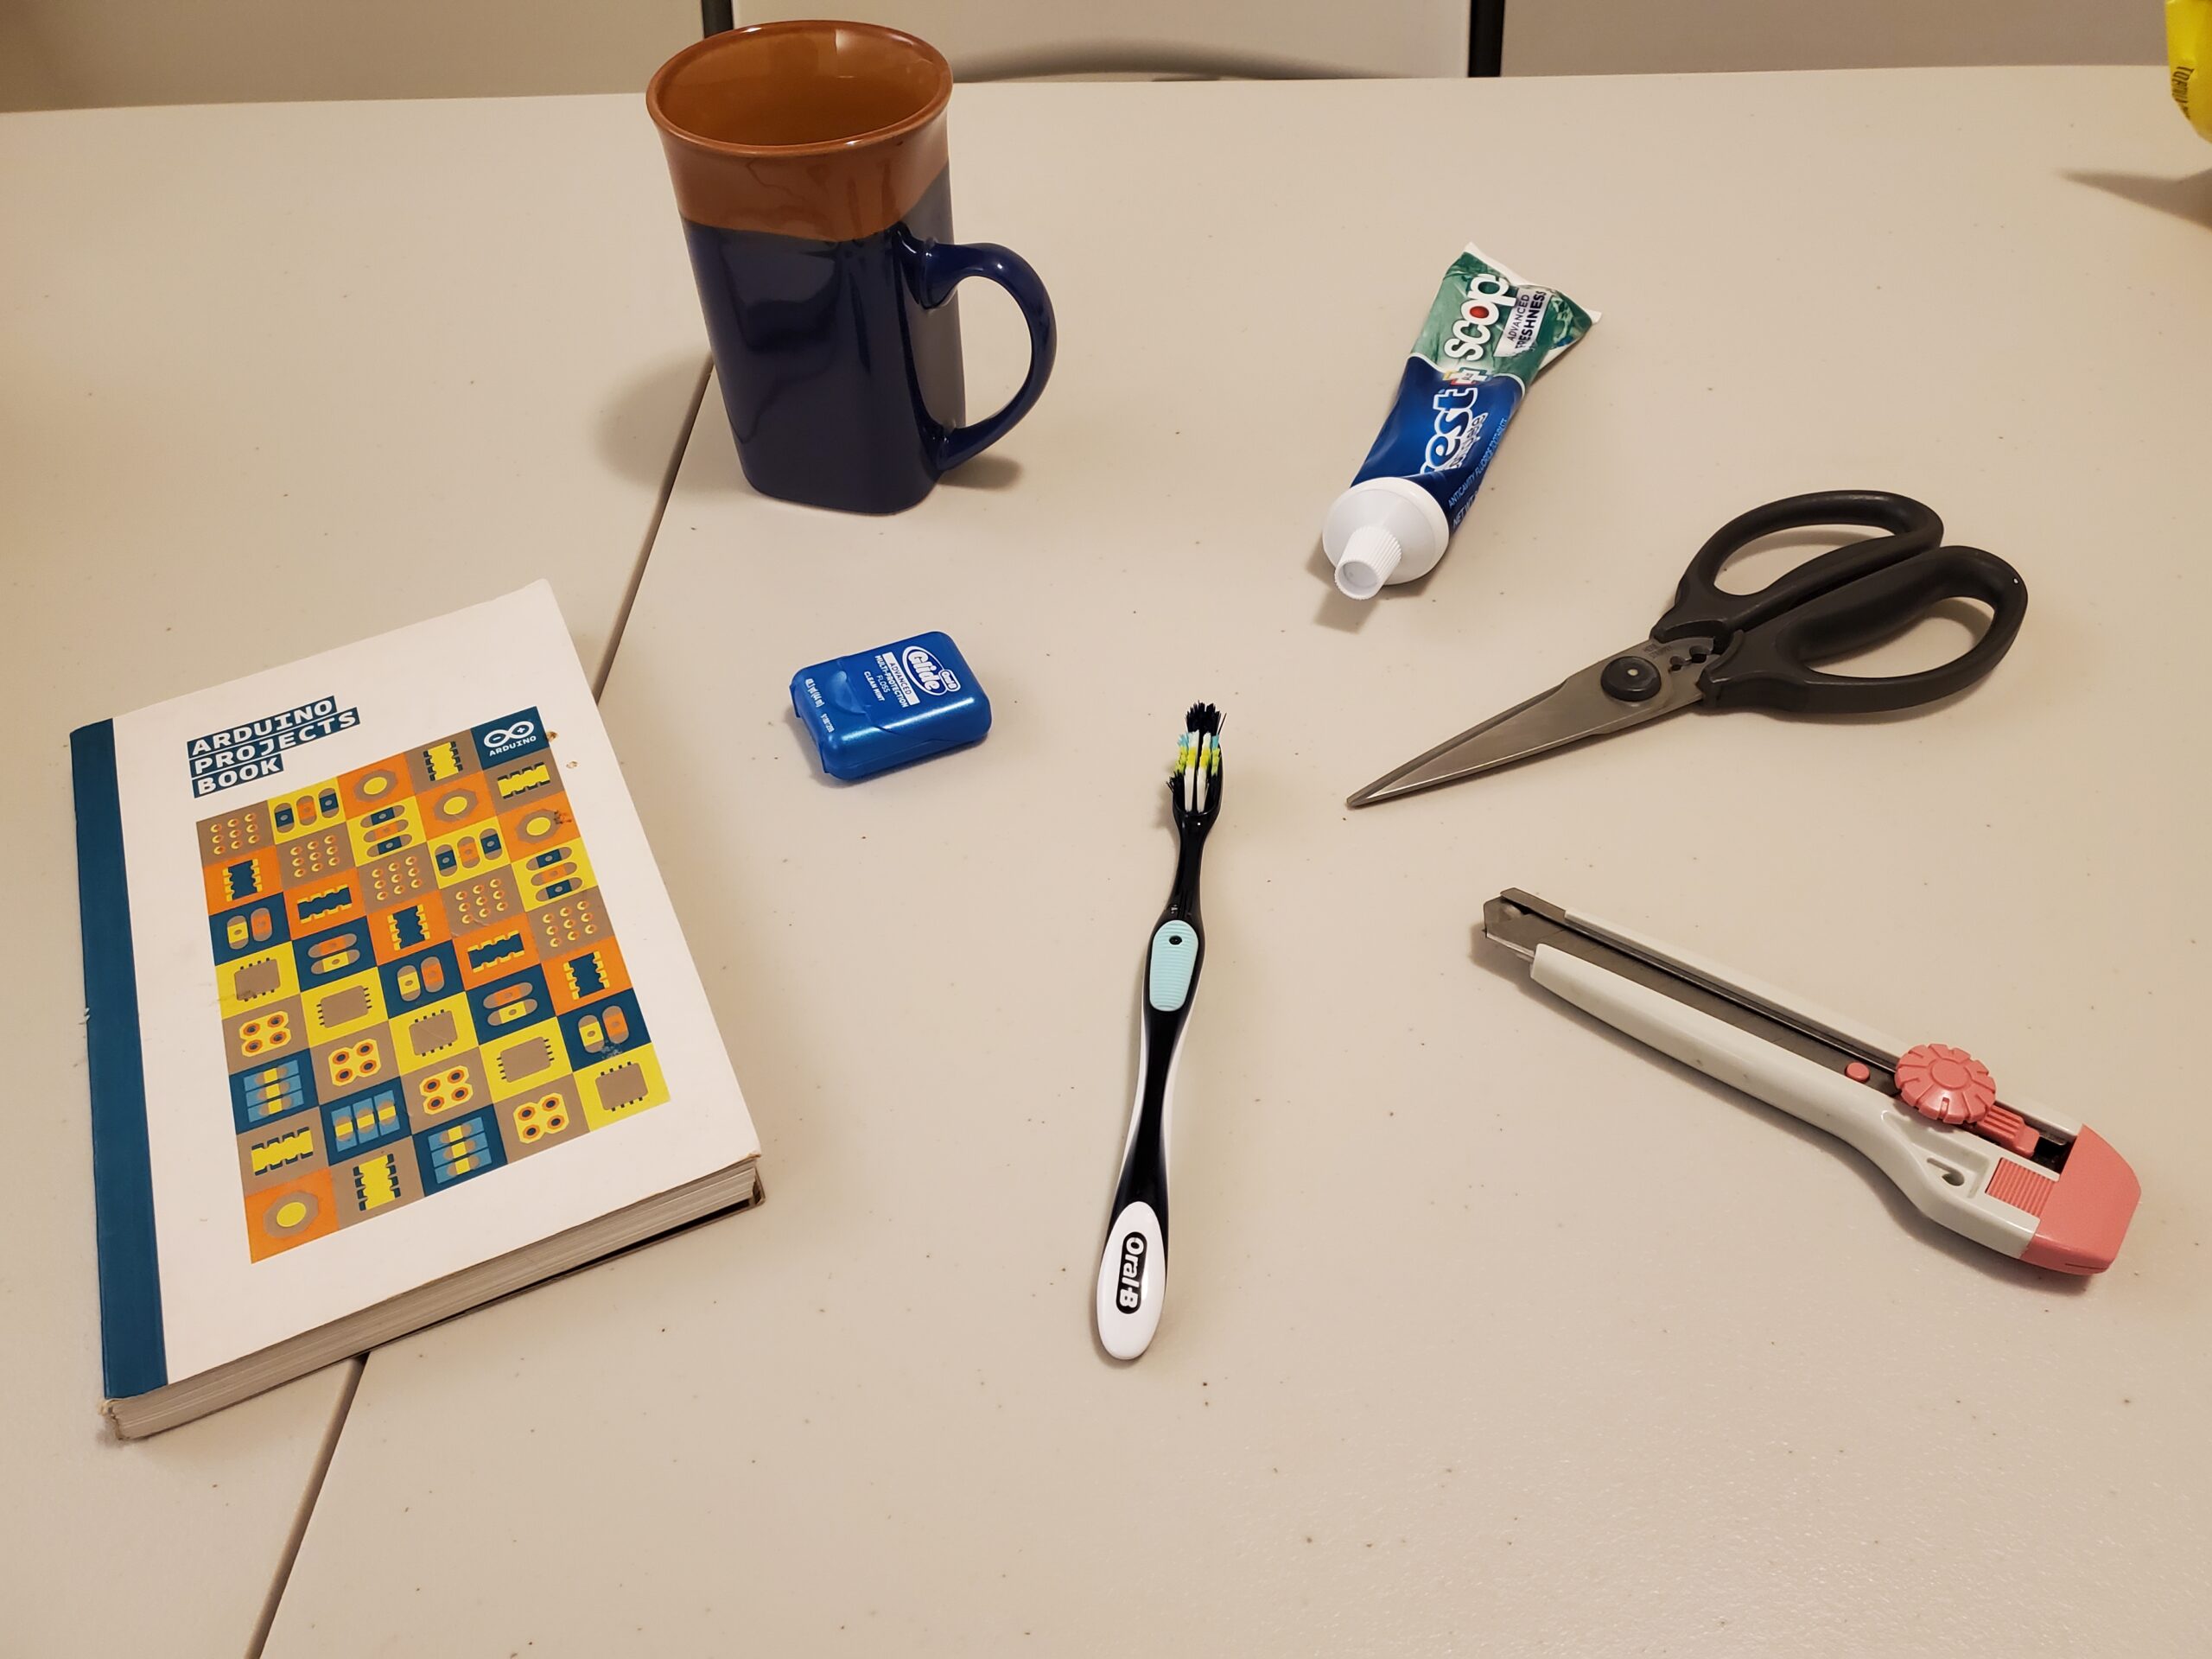
Below is a brief demonstration of YOLO. We randomly placed several objects on a table and took a photo of the scene by using our phone camera. Note that this is a real raw photo and not some overly processed photo found on the Internet.

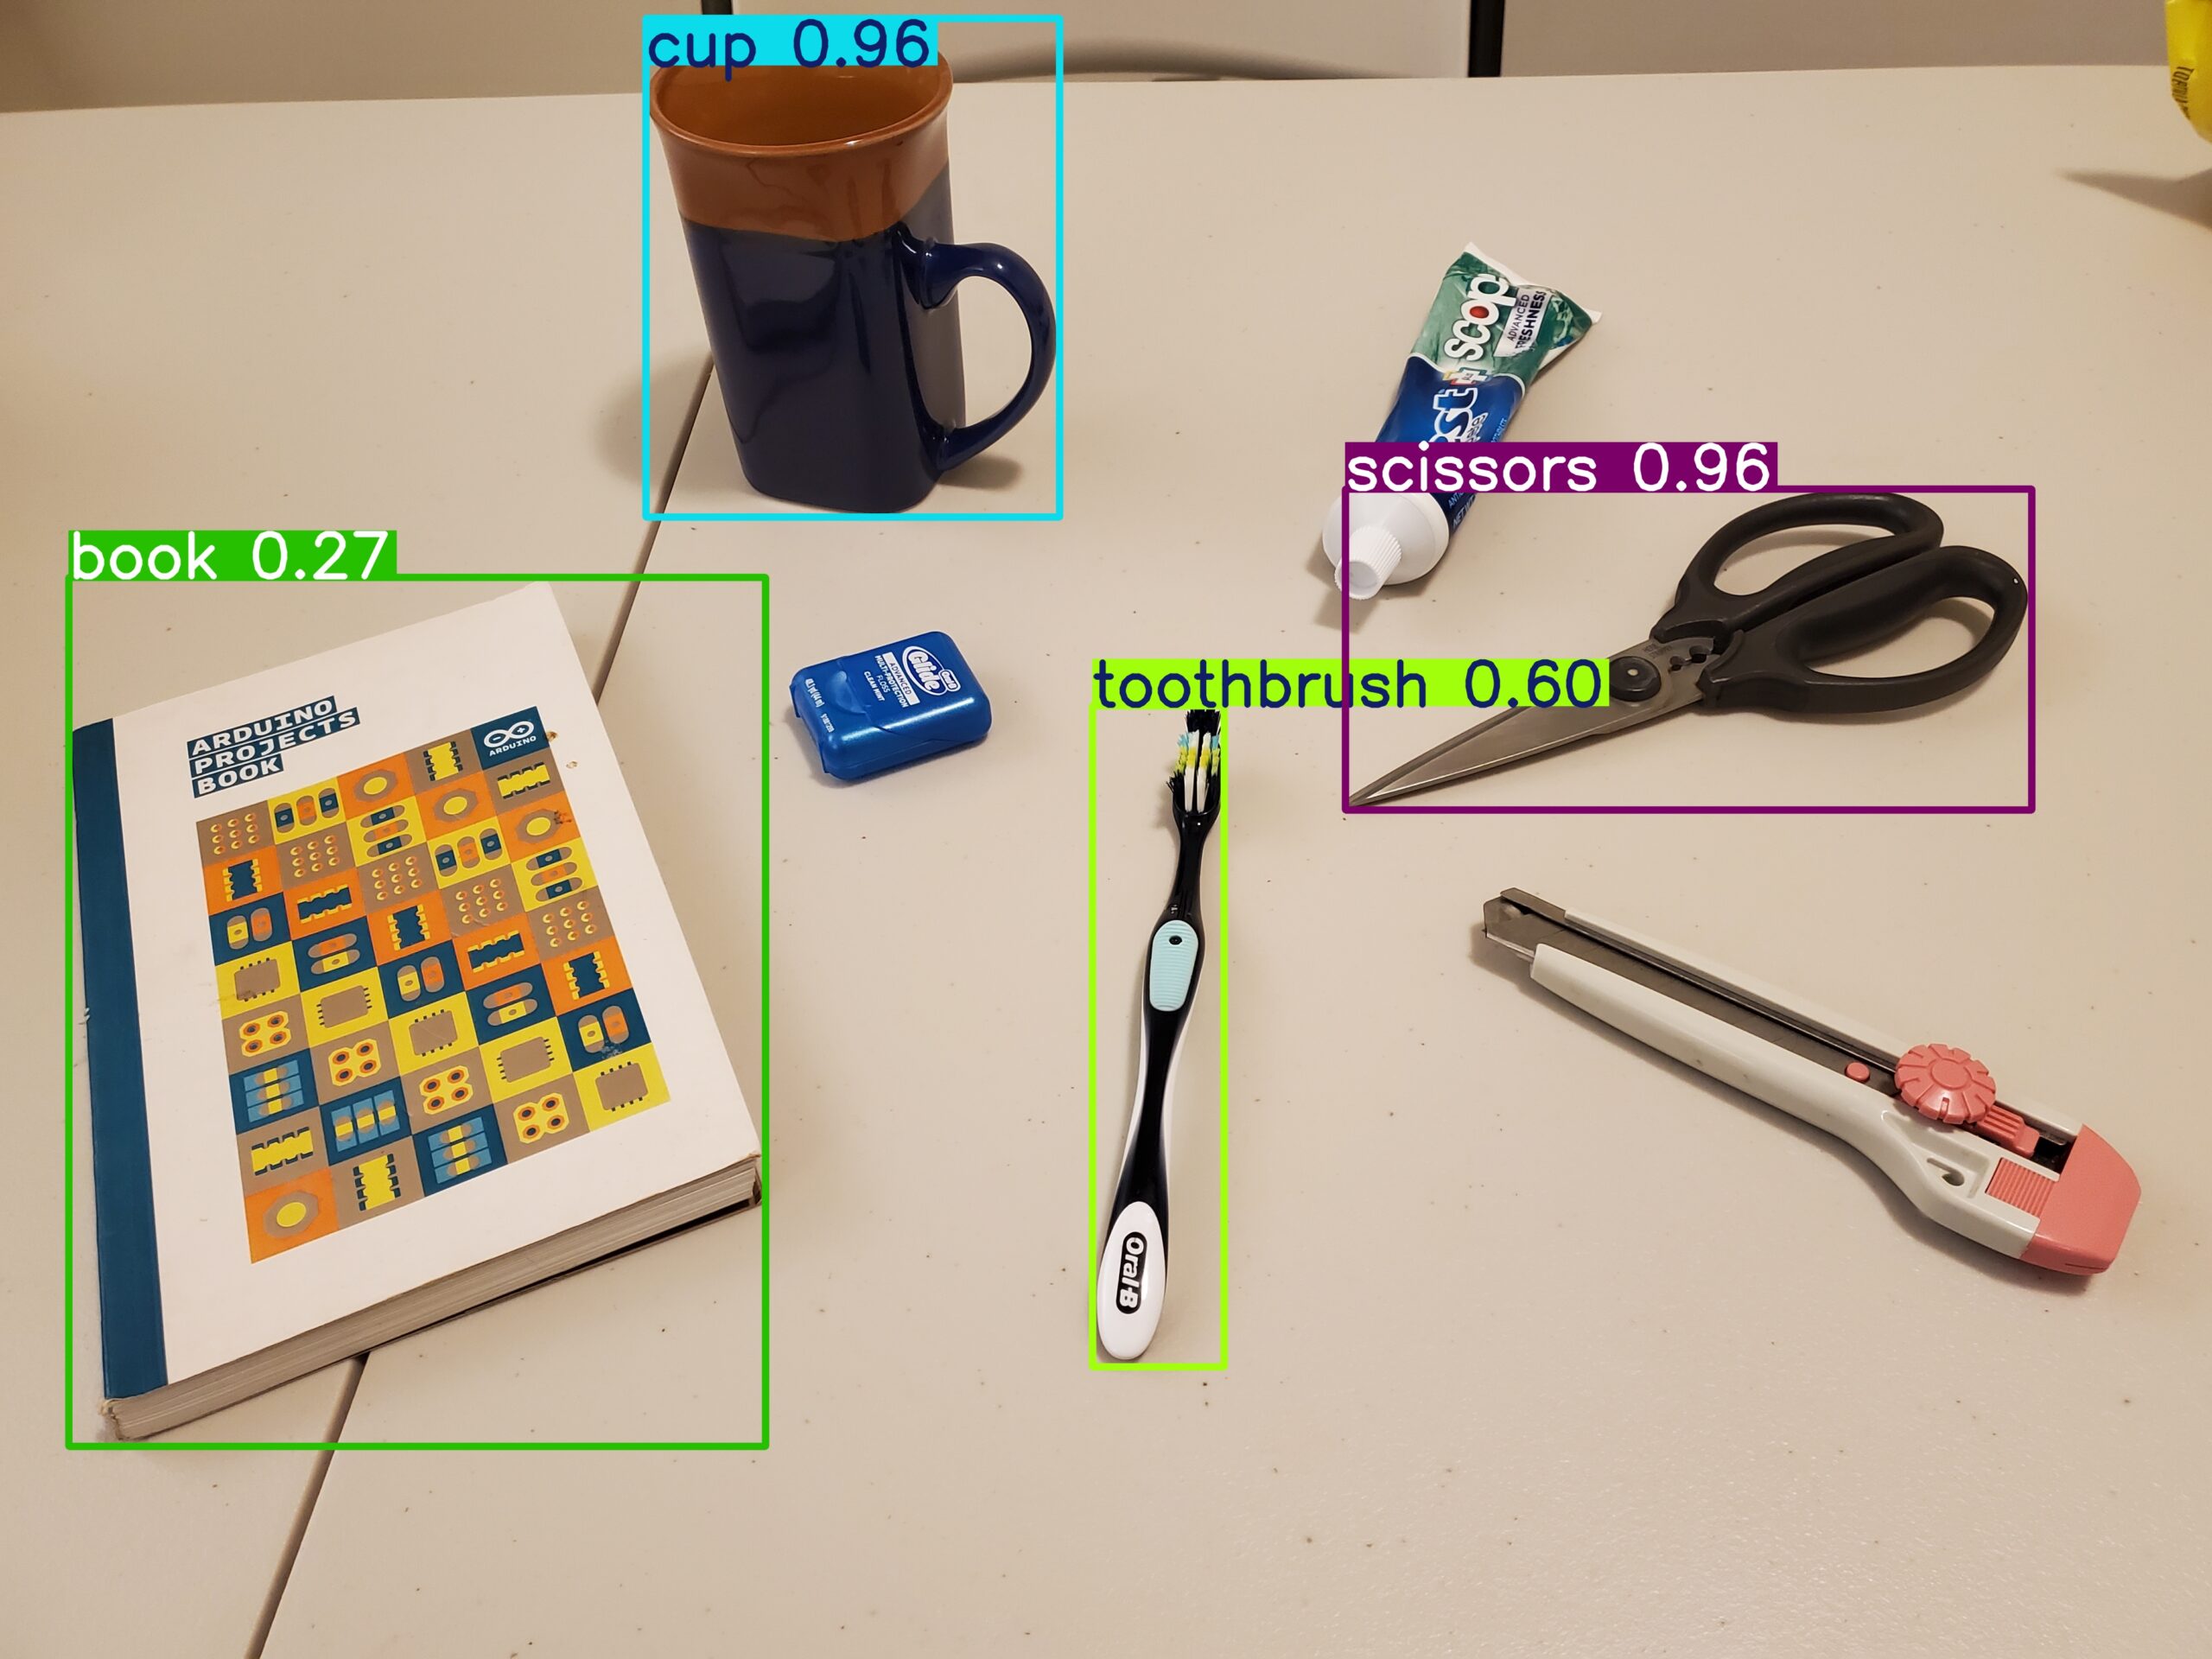
The YOLO11 algorithm was able to correctly recognize most of the objects in this scene:
Prerequisites
- Raspberry Pi 5 with 8GB RAM. You can probably use the Raspberry Pi 5 version with 4GB RAM.
- Linux Ubuntu 24.04 installed on Raspberry Pi 5. We created a separate video tutorial on how to install Linux Ubuntu 24.04 on Raspberry Pi 5. Note that we do not suggest using the Raspberry Pi OS operating system for computer vision. Use Linux Ubuntu since it has better community support and your knowledge will be transferable to other computing architectures.
- Optionally, attach a solid-state drive as the main Raspberry Pi drive instead of a microSD card. You can significantly improve the read and write speed of Raspberry Pi by using a solid-state drive. We have created a separate video tutorial explaining how to interface Raspberry Pi with a solid-state drive and how to install Linux Ubuntu on the solid-state drive.
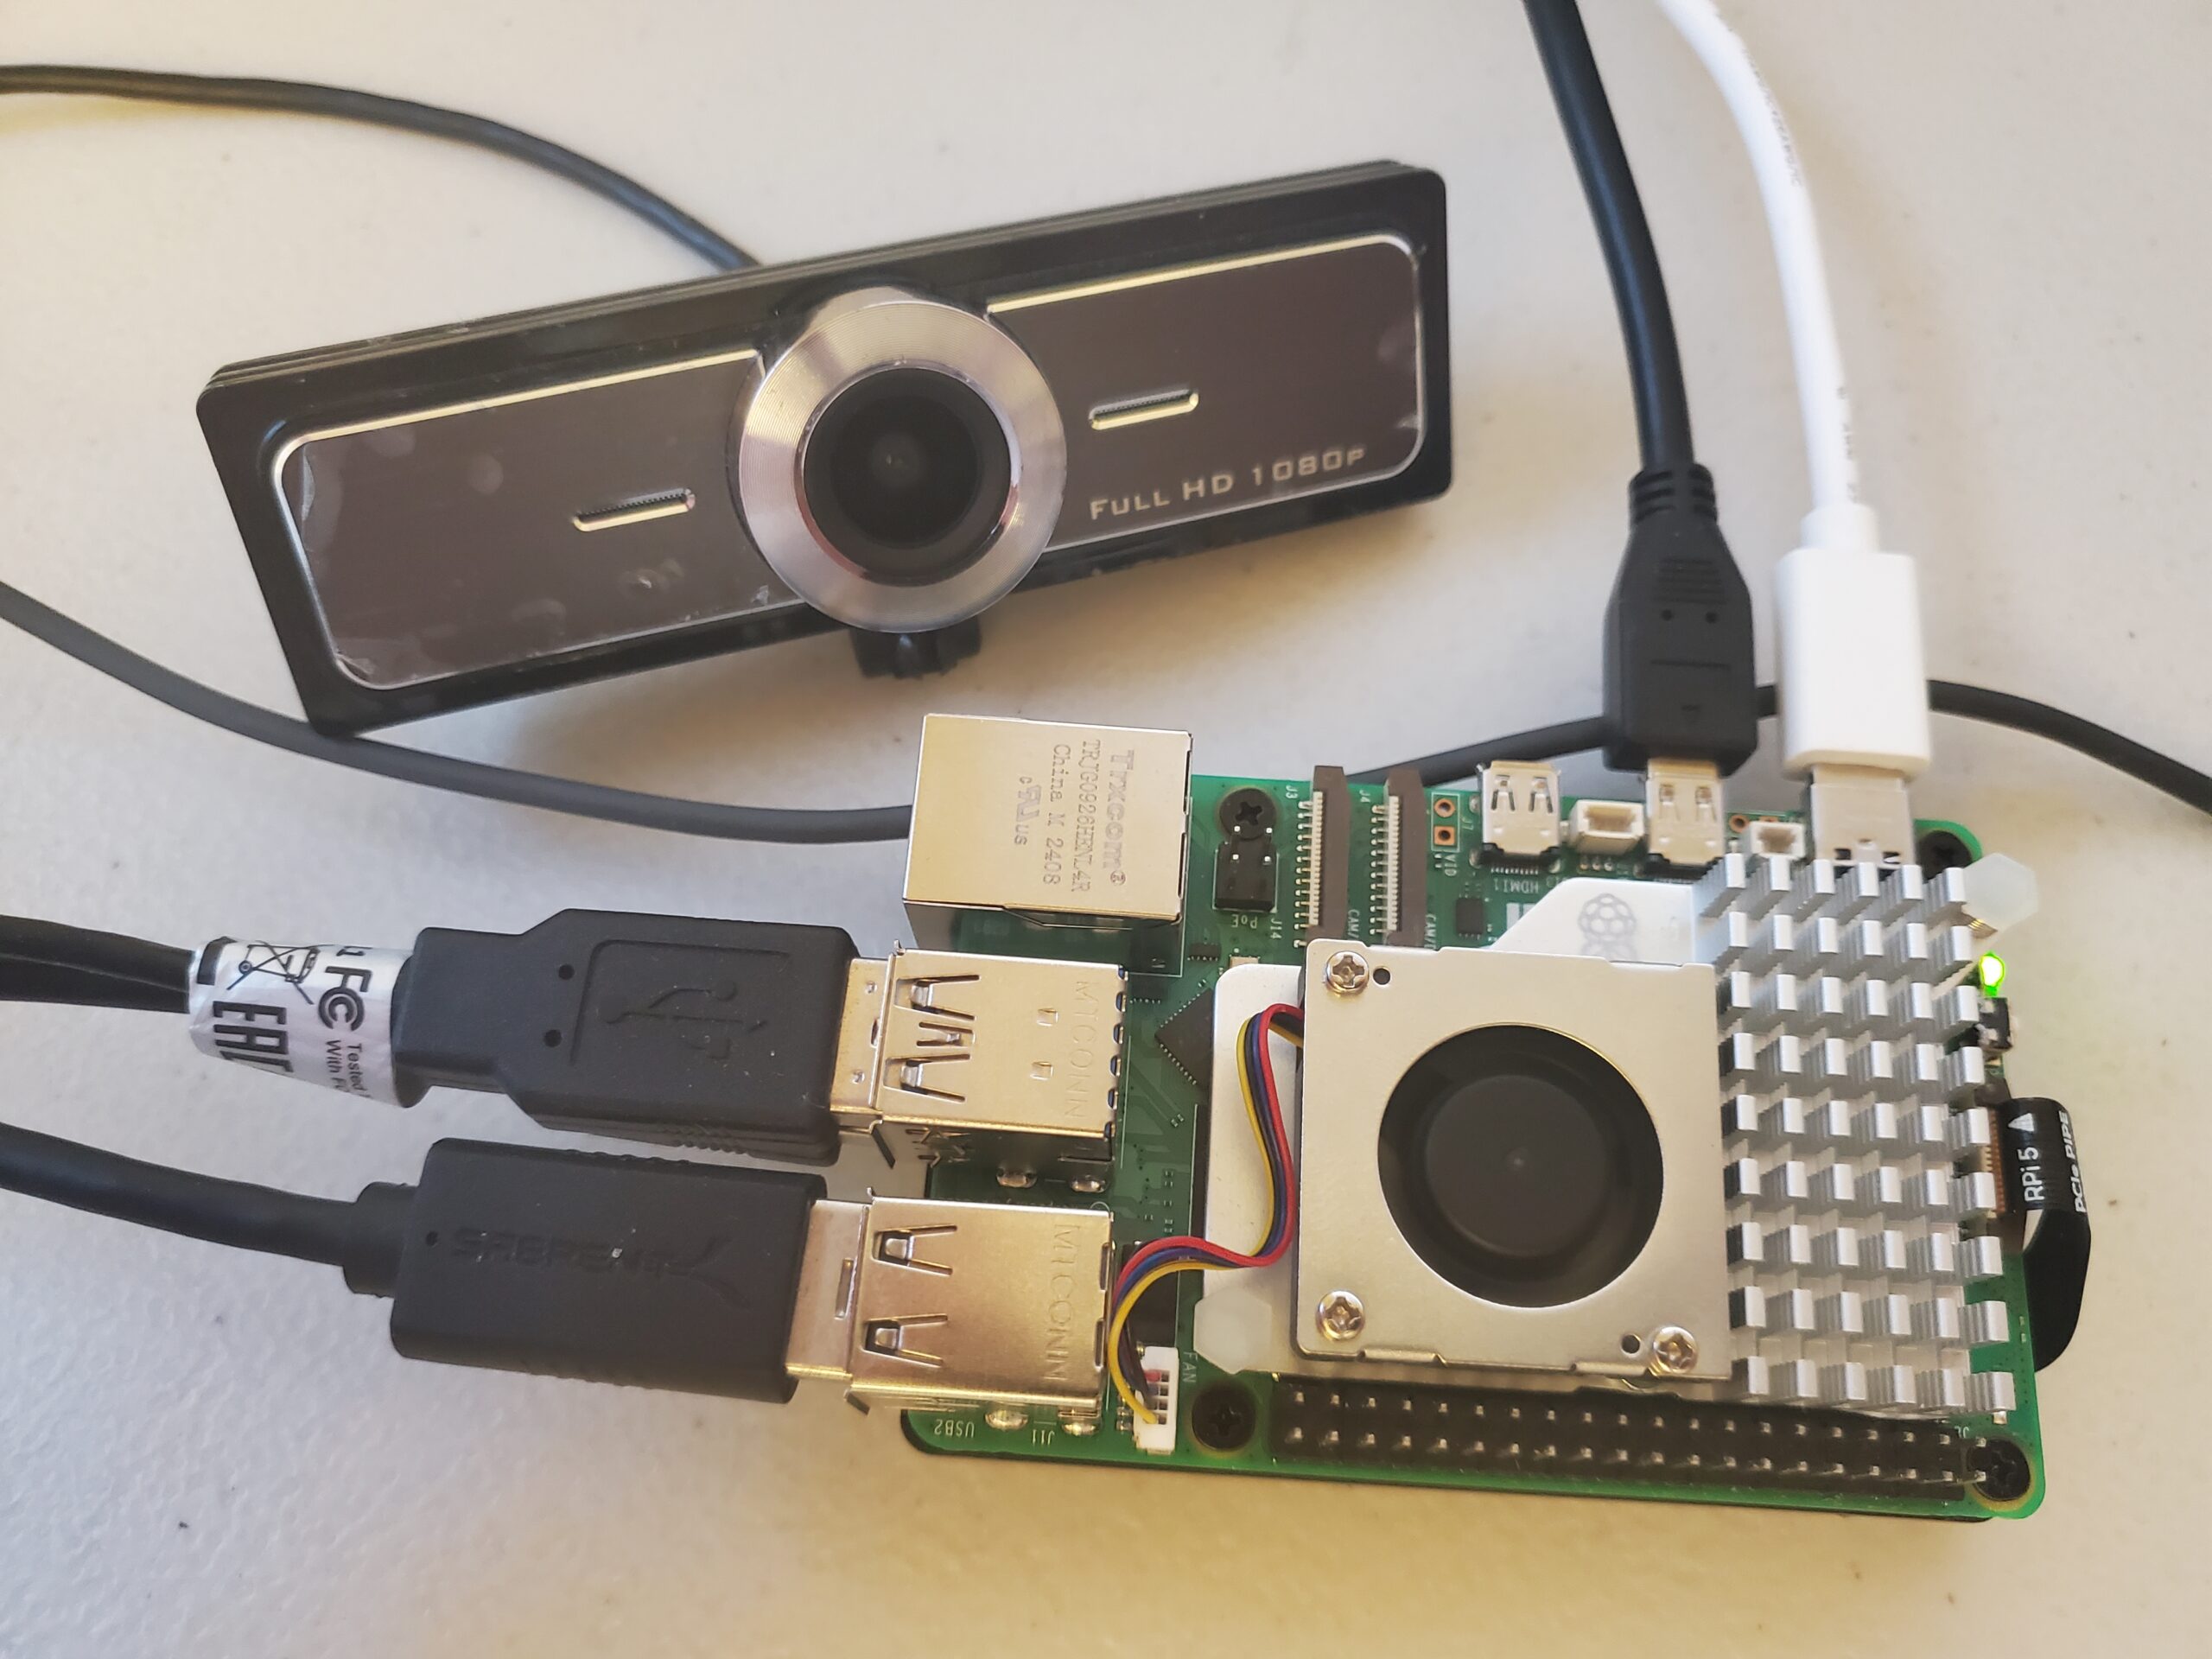
Our Raspberry Pi 5 is shown below (note that in this tutorial you do not need a USB camera).
Installation procedure
First of all, verify that you have the correct operating system. Open a Linux terminal and type
lsb_release -aThe output should look like this
No LSB modules are available.
Distributor ID:	Ubuntu
Description:	Ubuntu 24.04.1 LTS
Release:	24.04
Codename:	noble
Next, make sure that Python is installed on the system. Python 3.12 should come together with Linux Ubuntu 24.04.
python3 --versionThe output is
Python 3.12.3Next, install git and git support for large-scale files:
sudo apt update && sudo apt upgrade
sudo apt install git
sudo apt-get install git-lfs
Next, initialize git for large-scale files
sudo git lfs install
git lfs install
The next step is to create a workspace folder and create the Python virtual environment.
sudo apt install python3.12-venvcd ~
mkdir testYolo
cd testYolo
python3 -m venv env1
source env1/bin/activate
Install the necessary libraries
pip install setuptools
pip install git+https://github.com/ultralytics/ultralytics.git@main
This should install YOLO and the supporting libraries.
Next, we wrote two Python files for running YOLO. The first Python file given below will use a compressed version of YOLO11.
from ultralytics import YOLO

# Load a YOLO11n PyTorch model
model = YOLO("yolo11n.pt")

# Export the model to NCNN format
model.export(format="ncnn")  # creates 'yolo11n_ncnn_model'

# Load the exported NCNN model
ncnn_model = YOLO("yolo11n_ncnn_model")

# Run inference
results = ncnn_model("test2.jpg")


# Process results list
for result in results:
    boxes = result.boxes  # Boxes object for bounding box outputs
    masks = result.masks  # Masks object for segmentation masks outputs
    keypoints = result.keypoints  # Keypoints object for pose outputs
    probs = result.probs  # Probs object for classification outputs
    obb = result.obb  # Oriented boxes object for OBB outputs
    result.show()  # display to screen
    result.save(filename="result.jpg")  # save to disk
The results are not good by using this compressed model. Instead, we will use the full models. The code given below uses the full model for the inference.
from ultralytics import YOLO

# Run inference on an image
# yolo11n.pt, yolo11s.pt, yolo11m.pt, yolo11l.pt
model = YOLO("yolo11l.pt")
results = model("test2.jpg")  # results list

# Process results list
for result in results:
    boxes = result.boxes  # Boxes object for bounding box outputs
    masks = result.masks  # Masks object for segmentation masks outputs
    keypoints = result.keypoints  # Keypoints object for pose outputs
    probs = result.probs  # Probs object for classification outputs
    obb = result.obb  # Oriented boxes object for OBB outputs
    result.show()  # display to screen
    result.save(filename="result.jpg")  # save to disk
This piece of code will save the output image in the file called “result.jpg”. The output image is given below.