In this tutorial, we explain how to install and run Arduino Integrated Development Environment (IDE) on Raspberry Pi 5 or 4 in Linux Ubuntu. The YouTube tutorial is given below


Motivation and Important Notes
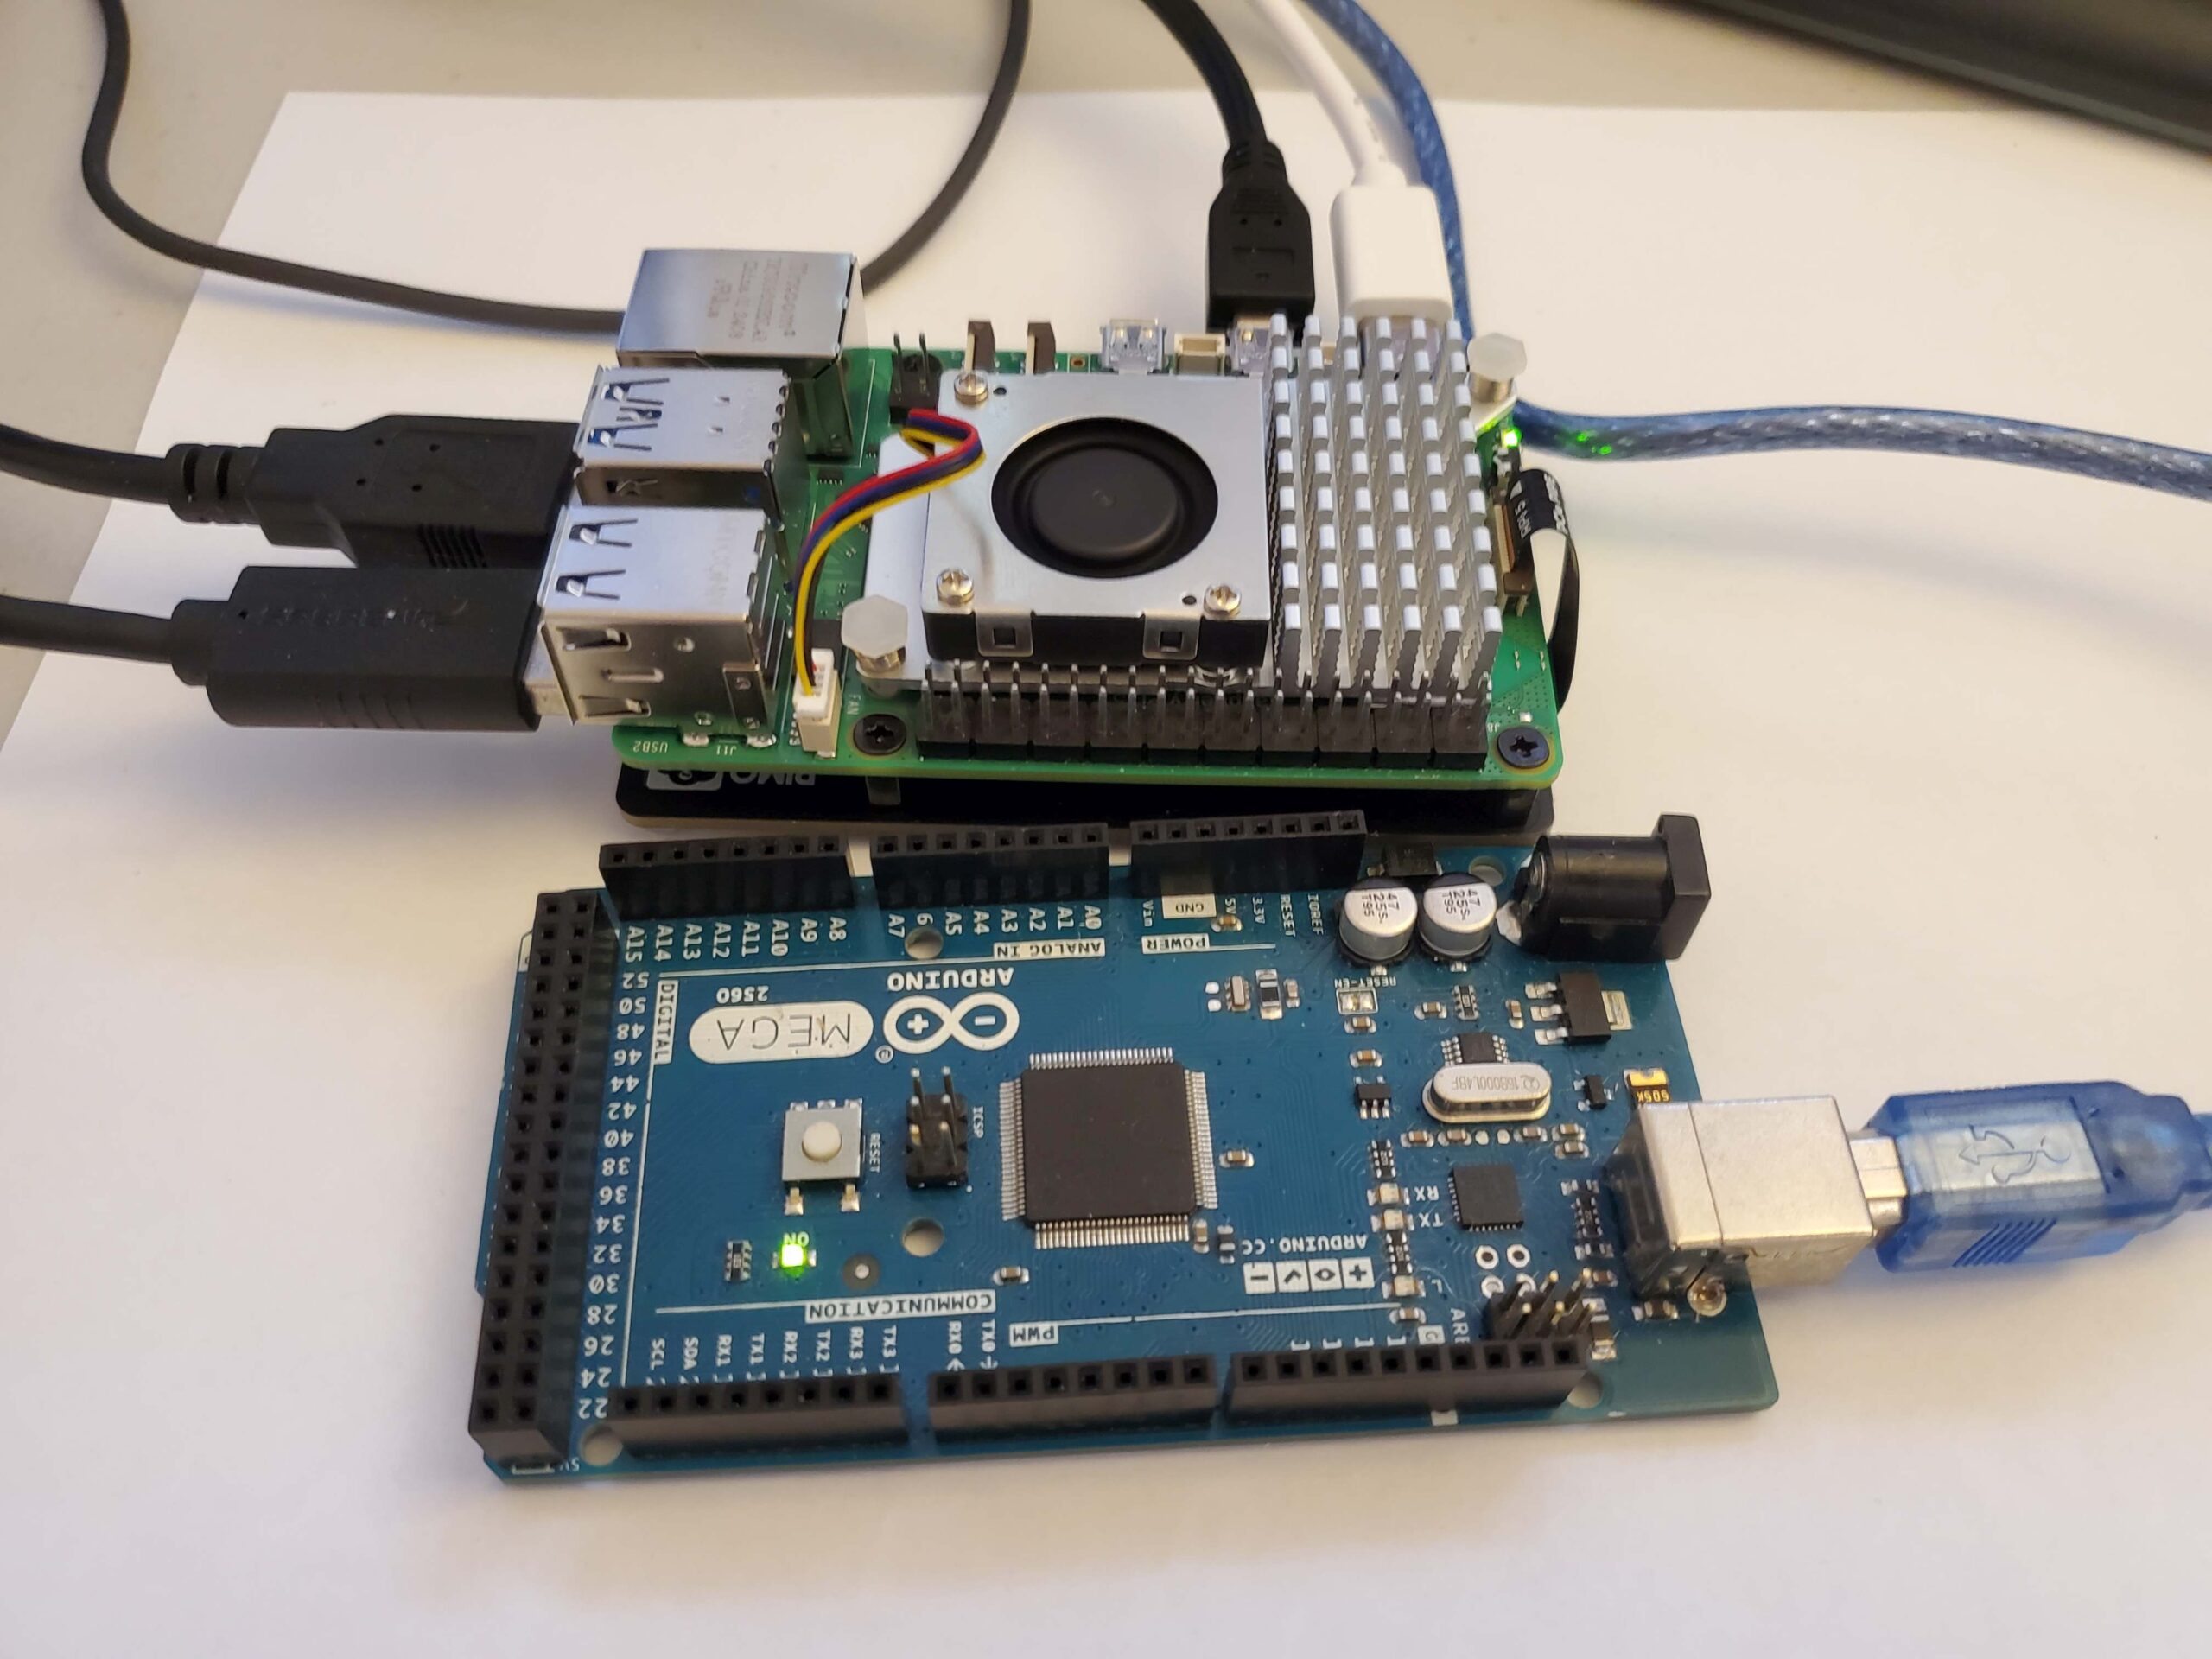
Motivation: In a typical robotic system, Raspberry Pi 4 or 5 are used as high-level controllers running computer vision, machine learning, and model-based control algorithms. The high-level controller needs to communicate with a low-level controller that is used to control motors and receive measurements from encoders. Usually, low-level controllers are Arduino, ESP32, stm32, and Teensy microcontrollers. Arduino and ESP32 microcontrollers can be programmed by using Arduino IDE. Consequently, it is of paramount important to learn how to install Arduino IDE on Raspberry Pi.
- In this tutorial, we are running Linux Ubuntu 24.04 on our Raspberry Pi 5. However, everything explained in this tutorial applies to any other Linux Ubuntu version. Note that we do not suggest to people interested in using Raspberry Pi 4 or 5 for robotics, computer vision, and machine learning applications to install the official Raspberry PI OS. Instead, install Linux Ubuntu. We created a separate video tutorial on how to install Linux Ubuntu on Raspberry Pi 4 or 5. The video is given below.

- Raspberry Pi 4 and 5 are based on the ARM64 processor architecture (also known as the aarch64 processor architecture) and NOT on the x86_64 processor architecture! You should keep in mind this when downloading the Arduino installation file since you need to download the installation file for ARM64. To verify that Raspberry Pi is running on an actual ARM64 architecture, open a terminal and type this:
uname -mThe output should be
aarch64This means that your Raspberry Pi 5 is running an ARM64 architecture. You can also type this
dpkg --print-architecture- As of October 2024, we have two versions of Arduino IDE: Arduino IDE 2.0 and Arduino IDE 1.0 (Legacy IDE). As of October 2024, Arduino did not release an installation version of Arduino IDE 2.0 for arm64 architectures. Consequently, we need to use the Arduino 1.0 which can be installed on arm64 architecture. That is, in this video tutorial, we explain how to install Arduino 1.8.9 (the most recent Arduino 1.0 IDE) on Raspberry Pi 5.
If in the future Arduino releases a version of Arduino IDE 2.0 for arm64 architectures, we will create a video tutorial on how to install it on Raspberry Pi 4 or 5.
- Note that the standard Raspberry Pi 5 power adapter (power supply) provides 5V and 5A. Since we will attach Arduino through an USB port of Raspberry Pi 5, Arduino will consume current. If you attach a device, actuator, or a sensor to Arduino and you use Arduno internal 5V to provide the power to the device, you will increase current consumption of your Raspberry Pi 5. If the current is too high, you might burn your Raspberry Pi 5. Always keep this in mind. You might consider attaching a separate power supply to your Arduino.
Installation instructions
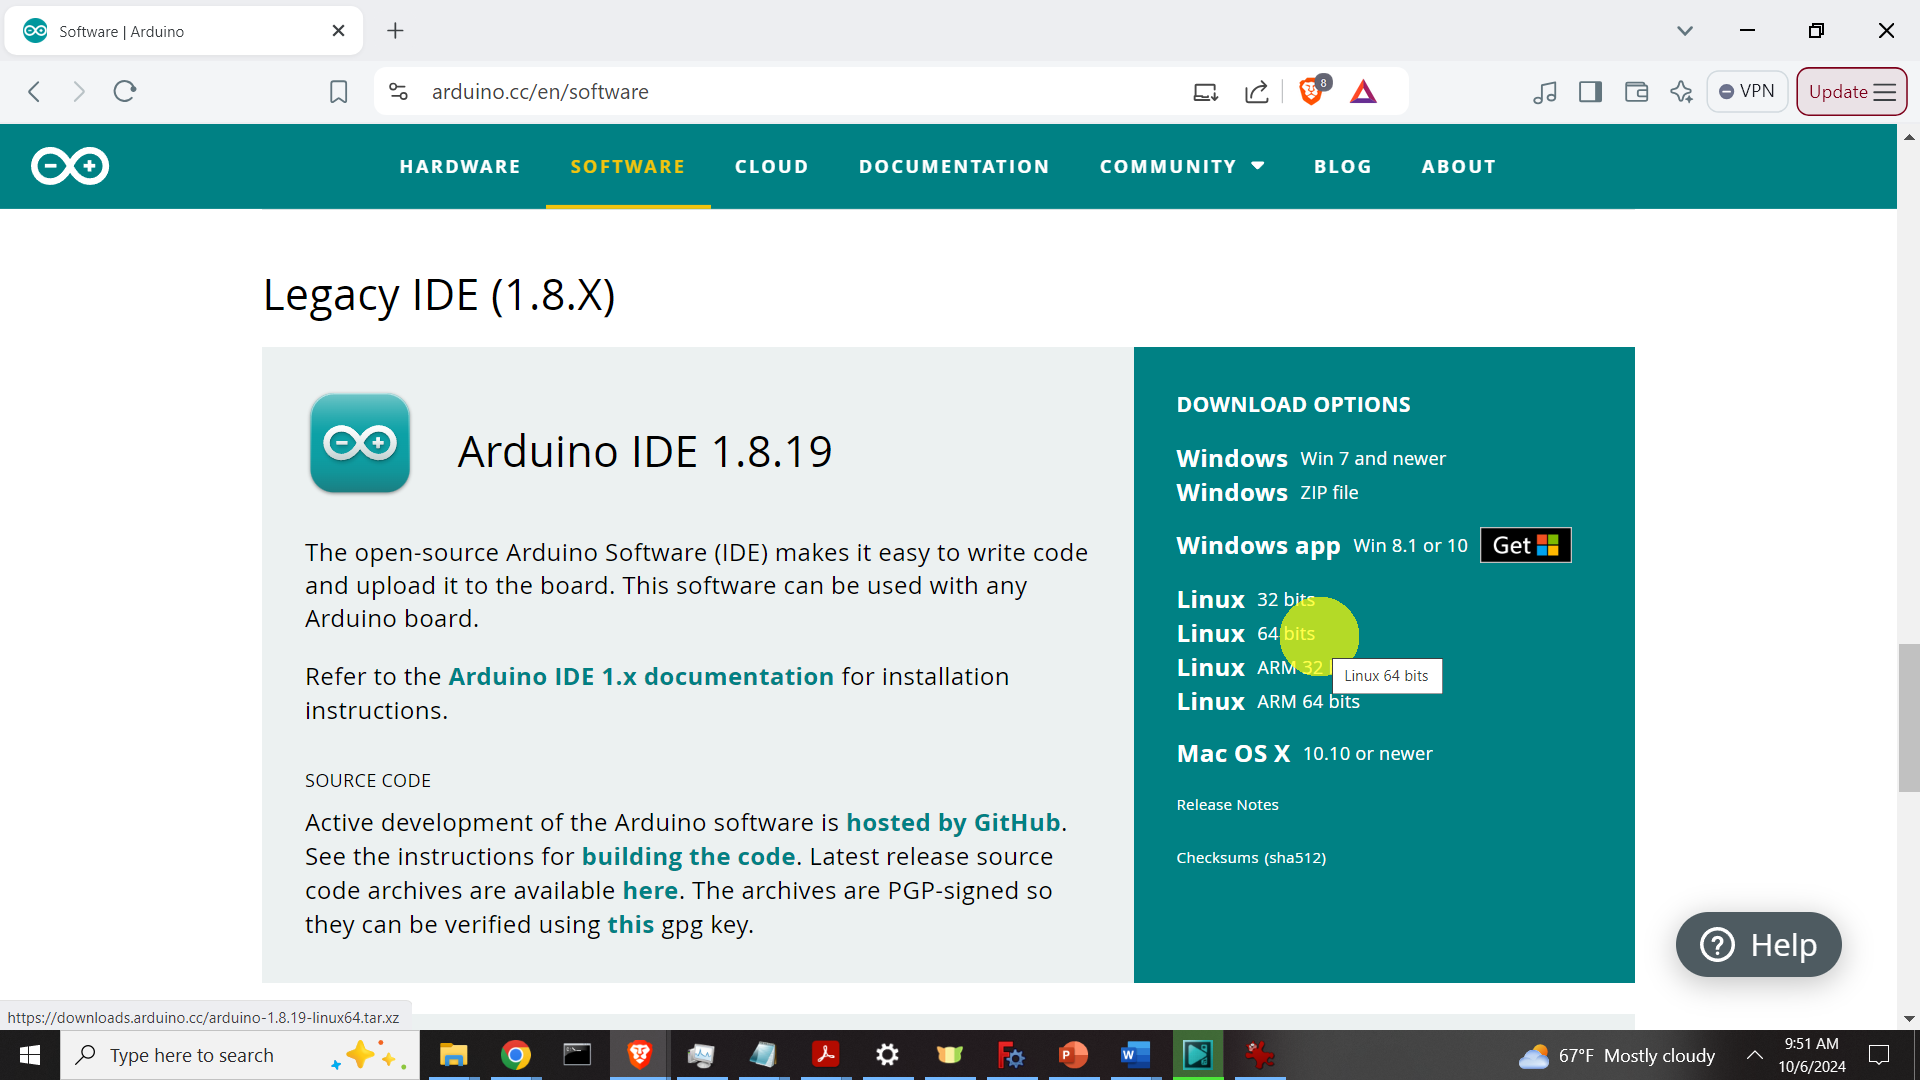
Go to the official Arduino webpage and download the installation file for the most recent version of Arduino 1.0 IDE (link is given here). In our case, it is Arduino IDE 1.8.19. Make sure that you download the ARM 64-bit version.

Download the file to the downloads folder. Then open a terminal and navigate to the Downloads folder:
cd ~/DownloadsThen, in this folder by typing
ls -layou should see a downloaded file (or a file with a different version – make sure that you adjust the version)
arduino-1.8.19-linuxaarch64.tar.xzYou need to decompress this file
tar -xvf arduino-1.8.19-linuxaarch64.tar.xzThis will create a folder called: arduino-1.8.19
Let us move this folder to the home folder, so that we can have it in a more secure and personalized space.
mv ~/Downloads/arduino-1.8.19 ~/ArduinoInstallThis will create a new folder called ArduinoInstall in our home folder, and move the content of the arduino folder from the downloads folder. Do not name the folder simply as “Arduino”, since then you will see this error:
Incorrect IDE installation folder: Your copy of the IDE is installed in a subfolder of your sketchbook. Please move the IDE to another folder
When you try to install Arduino.
Next, navigate to the Arduino folder, and run the installation script:
cd ~/ArduinoInstall
sudo sh install.sh
Next, we need to set the proper port permissions such that we can read and write data to the USB Arduino port. To do that, first type this
ls -l /dev/ttyACM*This should list all the port names associated with Arduino. Usually, it is ttyACM0
crw-rw---- 1 root dialout 188, 0 5 apr 23.01 ttyACM0To add the permissions, you need to type this with your username (my username is “ahaber”):
sudo usermod -a -G dialout ahaberand after this, you need to reboot your system
sudo rebootThen, we can start Arduino. Set the board, and set the port and then, run a Hello World example
void setup() {
  // open the serial port at 9600 bps:
  Serial.begin(9600);
}

void loop() {
  // put your main code here, to run repeatedly:
  Serial.println("Hello World!");
}